Section 4: Deploying and Operating SBE 19plus V2
72
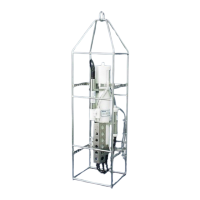
Deployment
1. Install a cable or dummy plug for each connector on the 19plus V2 sensor
end cap:
A. Lightly lubricate the inside of the dummy plug/cable connector with
silicone grease (DC-4 or equivalent).
B. Standard Connector - Install the plug/cable connector, aligning the
raised bump on the side of the plug/cable connector with the large pin
(pin 1 - ground) on the 19plus V2. Remove any trapped air by
burping or gently squeezing the plug/connector near the top and
moving your fingers toward the end cap. OR
MCBH Connector – Install the plug/cable connector, aligning
the pins.
C. Place the locking sleeve over the plug/cable connector. Tighten the
locking sleeve finger tight only. Do not overtighten the locking
sleeve and do not use a wrench or pliers.
2. Connect the other end of the cables installed in Step 1 to the
appropriate sensors.
3. Verify that the hardware and external fittings are secure.
4. If applicable, remove the Tygon tubing that was looped end-to-end around
the conductivity cell for storage. Reconnect the system plumbing
(see Configuration Options and Plumbing in Section 2: Description of
SBE 19plus V2).
5. Profiling mode - Immediately prior to deployment:
• (if IgnoreSwitch=N) Turn on the magnetic switch, or
• (if IgnoreSwitch=Y) If not already done, send StartNow, or send
StartDateTime= and StartLater, or
• (if AutoRun=Y) With the 19plus V2 in quiescent (sleep) state, apply
external power.
6. Moored mode - If not already done, send StartNow, or send
StartDateTime= and StartLater.
The SBE 19plus
V2 is ready to go into the water.
CAUTION:
Do not use WD-40 or other
petroleum-based lubricants, as
they will damage the connectors.
Dummy
plug or
cable
Locking
sleeve
Data I/O for real-time
data and pump
power (6 pin) –
connects to Y-cable
Auxiliary
differential
input
sensors
(6 pin)
RS-232
sensor
(4 pin)
Auxiliary
differential
input
sensors
(6 pin)
79