4.3 … use variation with manual exposure (continued)
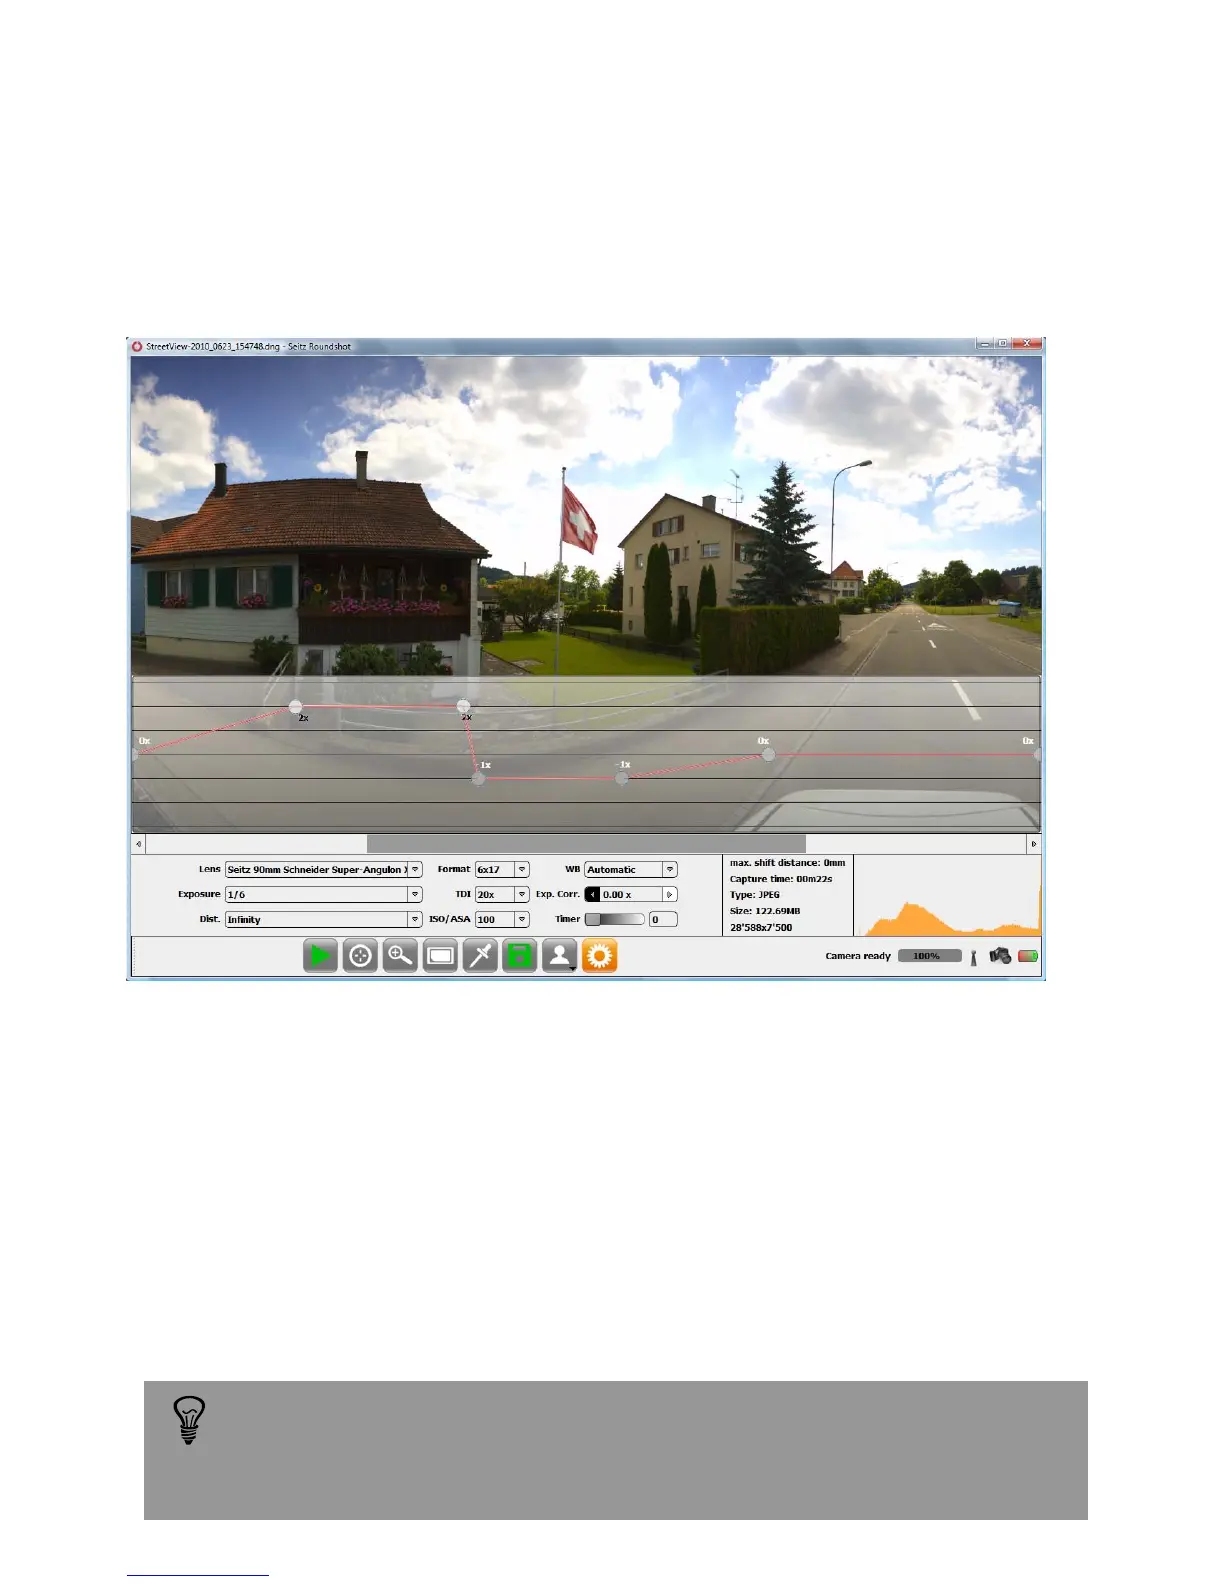
Step 4: According to image content the exposure correction curve can be designed.
Add as many intermediate point as necessary by just clicking on the corresponding
location on the curve.
In this example, the exposure correction curve is done as follow:
- section 1: smooth transition from the initial exposure time to 2 f-stops brighter
- section 2: stable exposure time at +2 f-stops
- section 3: sharp transition From +2 to -1 f-stop the resulting image will be darker
-
section 4: ...
Step 5: When the exposure correction curve is designed, take a second picture to see
the result. If the image is still not perfect it is possible to fine tune the curve by moving
every point individually.
When changing image angle, lens or any parameter affecting the image
format, the correction curve will be reset to flat. It is then necessary to
design a new correction curve.
Instruction Manual Seitz 6x17 Digital - version 4.05 - May 2013- © by Seitz Phototechnik AG / Switzerland www.roundshot.ch page 51