26
SENSAPHONE 400 User’s Manual
tion and compare that value to programmed high and low temperature
limits. Temperature zones must be used with Sensaphone’s 2.8K Remote
Temperature Sensor or weatherproof sensor.
NOTE: Before wiring, it is advisable to disable the zones to prevent
accidentally tripping an alarm. See Chapter 5.
Important Note regarding Ultra-Low temperature freezers:
If you are connecting the Sensaphone to an ultra low temperature freezer
(-80° C) and the freezer is equipped with alarm terminals/contacts you can
connect these directly to one of the zones on your Sensaphone (refer to
your freezer owner’s manual for proper connection).
2.10 InStallIng the SenSor
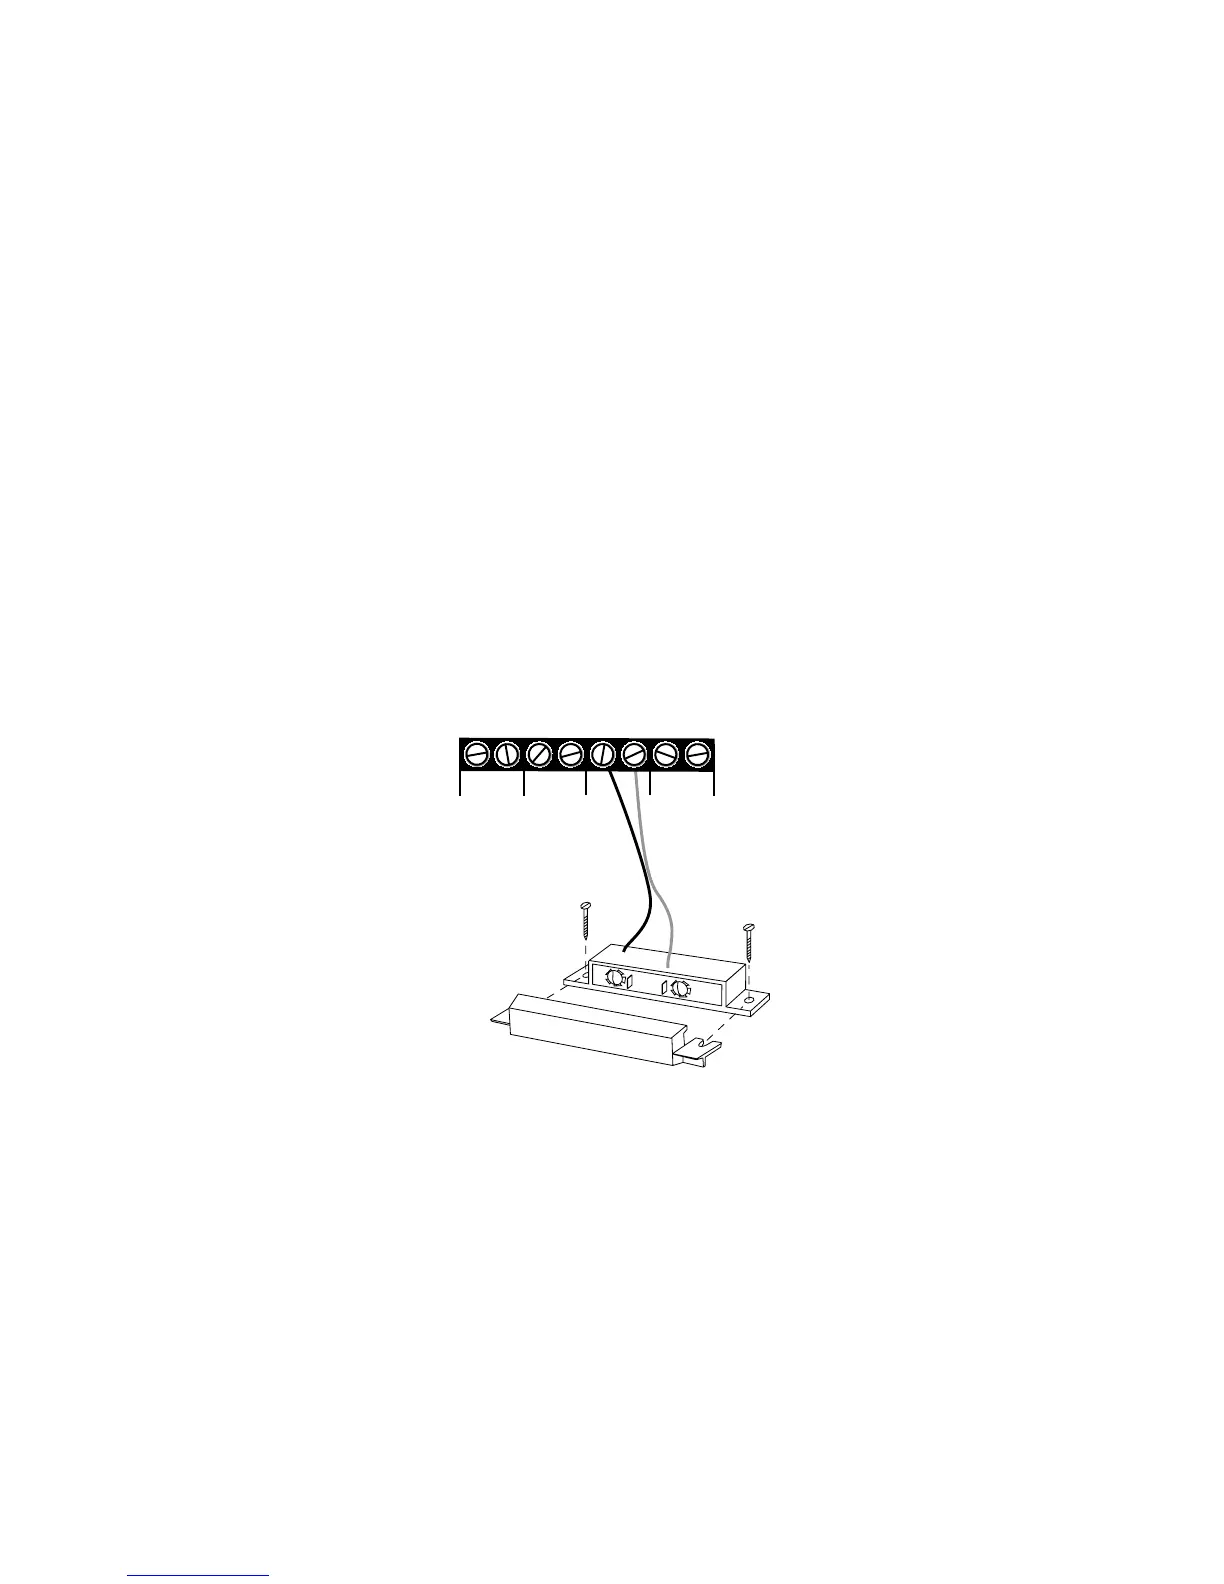
After you have selected the sensor, loosen the screw of the alert zone and
its corresponding common (c). Two wire leads are used to connect any
monitoring sensor. Fasten one lead to the numbered screw and the other
lead to C. Tighten both screws. If the zone was not disabled, the Model 400
may recite its “Alarm Exists” message as you connect the sensor. If it does,
just press ALARM CANCEL to stop it. Re-enable the zone after wiring.
Refer to Figures 2-6 and 2-7 for connecting a sensor to an alert zone.
Sensor wired to
Alert Input 3
1 C
ZONES
2 C
3 C
4 C
Figure 2-6. Sensor Connected to an Alert Zone
Any sensor can be attached to the Model 400 using 18-26-gauge wire (#22
recommended). The sensor can be several hundred feet from the unit, as
long as the total resistance of the circuit is not greater than 50 ohms. Use
wire appropriate for the application.