8-10
WEB PAGES►WEB FUNCTIONS IN THE MACHINE
Storing destinations for Scan to Desktop
The destination for Scan to Desktop is stored by the Sharp Network Scanner Tool Setup Wizard when "Network
Scanner Tool" is installed in your computer. For this reason, there is no need to store the Scan to Desktop destination in
the Web page. (Network Scanner Tool can be downloaded from the Sharp website.)
For information on Scan to Desktop system requirements, installing the Network Scanner Tool, and storing the
destination, see the "Sharpdesk installation guide".
Normally your computer is stored as the destination by the method indicated above.
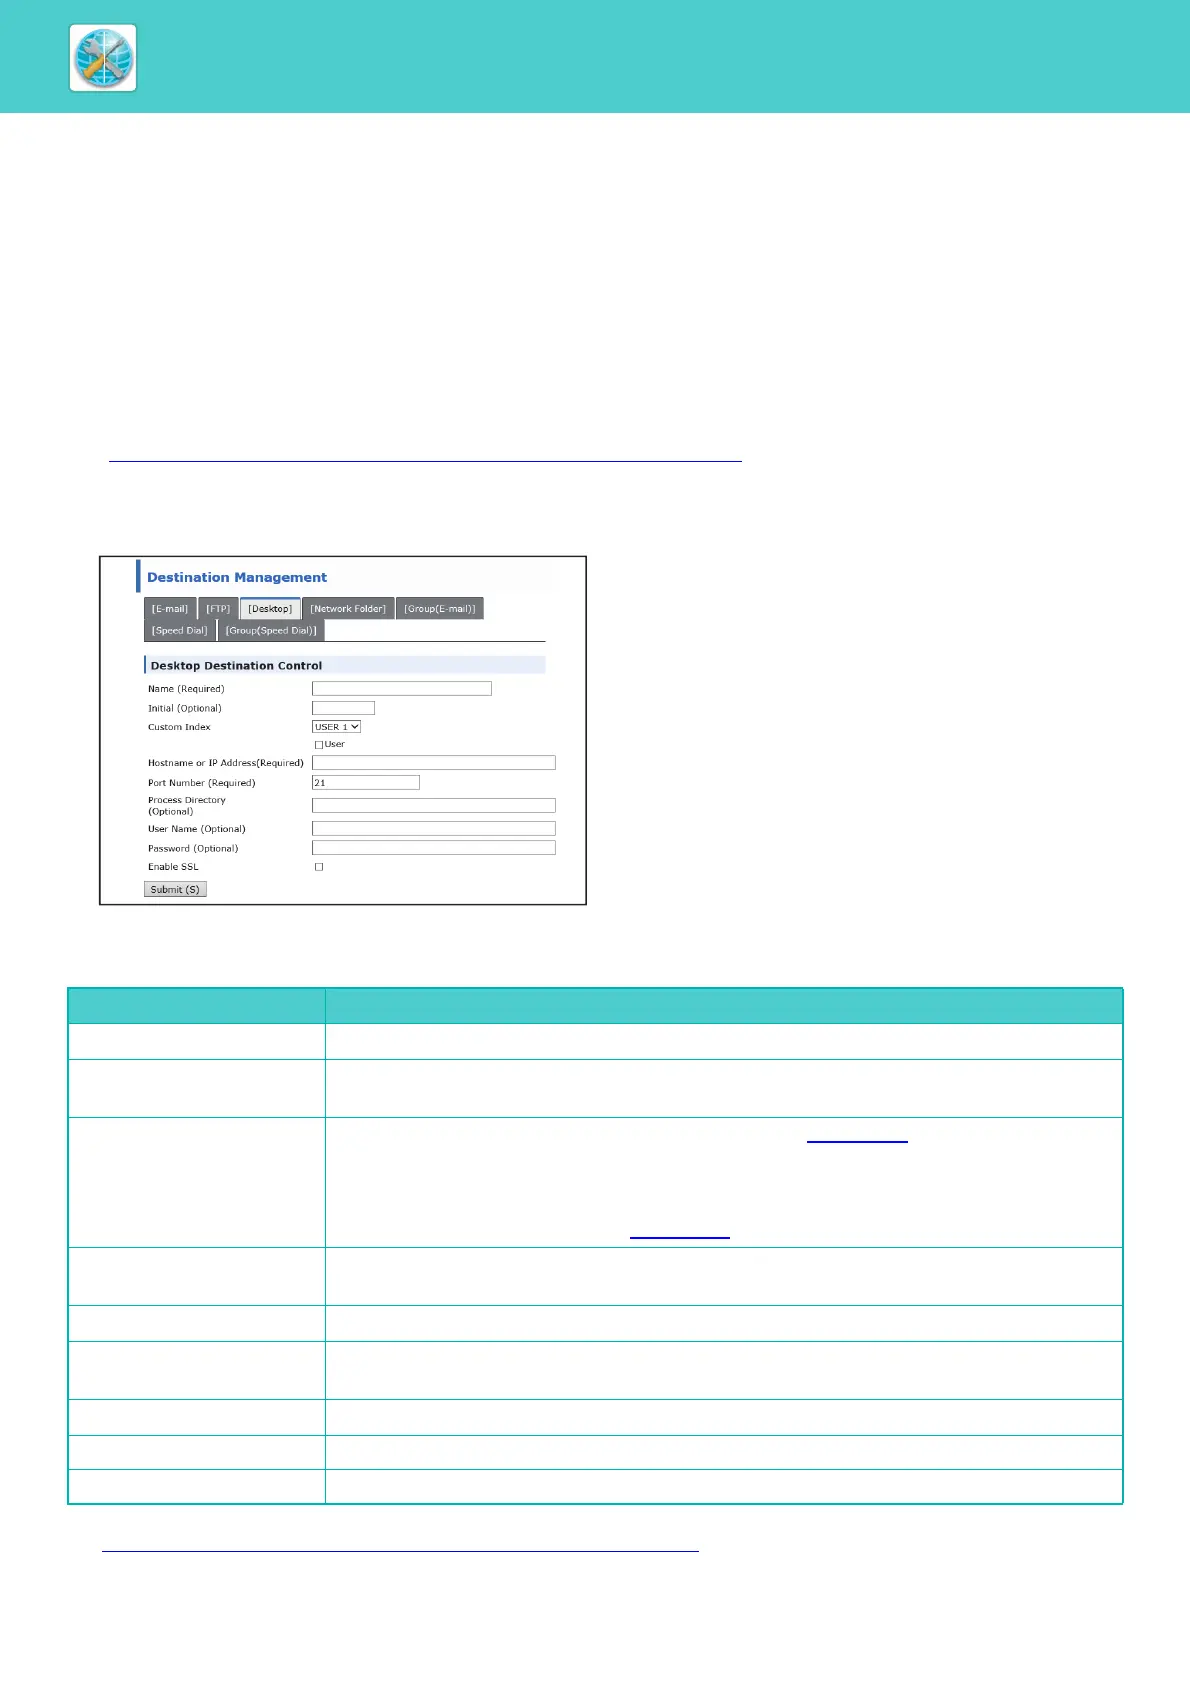
The following page for storing Scan to Desktop destination information appears when [Destination] is selected in the
menu frame, followed by [Desktop]. This page is used mainly by the system administrator in the following circumstance.
• When another machine that also has the network expansion kit is added to your network and you wish to send an
image scanned on the new machine to a destination stored on the existing machine
See Editing and deleting programmed transmission destinations (page 8-12)
to select the Scan to Desktop destination
information that you wish to use on the new machine and enter the displayed information in this screen in the new
machine. (When you have completed all entries, click [Submit].)
If there are several destinations that you wish to use on the new machine, repeat this procedure as needed.
If the information entered here differs from the
information entered on the host computer,
transmission/reception will not be possible.
For the settings, see the following table.
Scan to Desktop destination information
* If you entered a host name in "Hostname or IP Address", you will need to enter the DNS server settings.
► CONFIGURING SMTP, DNS AND LDAP SERVER SETTINGS (page 8-15)
Item Description
Name (Required)
Enter the name of the destination (up to 36 characters).
Initial (Optional)
Enter initial text for the destination (maximum of 10 characters). When the destination list is
displayed in the destination control screen, the initial text is used to group the destinations.
Custom Index
Names can be assigned to the custom indexes as desired (►page 8-3), allowing convenient
grouping of destinations.
Drop down list: Select a custom index for the destination to be stored.
User checkbox: When this is selected, the destination is stored in the user tab of the
address book. (►page 5-8)
Hostname or IP Address
(Required)*
Enter the IP address or host name of the FTP server (maximum of 127 characters).
Port Number (Required)
Enter a port number from 0 to 65535 for the desktop network scanner tool.
Process Directory
(Optional)
Enter the destination directory name for the file (maximum of 200 characters). The file will be
processed in this directory after it is received.
User Name (Optional)
Enter the login user name for the network scanner tool (maximum of 32 characters).
Password (Optional) Enter the login password for the network scanner tool (maximum of 32 characters).
Enable SSL Select this checkbox to use SSL communication.