MX-M753N MX-LC10 2 – 4
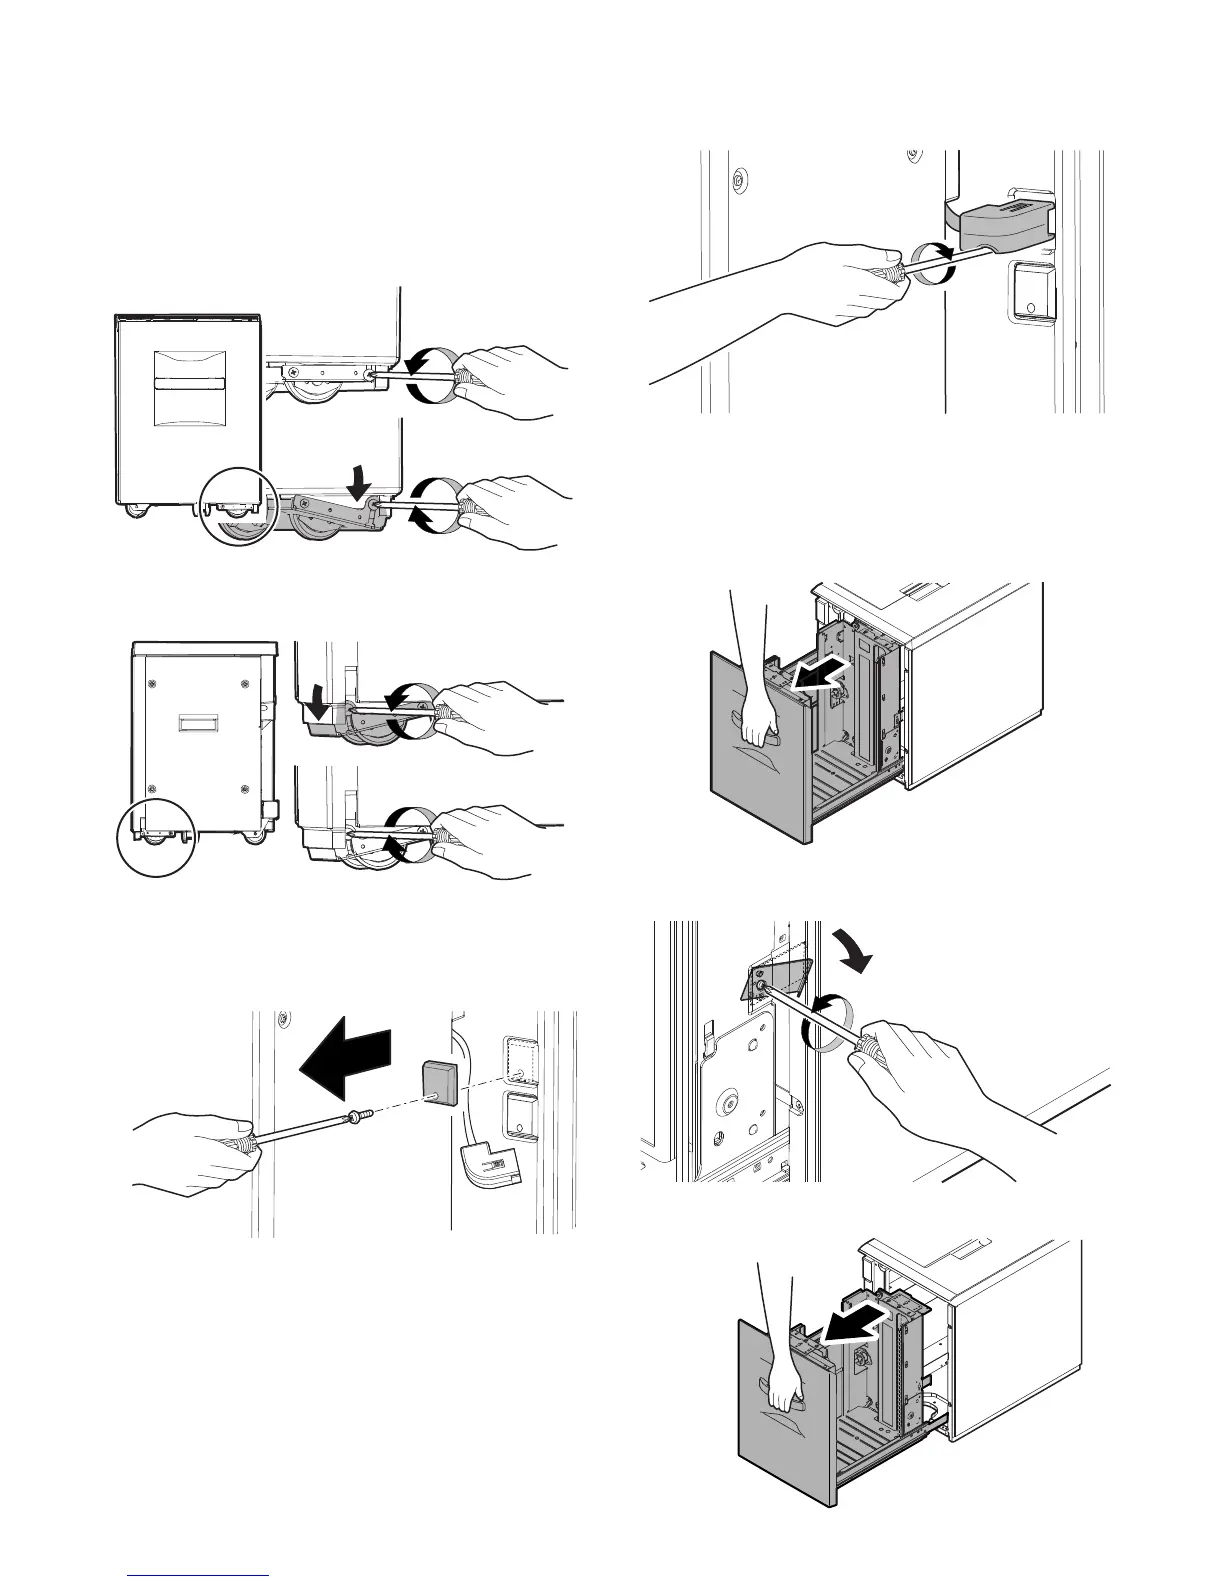
D. Adjusting the casters
1) After installing the large capacity tray to the main unit, loosen
the screws (one in the front and one in the rear) of the adjust-
ment caster mounting plate attached to the lower side of the
large capacity tray.
At that time, the casters of the adjustment caster mounting
plate are brought into contact with the floor by the spring force.
2) Tighten the screws (one in the front and one in the rear) of the
caster mounting plate which were loosened in procedure 1).
E. Connector connection
1) Remove the fixing screw from the connector cover on the main
unit and then remove the connector cover.
2) Connect the large capacity tray interface harness connector to
the main unit connector, and tighten the connector screw to fix
the connector.
F. Paper size switch
(1) Paper size switch from A4 to LT
Since the factory setting of the paper size is A4 or LT, if paper size
switch is required, perform the following procedures.
1) Pull out the large capacity tray until it stops.
2) Loosen the stopper fixing screw (1 pc.) on the lower right side
of the paper feed tray to disable the stopper function.
3) Then pull out the paper feed tray again until it stops.
 Loading...


