MX-M753N MX-LC10 2 – 3
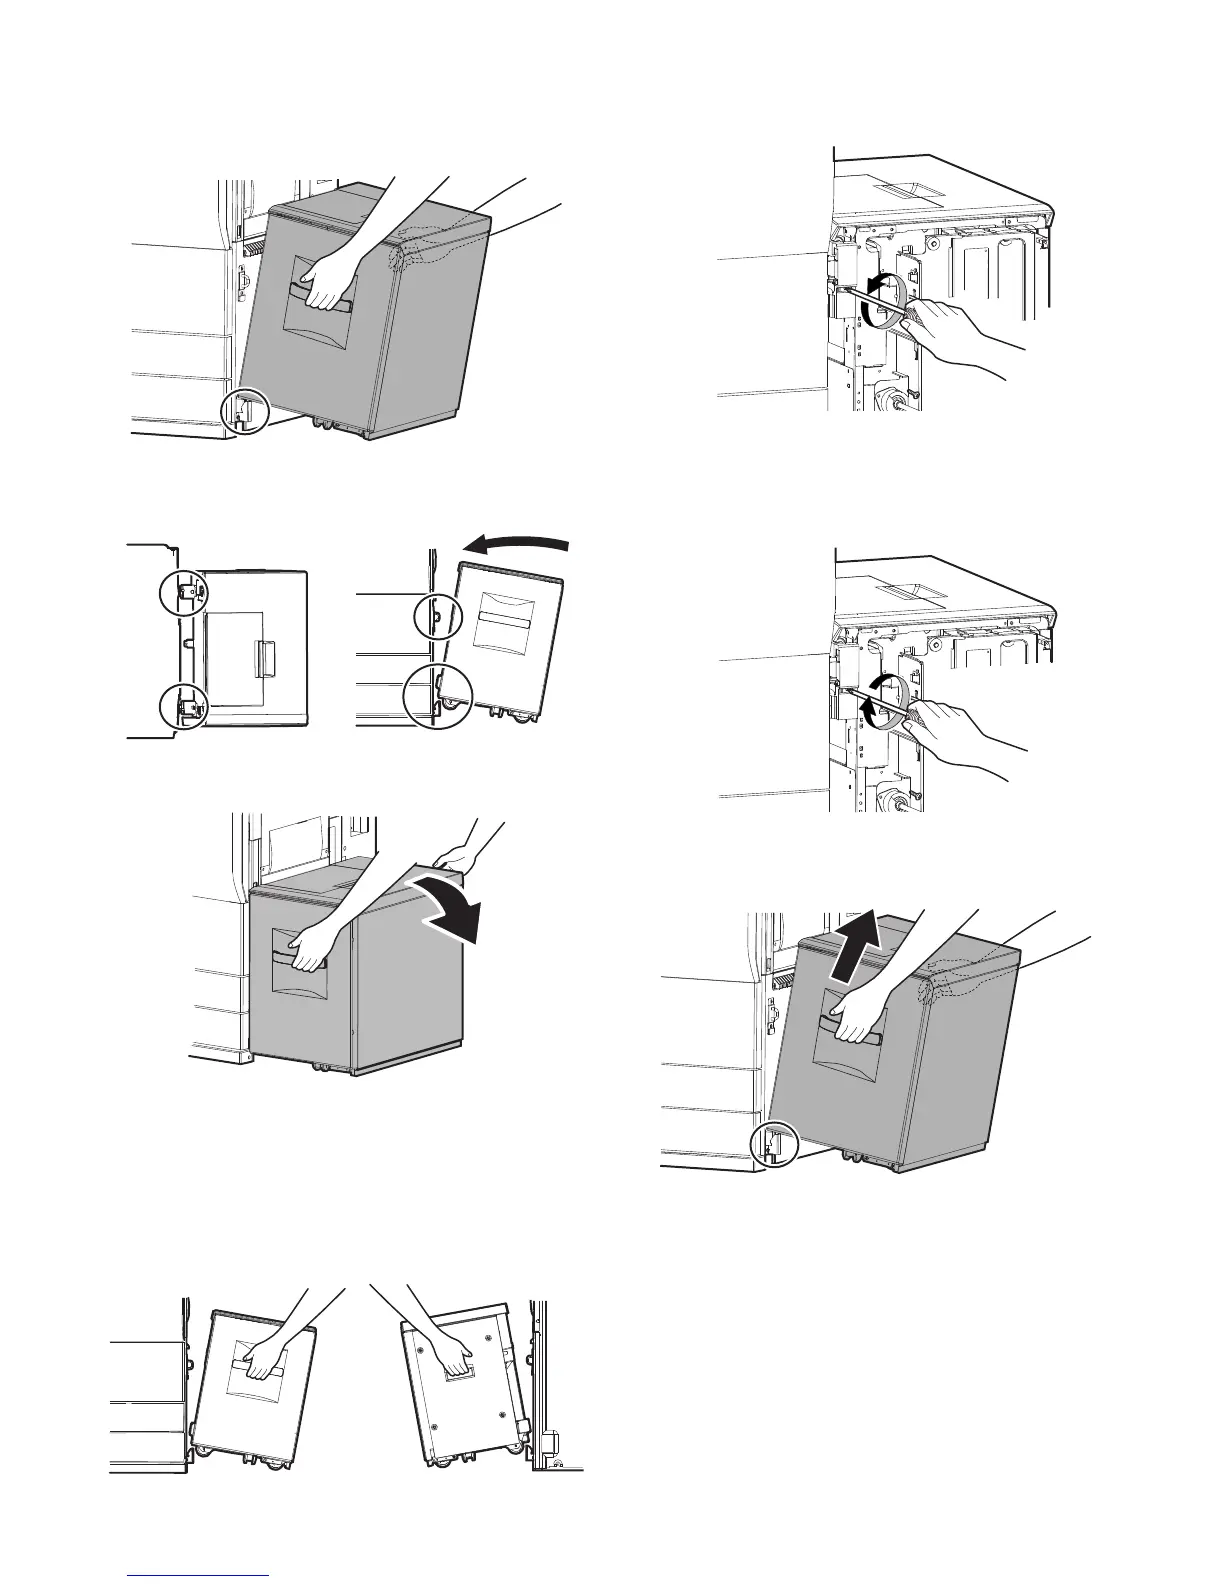
C. Attach of the large capacity tray to the main
unit
1) Hold the grips of the front and the rear cabinets with both
hands, and lift the left side.
2) Hang the metal fixture of the large capacity tray on the lower
front/rear connecting plate of the main unit side. Push the large
capacity tray onto the main unit and attach it.
To confirm that the large capacity tray is locked into place pull
it in the direction of the arrow as shown.
* If lock is incomplete, when the power switch is turned on, the
message, “Check installation of tray 5” is displayed on the
operation panel.
* Push the large capacity tray onto the machine, and lock it
securely.
Note 1)
When lifting the LCC, insert fingers firmly into the grip sections of
the front and rear cabinets and install slowly.
Note 2)
Turn the lock release screw of the front cover counterclockwise to
loosen and check that the screw is free.
* If the screw is tight at that time, installation will be incomplete.
<<How to separate the large capacity tray from the main
unit>>
1) Turn the lock release screw of the front cover clockwise and
tighten the screw securely to release lock.
2) Then hold the grips of the front and the rear cabinets with both
hands, and lift the left side. The large capacity tray will come
off.
 Loading...


