MX-M753N MX-KBX2 11 – 3
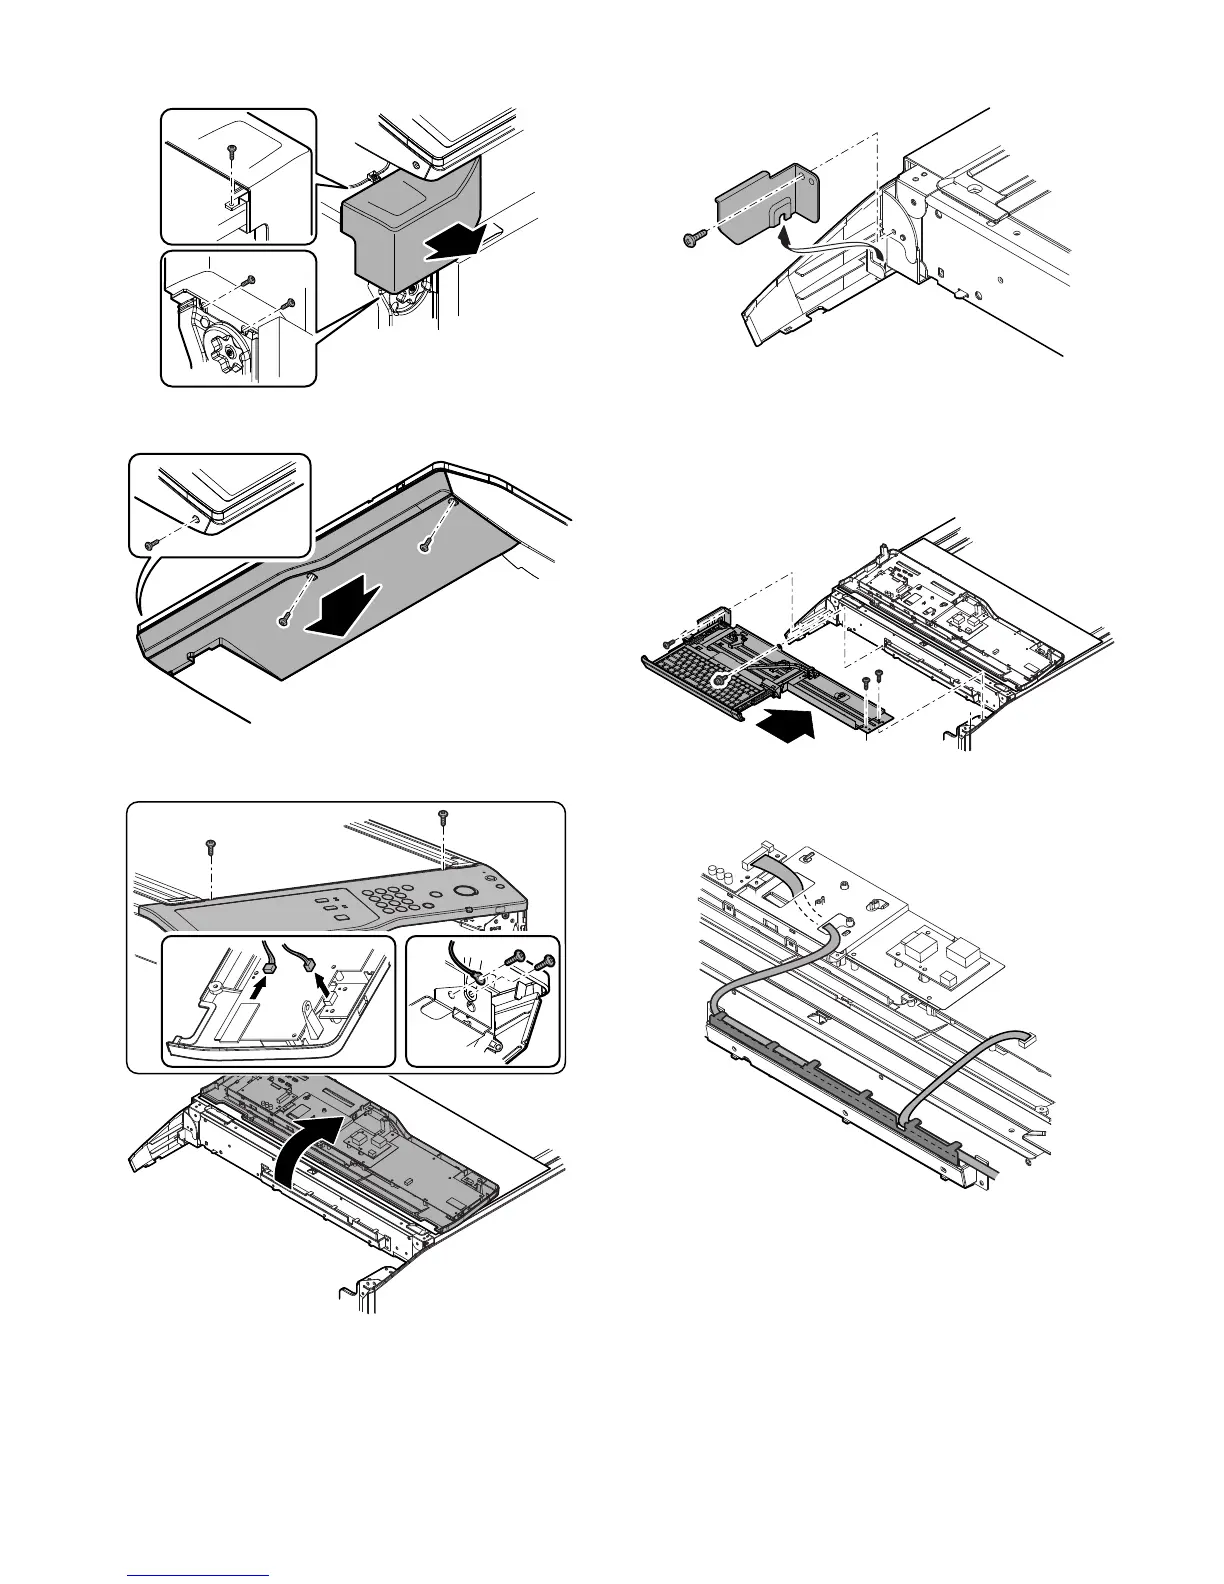
4) Remove the screw, and remove the front cabinet upper.
5) Remove the screw, and remove the operation base plate unit.
6) Remove the screws and disconnect two connectors. Place the
operation panel upside down on the protection sheet.
*1: Don't pull the lead wire. The connector is locked.
Hold the housing section of connector, pull out it.
*2: Slowly pull the lead wire and disconnect the connector.
*3: There is a locking section on the reverse side. Use care
when removing the connector.
7) Remove the screw, and remove the panel angle plate.
8) Install the keyboard unit (part No.1 in the package), and fix it
with the fixing screw A (part No.5 in the package) and the fixing
screw B (part No.6 in the package).
* When fixing the fixing screw B, use the short screwdriver or
the small screwdriver.
D. Install the operation panel
1) Check that each harness is engaged with the rib.
 Loading...


