Copyright © All rights reserved, SHARP CORPORATION
Confidential
71
5.5.Installation tool 2
Product Name (temporary) Purpose and Precautions for Use Image
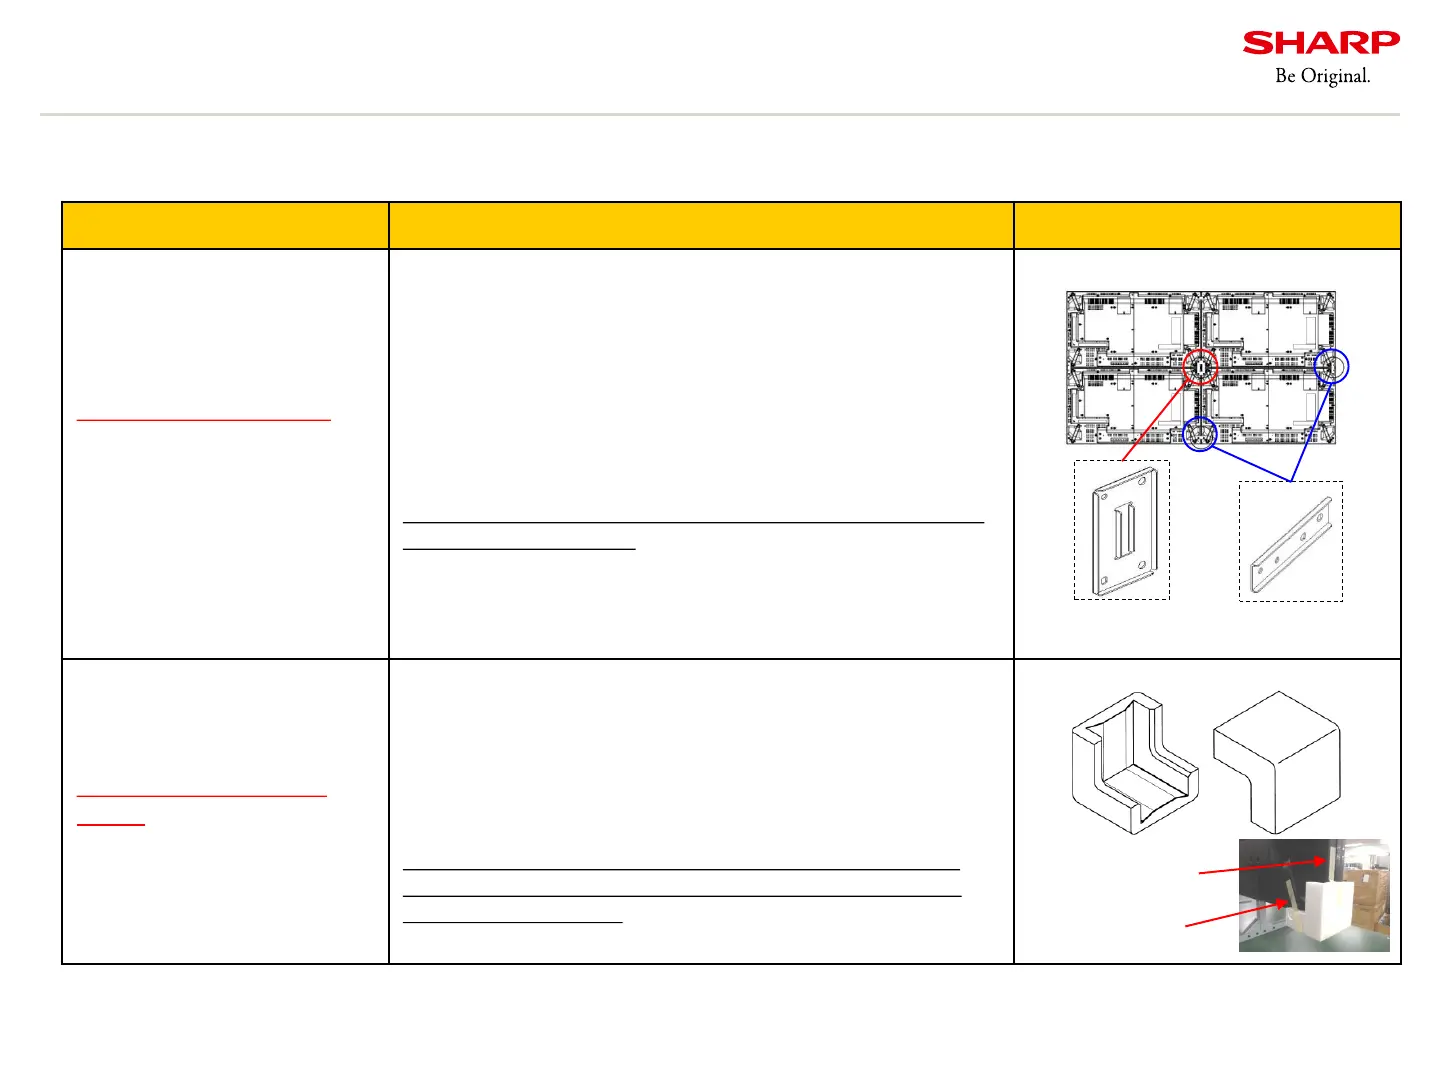
Screen alignment tool
Plate A (UKOG-1025MPZZ)
Screen alignment tool
Plate B (UKOG-1026MPZZ)
*Tool for this model only
Screws (M6X10)
(XBPS760P10KS0)
Plate A 2 screws
Plate B 4 screws
*Not inessential. M6
screws with length of 8 to
10mm can be used.
■Adjusting differences in level (thickness) in video wall
- Requires four M6 x 8mm screws for four displays.
Requires two M6 x 8mm screws for two displays.
- Use washer or spacer between displays as necessary.
- When using this tool, you need a space to go around to the
back of the display.
- Make sure the level difference is below 3mm before using
this tool.
*Extreme twist to this product may cause crack of the panel,
light leakage or failures.
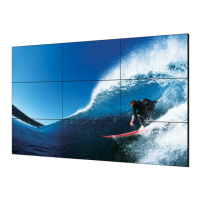
Corner Protector
(UKOG-1008MPZZ)
*Common tool for PN-V
Series
■Reduce shock while moving and installing
- Protect display from impact by covering the both lower
corner of a display.
- Requires two pieces for one display.
- This tool can increase installation efficiency. Use it as
necessary.
*This tool can not be attached to the display with magnet.
Use a sticker. (Attach a sticker to the handle part and the
side of the rear cover.)
Note: Contact the dealer from which you purchased the main unit or our sales reps if you need above tools.
(UKOG-1025MPZZ)(UKOG-1026MPZZ)
Handle part
Side of rear cover
We provide the following service parts for installation (for a fee).