17/54
Reassembling the top end of the motor:
Reassemble the piston
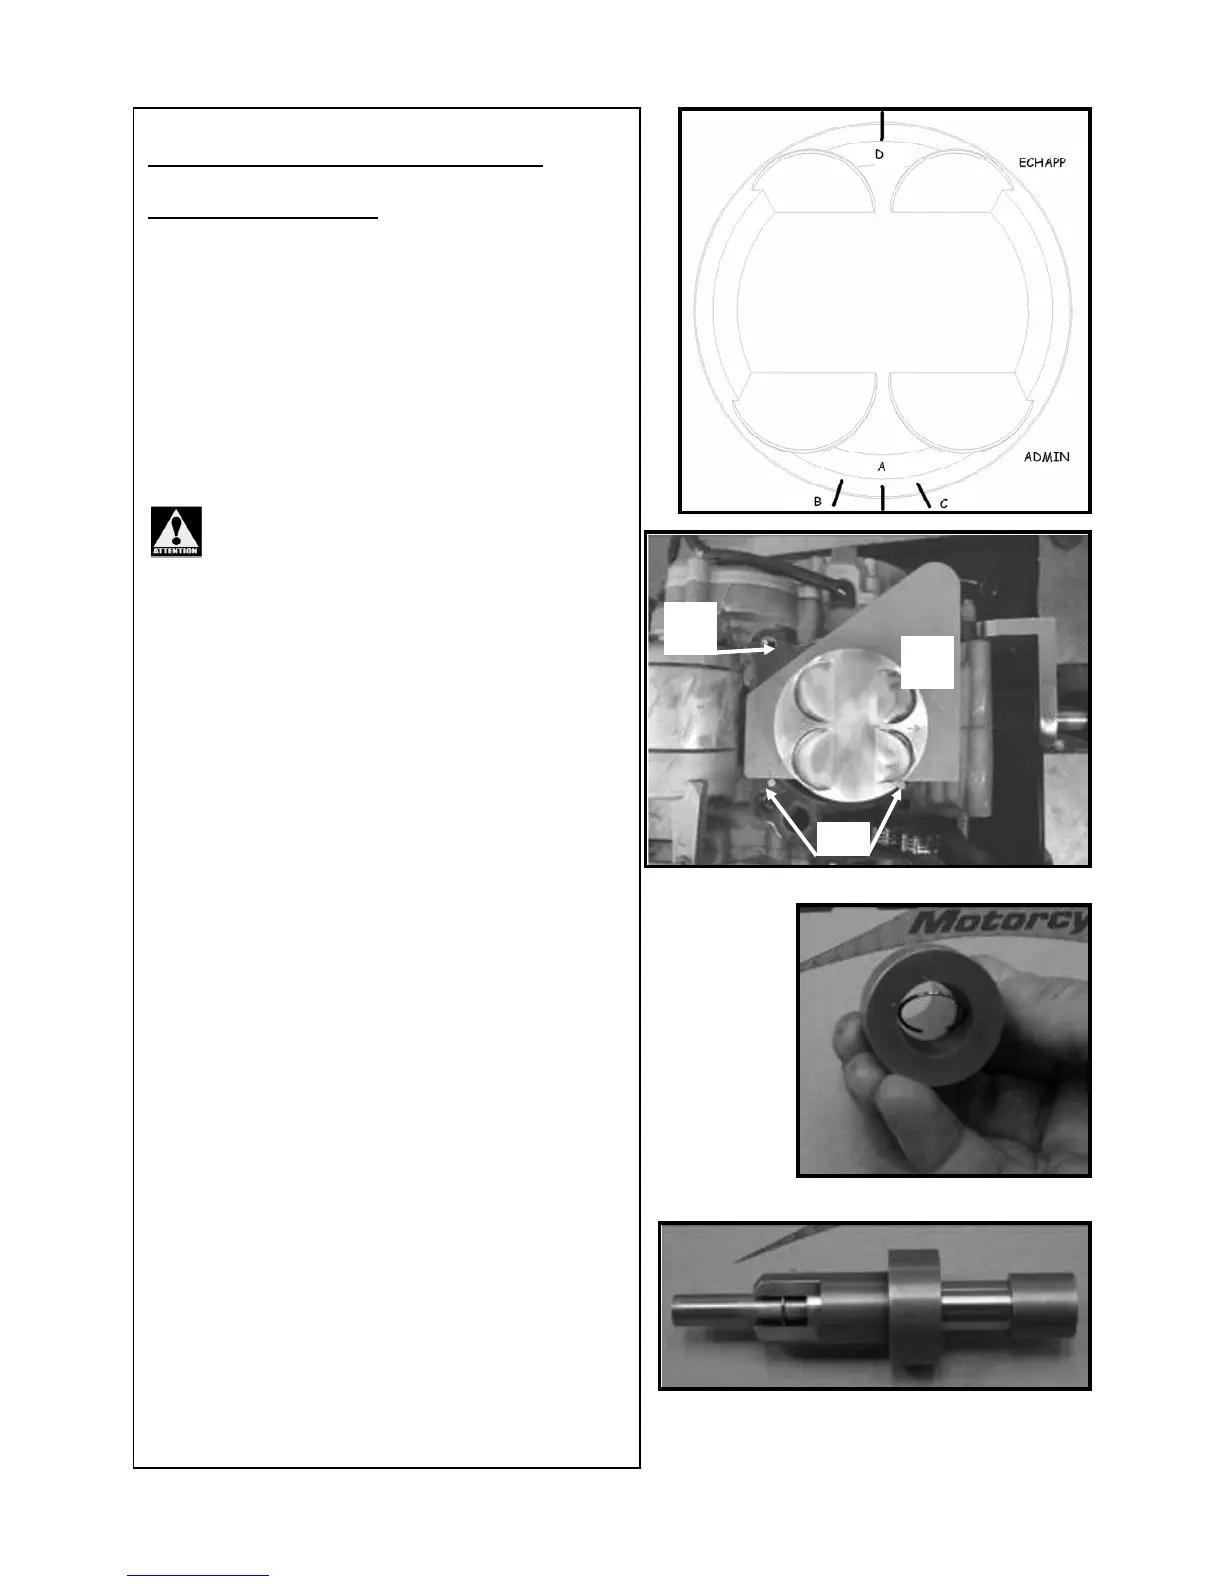
• Install the piston rings on the piston with
the end gaps as shown in the photo, the
compression ring goes in the top groove and
the oil control ring goes in the bottom groove.
A Lower expander end gap
B Lower piston ring end gap
C Upper expander end gap
D Upper piston ring gap
The expander rings do not have a top or
bottom; however the oil control ring and the
compression ring must be installed with the
« N » mark facing up.
• Apply engine oil to the wrist pin internal
bore in the piston.
• Carefully note the piston orientation (the
small cut outs are on the exhaust side)
• Install the locating pins [B].
• Install the base gasket [C].
• Use special tool number 1821 to
maintain the piston in the correct location [A].
• Place one of the cir clips in the special
tool number 2075 as shown in the photo; install
the clip close to one end of the tool.
• Use the tool to set up the clip for
installation on the wrist pin.
• Install the cir clip on the wrist pin.
A

 Loading...