25
11 SetupSetup
1
3
5
2
4
6
7
8
12
14
13
9
10
11
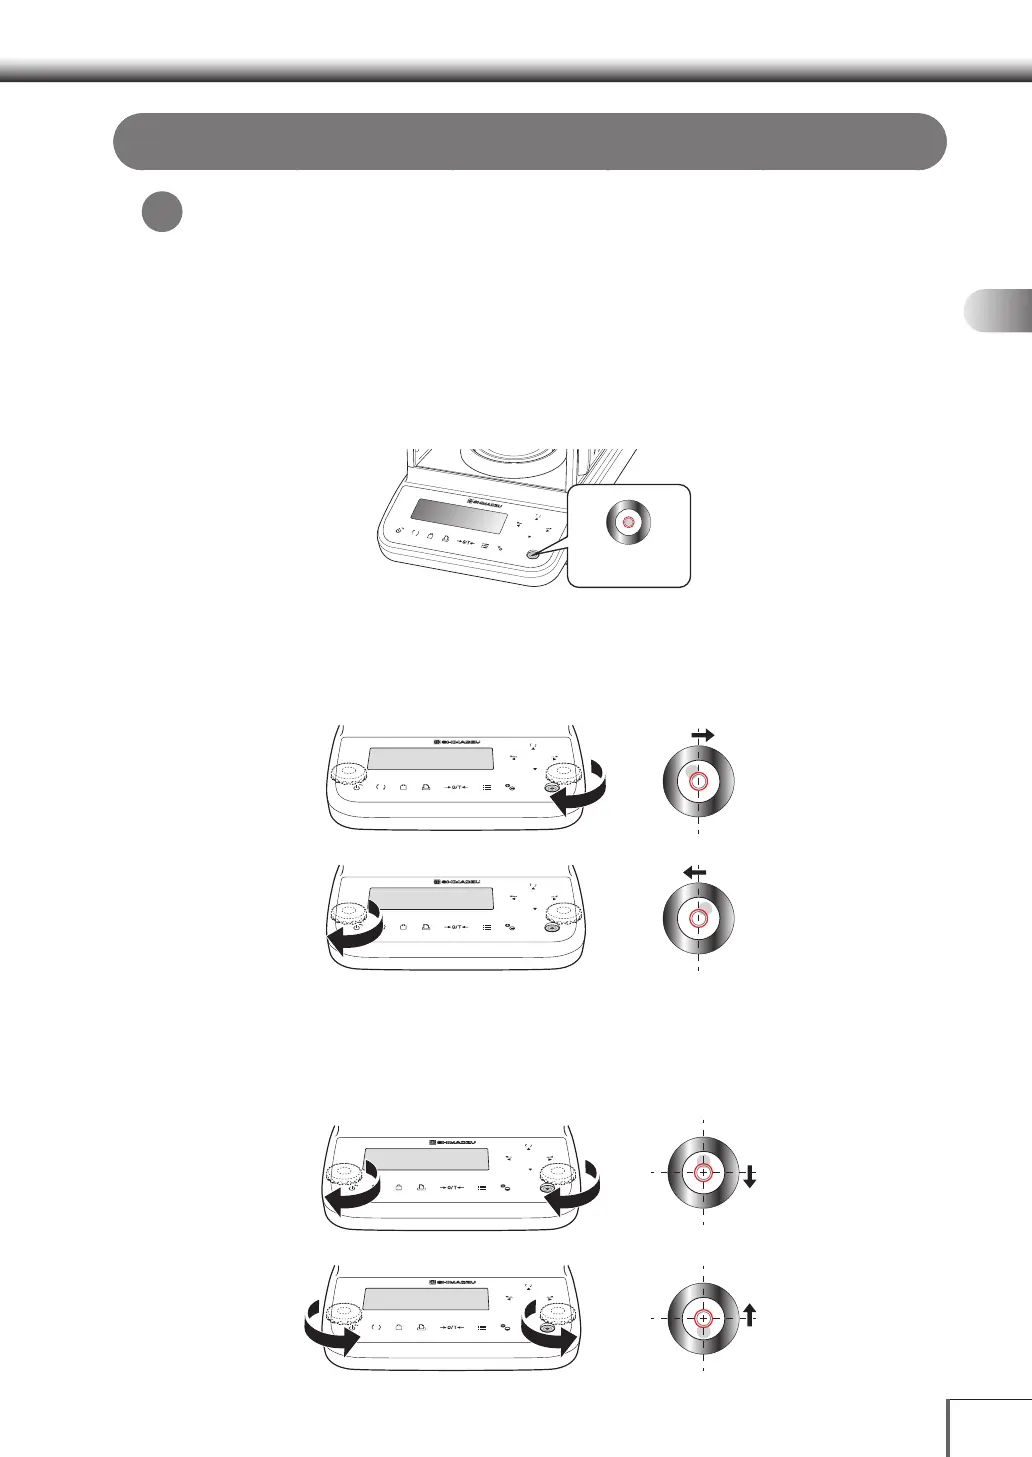
Adjusting the Horizontal Level of the Balance
Level Screw Operations
Turning the level screws in a clockwise direction when seen from above extends the legs to tilt
the balance. Turning them in a counterclockwise direction shortens the legs to tilt the balance
in the opposite direction.
Level the balance by following the procedure below.
1.
Turn all the level screws (total two at front) counterclockwise as
viewed from above until they come to a gentle stop.
The balance will be tilted toward the front.
OK
FUNC
g
d
Level indicator
2.
Adjust the two level screws at the front so that the air bubble in
the level becomes centered in the left/right direction.
At this stage it doesn’t matter if the air bubble isn’t centered in the front/rear direction.
OK
FUNC
g
d
OK
FUNC
g
d
3.
Turn both the level screws at the front in the same direction
for the same amount to center the air bubble in the level in the
front/back direction.
Adjust them to bring the air bubble into the center of the circle.
OK
FUNC
g
d
OK
FUNC
g
d
*