61(83)
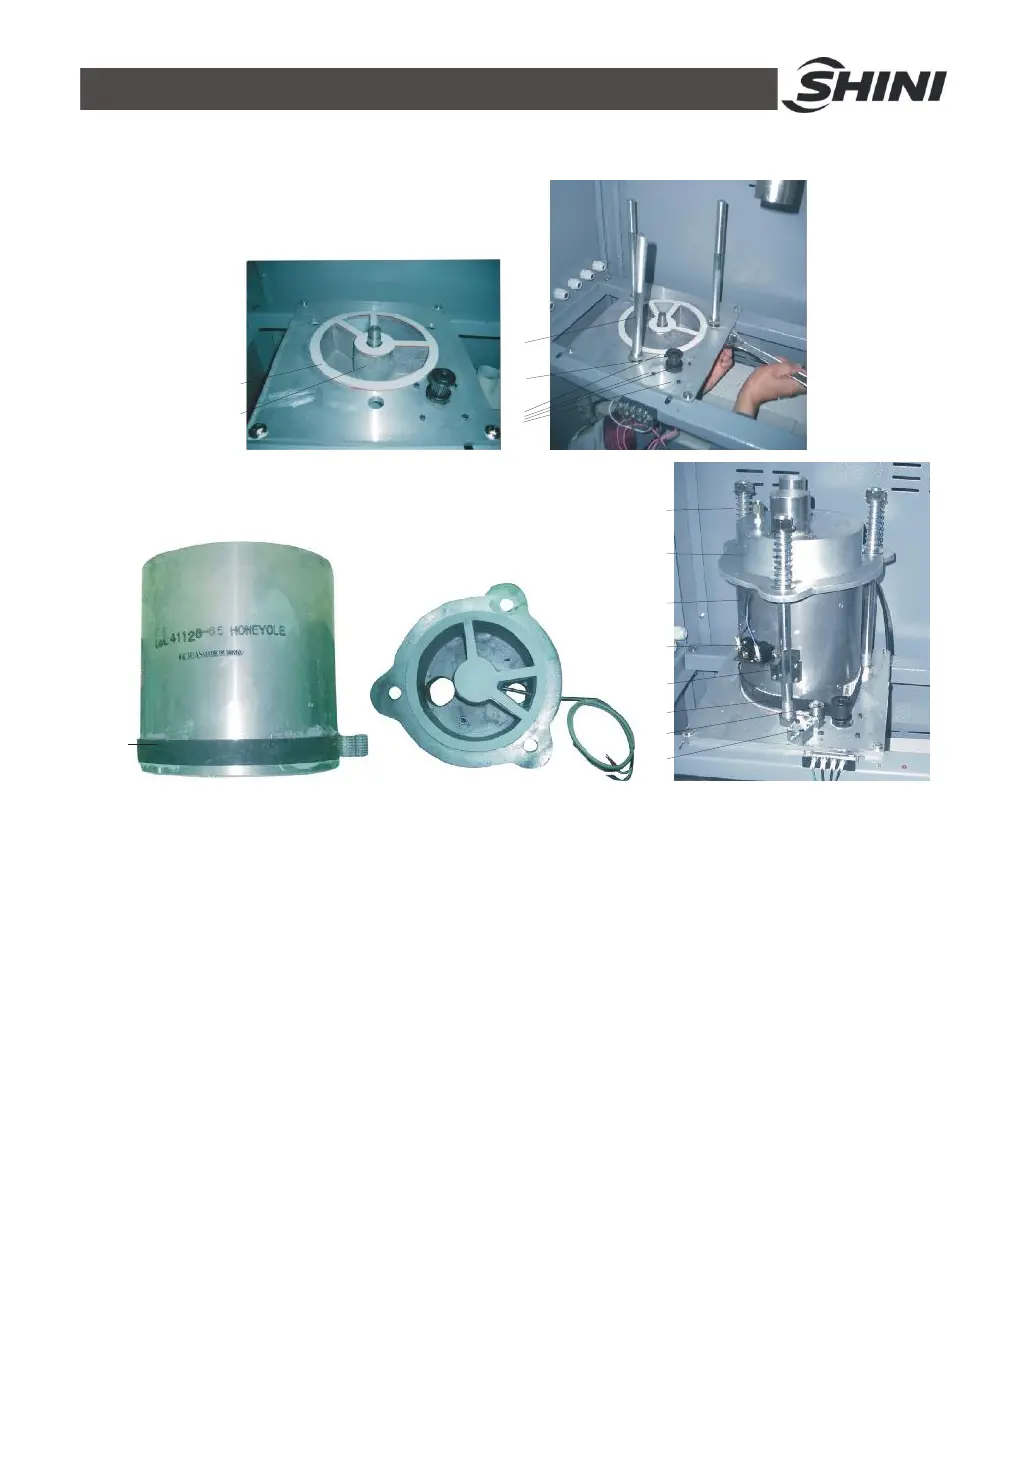
3.2.2 Installation of the Rotor (SD-40H~700H)
1
2
3
4
5
6
7
8
9
10
11
12
13
14
Picture 3-2:Installation of the Rotor (SD-40H~700H)
1) The upper and lower lid of honey-comb should install Teflon gasket (Fig. 1).
2) Use 4 screws to fix the rotor base on the machine frame firmly, and then
install the shaft accordingly (Fig. 2).
3) Install the gearmotor and transmission gear (Fig. 4).
4) Install and fix the main support screws (Fig. 3).
5) Fit the transmission belt in proper position (Fig. 6).
6) Install the honeycomb-rotor (Fig. 9) and transmission belt (Fig. 12).
7) Fix the rotor top cover (Fig. 8).
8) Fit all springs and tighten the screws (Fig. 7).
9) Install both the transmission belt (Fig. 13) and belt tension regulator (Fig. 14).
10) Install micro-switch and fixed board firmly (Fig. 10).
 Loading...