62(83)
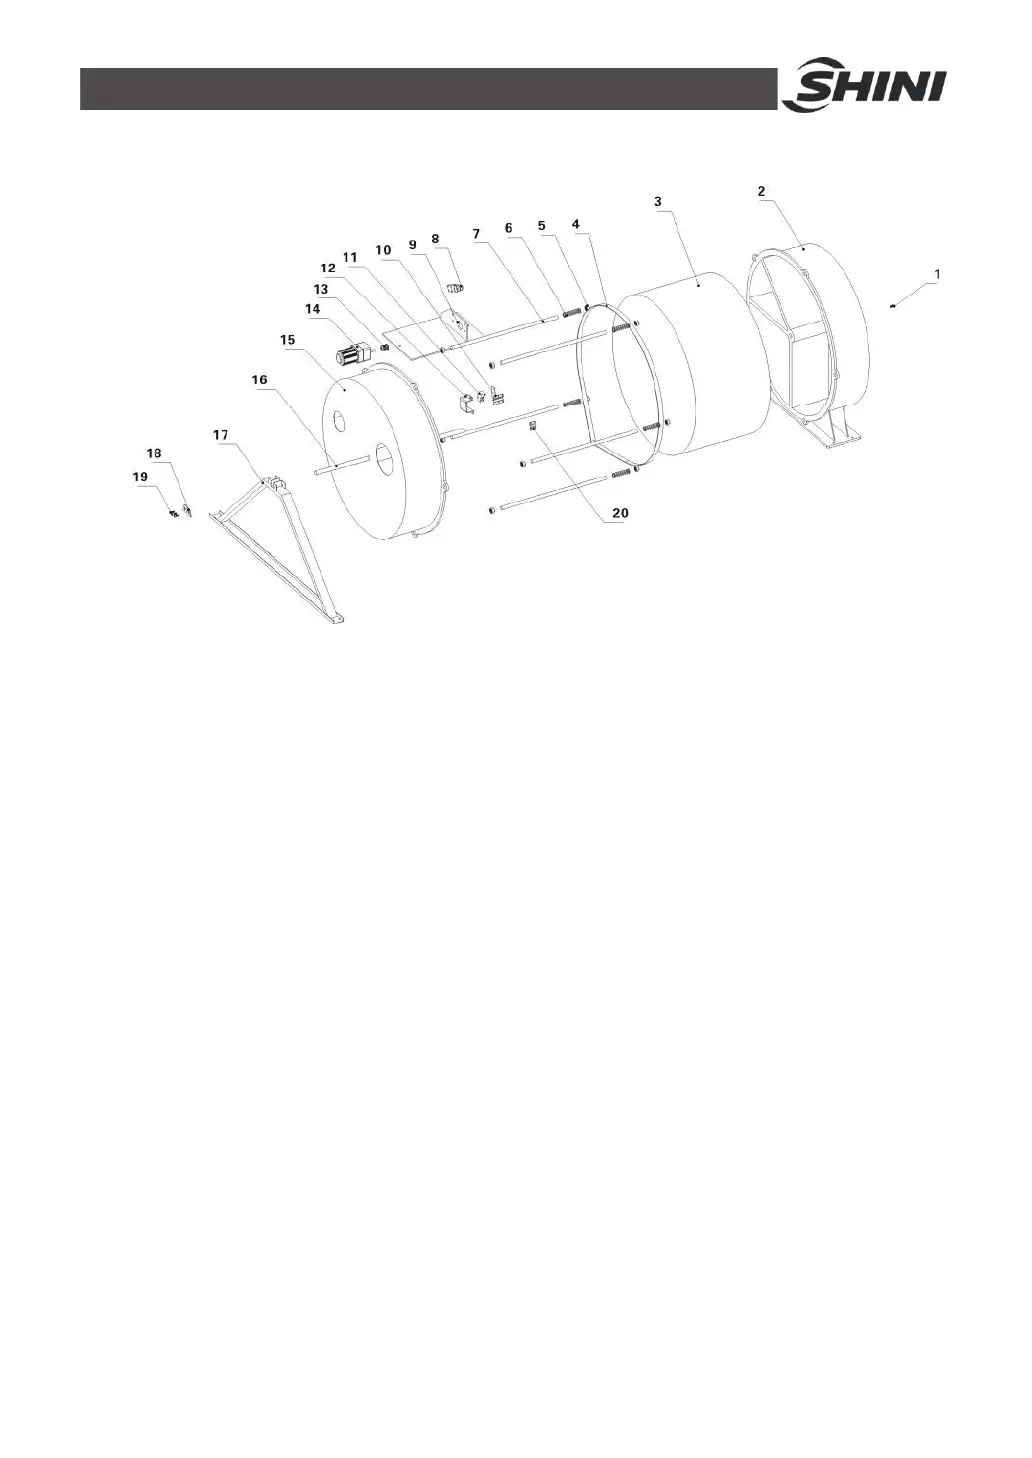
3.2.3 Installation of the Rotor (SD-1000H~4000H)
Picture 3-3:Installation of the Rotor (SD-1000H~4000H)
1) Use one solid strap or applicable washer to lifted or block up to the wheel 3 to
align the wheel bearing bore and fixed honeycomb lid 2 center hole.
2) Use honeycomb shaft 16 to penetrate the wheel 3 and fixed honeycomb lid 2,
and install synchronic belt 4 on the rotor 3.
3) Install removable lid 15 on the honeycomb shaft 16, and use honeycomb
mounting bracket 17 to sustain the shaft.
4) Use inner hexagonal screw 1 to fix the plate 18 on the shaft 16.
5) Use hexagonal nut 5、double-headed screw bolt 7 and spring 6 to fix the
removable lid 15, which ensures good seal at the ends of the
honeycomb-rotor.
6) Use fixed iron sheet 20、fixed iron sheet 10 to fix microswitch 10, this
ensures that the direction of shell fragment of microswitch 10 is the
same as rotating rotor 3, and then install the box of microswitch 12.
7) Use two solid straps to fix honeycomb lid 2 and honeycomb mounting bracket
17, then install components on the bracket.
8) Install motor cabinet 9 on the bracket, then install gearmotor 14 and
synchronic wheel 13 and synchronic belt 4.
9) Install belt tightener on the motor cabinet to make belt tightener rotate without
slipping.
 Loading...