Mark VII Restored Manual - V1.02 – Donated without cost to the world-wide Shopsmith Community - Everett L. Davis 2016 41
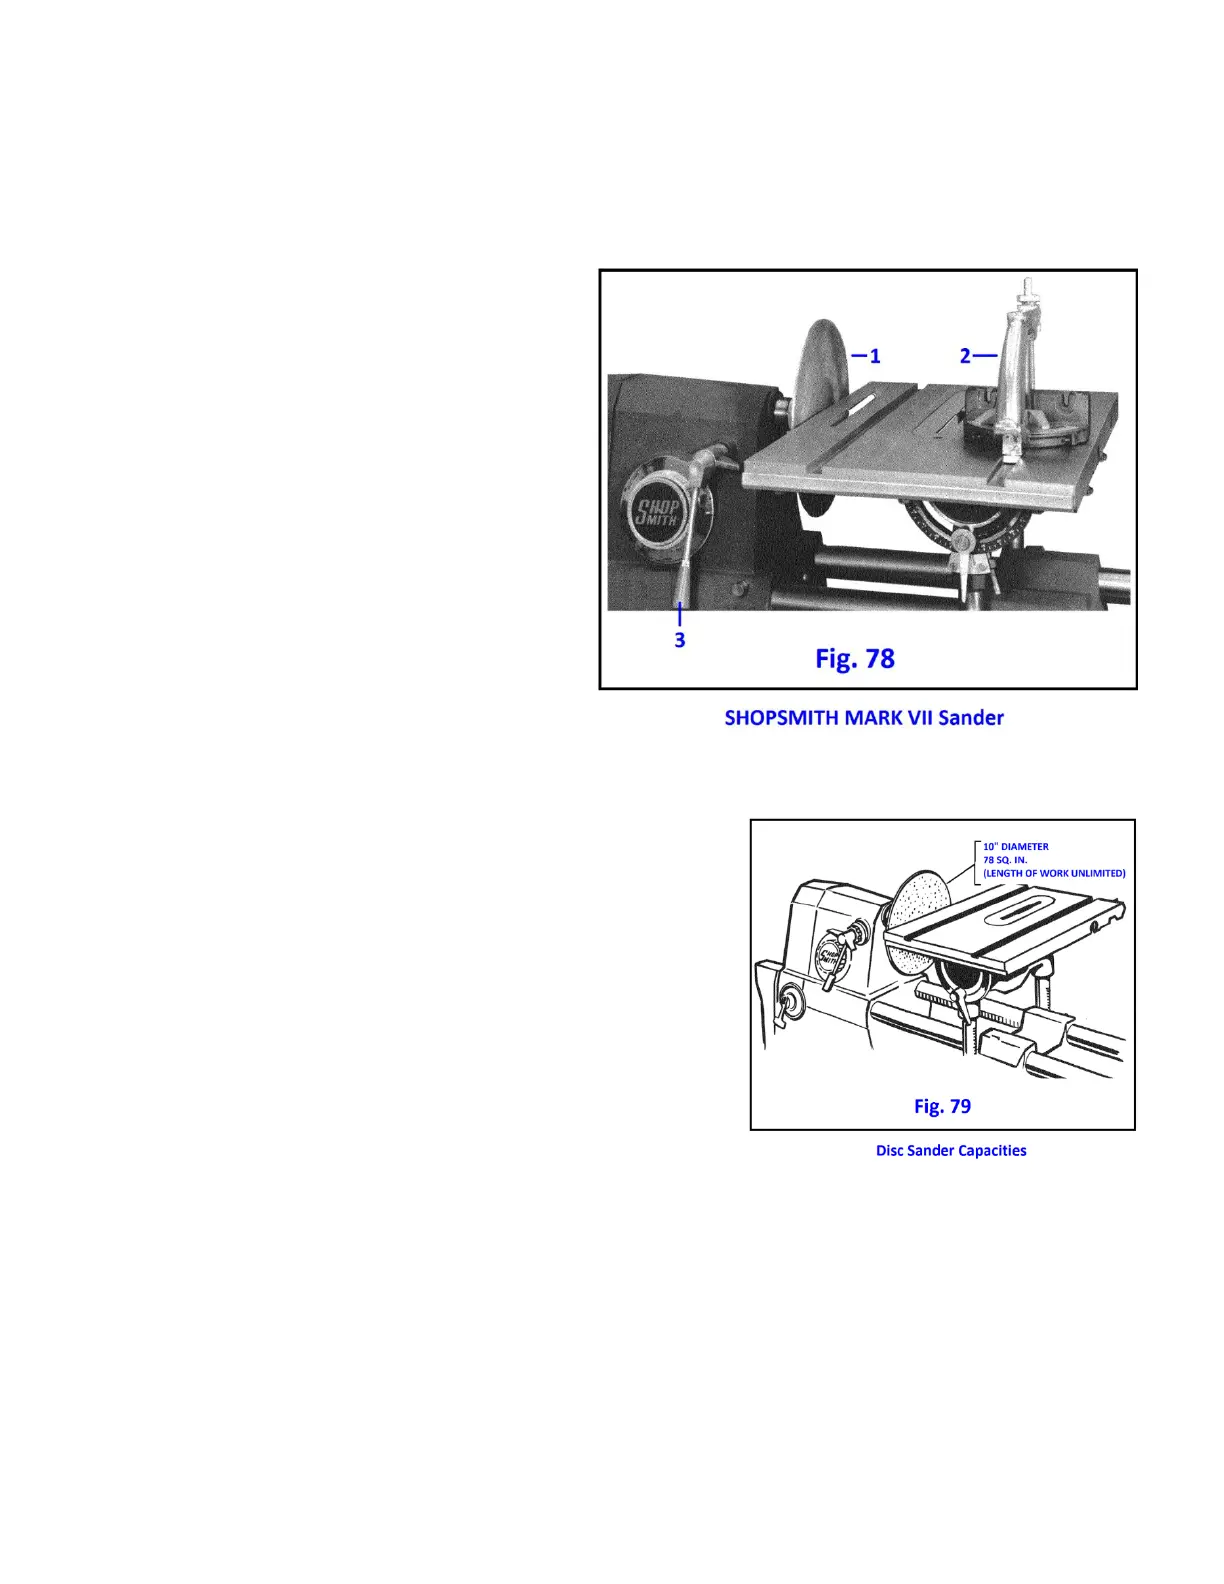
SHOPSMITH 10 INCH DISC SANDER
NOMENCLATURE
1. 10" Double Faced Sanding Disc - One side
conical, other side flat. Affords 78 square
inches of sanding area. Attached directly to
main or upper auxiliary spindle.
2. Miter Gauge - Used as stop or guide for
many sanding operations. Use with rip
fence to create jigs for duplicate sanding
and special operations.
3. Quill Feed Lever - Permits advancing disc
into work. Unparalleled accuracy for single
or duplicate parts because amount of work
sanded off can be mechanically controlled
with the feed stop.
HOW TO USE THE DISC SANDER
ATTACHING SAND PAPER
Liquid Adhesive (Item No. 505554) is applied to both the disc and
sandpaper sheet. Spread adhesive thinly and evenly and let dry
for 20 minutes or until it turns black. Press sandpaper onto disc.
This is contact bond cement - sheet cannot be moved after initial
contact so make sure it is correctly positioned.
Remove old sandpaper and adhesive completely before applying
a new sheet.
MOUNTING
The SHOPSMITH 10" disc can be used on either the main spindle
or the upper auxiliary spindle. On the main spindle it can be flat
face out or with coned face (hub side) out. Either way around it
may be used with the accessory lower saw guard in place for dust collection. On the auxiliary spindle the disc
can be mounted only with the flat face out.
Sanding is always done on the "down" side of the disc (Fig. 80). If it is ever necessary to use the "up" side of the
table, or if you are moving a long piece across the face of the disc, be sure to hold the work firmly down on the
table to prevent the disc from lifting it.