Mark VII Restored Manual - V1.02 – Donated without cost to the world-wide Shopsmith Community - Everett L. Davis 2016 44
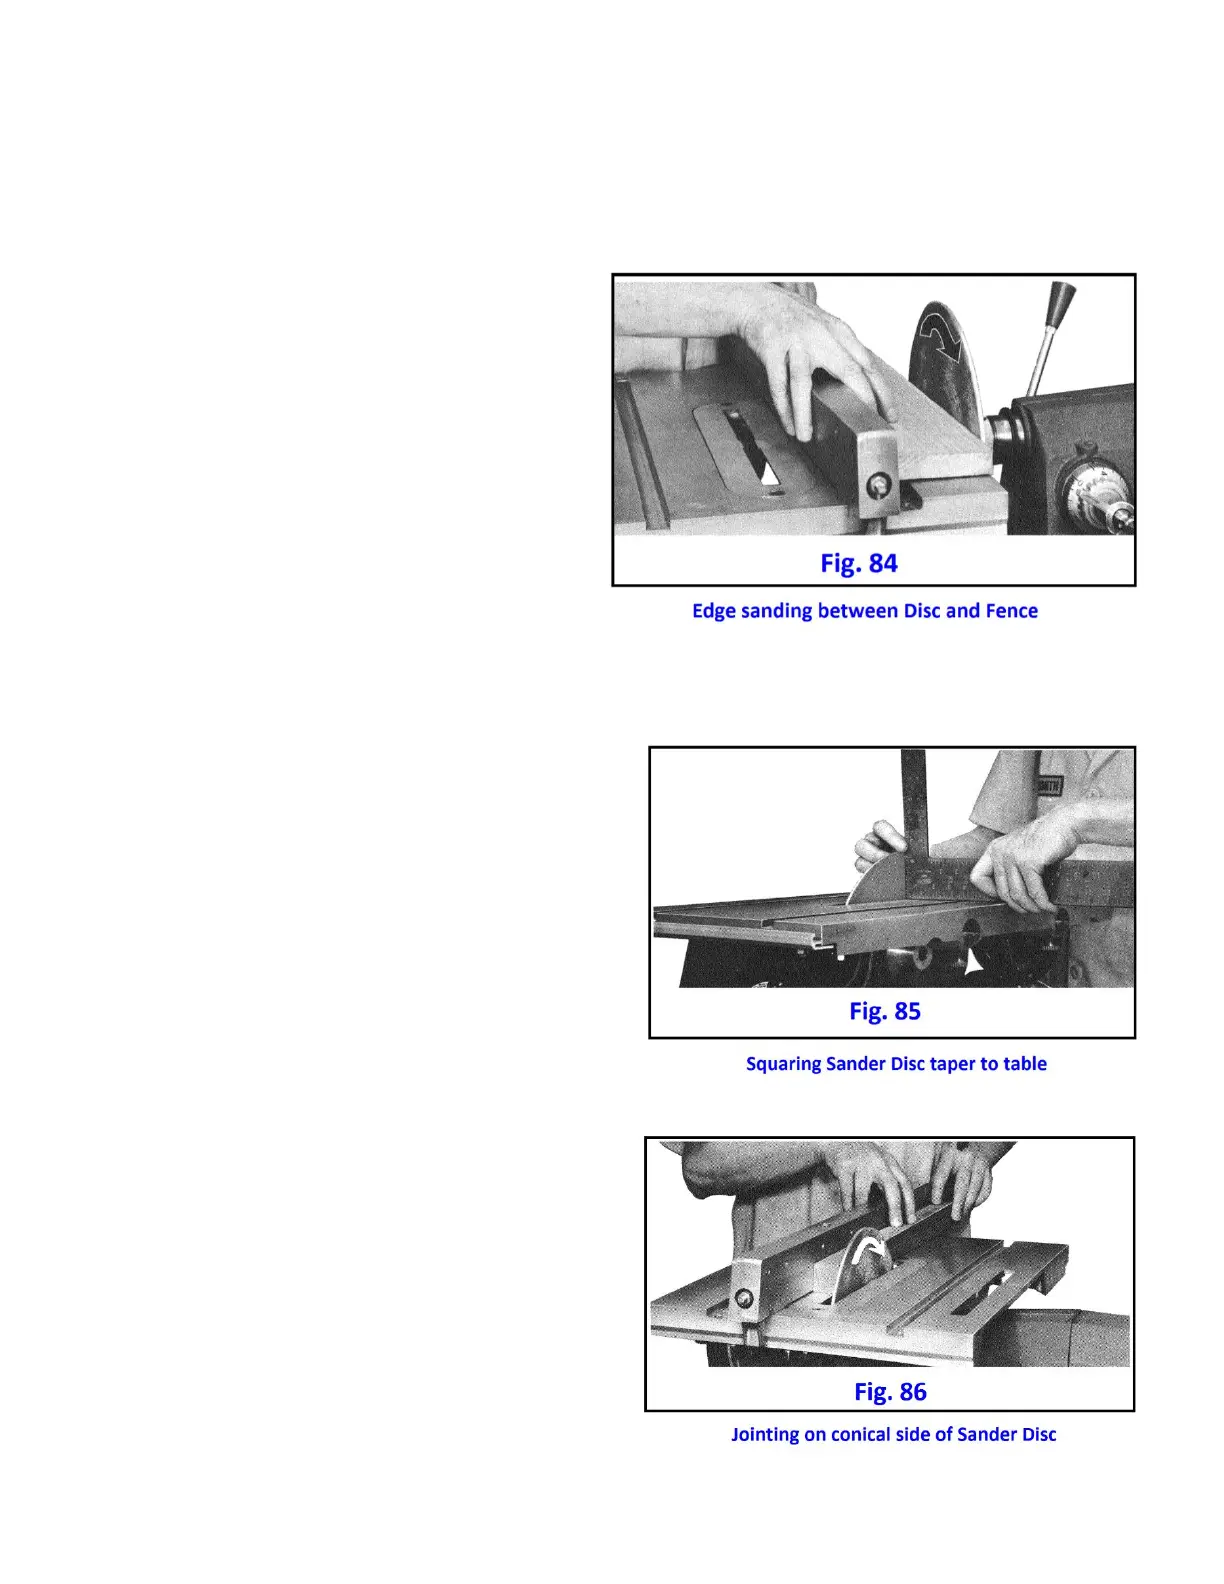
JOINTING ON DISC SANDER - FLAT SIDE
Long straight edges are sanded smooth and
square in an operation that combines sanding,
jointing and finishing to exact width. Use angling
screw (No. 2, Fig. 25) to set the rip fence at a
slight angle to the disc. The distance from fence
to disc should be slightly less than the width of
the work piece. Angle of the fence should be such
to allow contact from outer edge of the disc to
just short of the center. With forward rotation
of spindle work is fed through FROM THE BACK
toward the front of the table while contact is
maintained with the fence throughout the pass.
Can also be setup for feed from the front if
spindle is operated in reverse (Fig. 84). As always,
work slowly - do not force the cut. This setup is a very practical method of jointing plywood.
JOINTING ON DISC SANDER-CONICAL SIDE
1. Square table to taper of conical side of disc. (Fig.
85)
2. Use the fence in normal parallel position for a
guide. Determine work dimension by measuring
between center line of sander disc and fence. Work is
fed through against the rotation of the sander disc.
DRUM SANDER
The drum will sand inside and outside curves and
internal circular cutouts with a speed and efficiency
impossible to achieve with any other means. The
special shaper insert is used with the drum sander to
give support in the area immediately surrounding the
drum.
SANDPAPER
Sandpaper, in disc form for the disc sander and in
sleeves for the drum, is available in course, medium
and fine grits. Paper for 10" disc has score mark for
removal of center piece for hub clearance on conical
side.