RAY26P-xxxxx5
RAY26P-xxxxx9
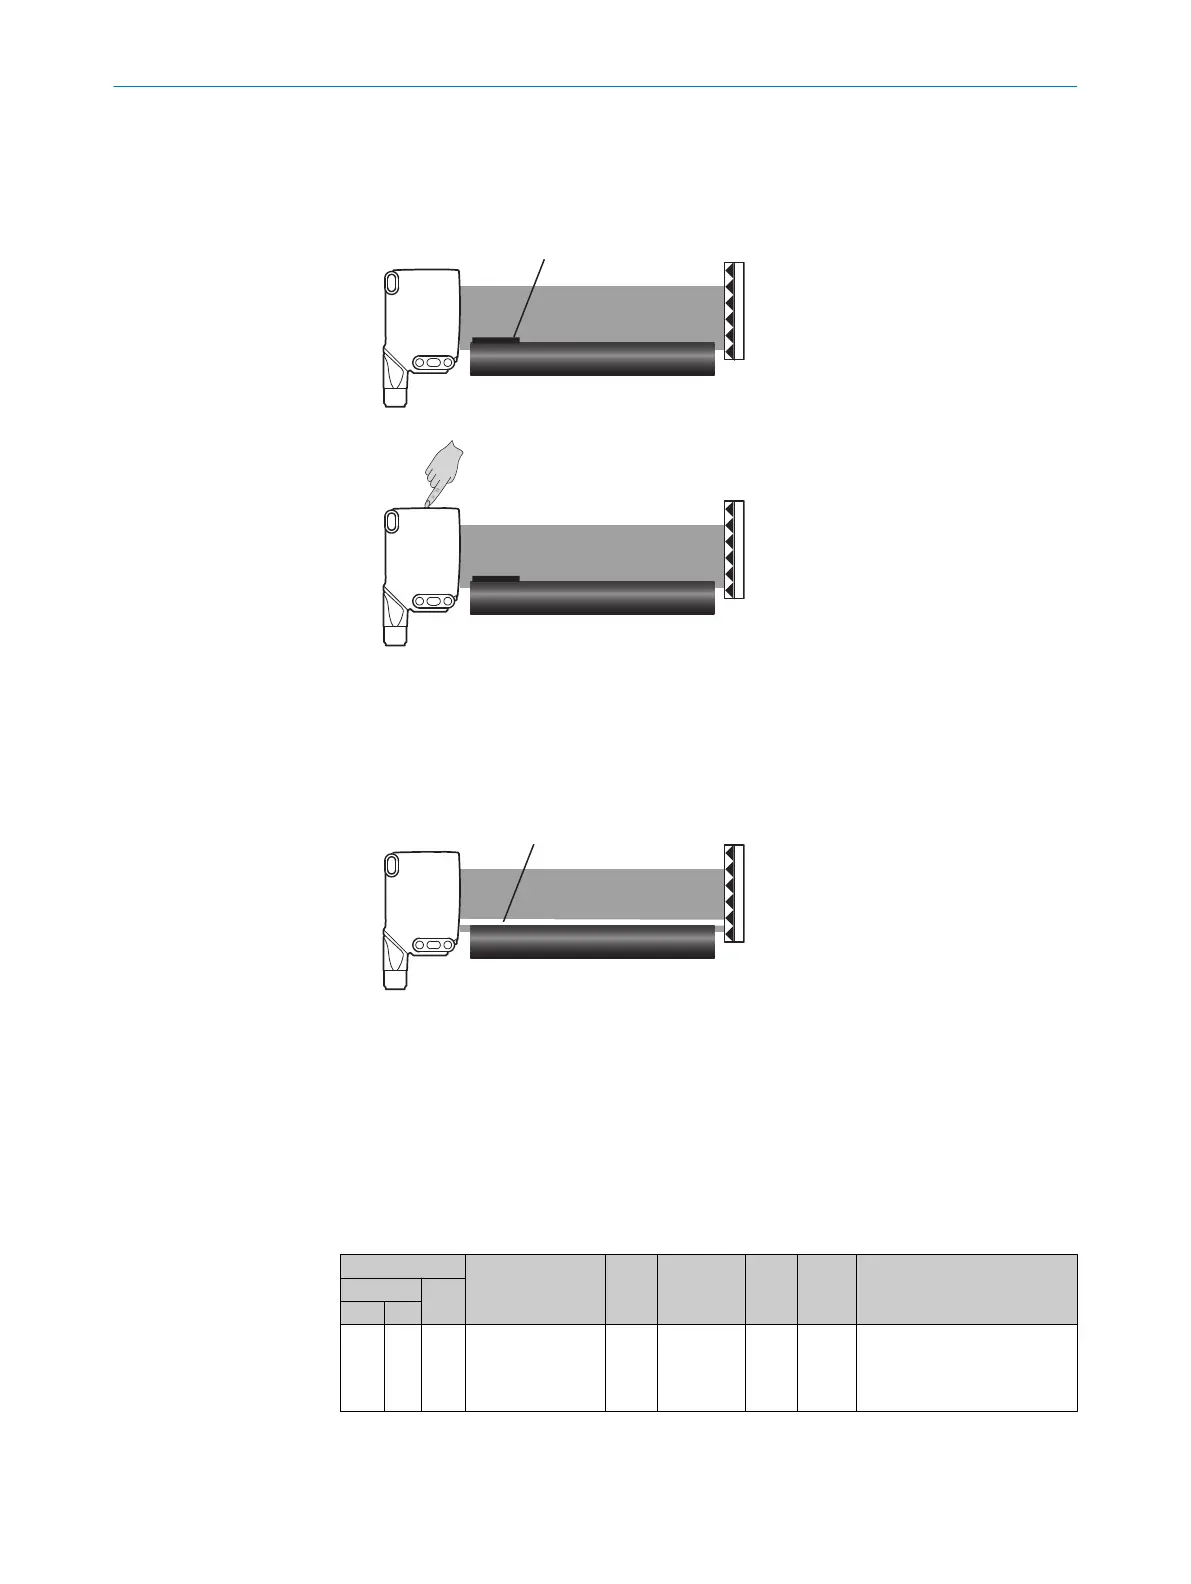
1. Place an object A with the corresponding height to be blanked (e.g. 3 mm) in the
light band in front of the RAY26.
2. Teach RAY26 and it is ready for use.
3. Remove the object from the light band.
This area (B = object height A) is now blanked for detection.
If the conveyor belt moves a little bit up, it is not detected.
An object must now be e.g. approx. 8 mm high so that it can be detected by
RAY26P-xxxxx5 (MDO: 5 mm). If the RAY26 is re-teached without object A into the
light band, then the blanked area is no longer present and is available for detec‐
tion again.
Conveyor blanking via IO-Link
RAY26P-xxxxx3
The conveyor blanking allows a stepwise inactivation of the detection area (A = approx.
1 mm for each level) just above the conveyor belt. Thereby influences of the conveyor
belt (which causes false signals of the sensor) can be suppressed. The setting of the
conveyor blanking can be done via IO-Link with the index 238.
After setting the sensor has to be taught again (index 2, value 65).
Table 7: Index 238
ISDU
Name
Data
type
Length Access
Default
value
Value/RangeIndex
Sub-
Index
DEC HEX
238
0xE
E
- Conveyor blanking Uint 8 Bit rw 0
0 = Deactivated
1 = Level 1
2 = Level 2
3 = Level 3
4 = Level 4
7 COMMISSIONING
14
8022178.18JF 02.07.2020 | SICK
Subject to change without notice