Previous image, steps to the previous image and pauses.
First image, steps to the first image in the series and pauses.
Choose image folder, lets the user select images to be used in the emulator.
Settings for viewing the image series, including repeat (on/off) and viewing
time.
7.9.3 Selecting images to be used
Click the Choose image folder button to select images to use in the emulator. The images
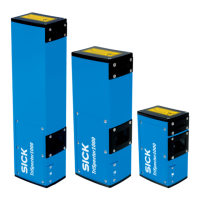
must be Portable Network Graphics (.png) files acquired by a TriSpector1000.
NOTE
When selecting an image in the Choose image folder window, all images in the folder will
be used in the emulator, not only the selected image.
To save images from the TriSpector1000 to PC, see "Recording images", page 32.
7.9.4 Copying a configuration from the emulator
When connected to a TriSpector1000
If the emulator was started by using the Switch to simulated device option:
1. In the SOPAS ET device window, click Switch to physical device on the Device menu.
When not connected to a TriSpector1000
If the emulator was started from the SOPAS ET main window:
1. In the SOPAS ET device window, click Export... on the Device menu.
✓
The Device Export window opens.
2. Save the configuration as a SOPAS ET (.sopas) file.
3. Connect to the TriSpector1000 from the SOPAS ET main window.
4. Load the configuration by clicking Import... on the Device menu.
NOTE
To save an imported configuration in the device´s flash memory, click Save permanent on
the Parameter menu.
7.10 Exporting and importing data
Use the Export and Import functions in the SOPAS ET device window to export and import
TriSpector1000 configurations between the device and a PC.
Exporting a configuration to a PC
1. In the SOPAS ET functions panel, on the Device menu, click Export...
✓
The Device Export window opens.
2. Select file name and destination folder on the PC.
3. In the Save as type list, select SOPAS (*.sopas) SOPAS ET file.
4. Click Save.
Importing a configuration from a PC
1. In the SOPAS ET functions panel, on the Device menu, click Import...
✓
The Import window opens.
7 OPERATION
56
O P E R A T I N G I N S T R U C T I O N S | TriSpector1000 8021808/12ID/2019-01 | SICK
Subject to change without notice