Operating Instructions Chapter 4
V200/V300
8012227/YT87/2016-03-29 © SICK AG • Industrial Safety Systems • Germany • All rights reserved 27
Subject to change without notice
Mounting
The most common mounting options are:
• mounting on a frame
• mounting in a frame
You will find other mounting options on the example application at www.sick.com.
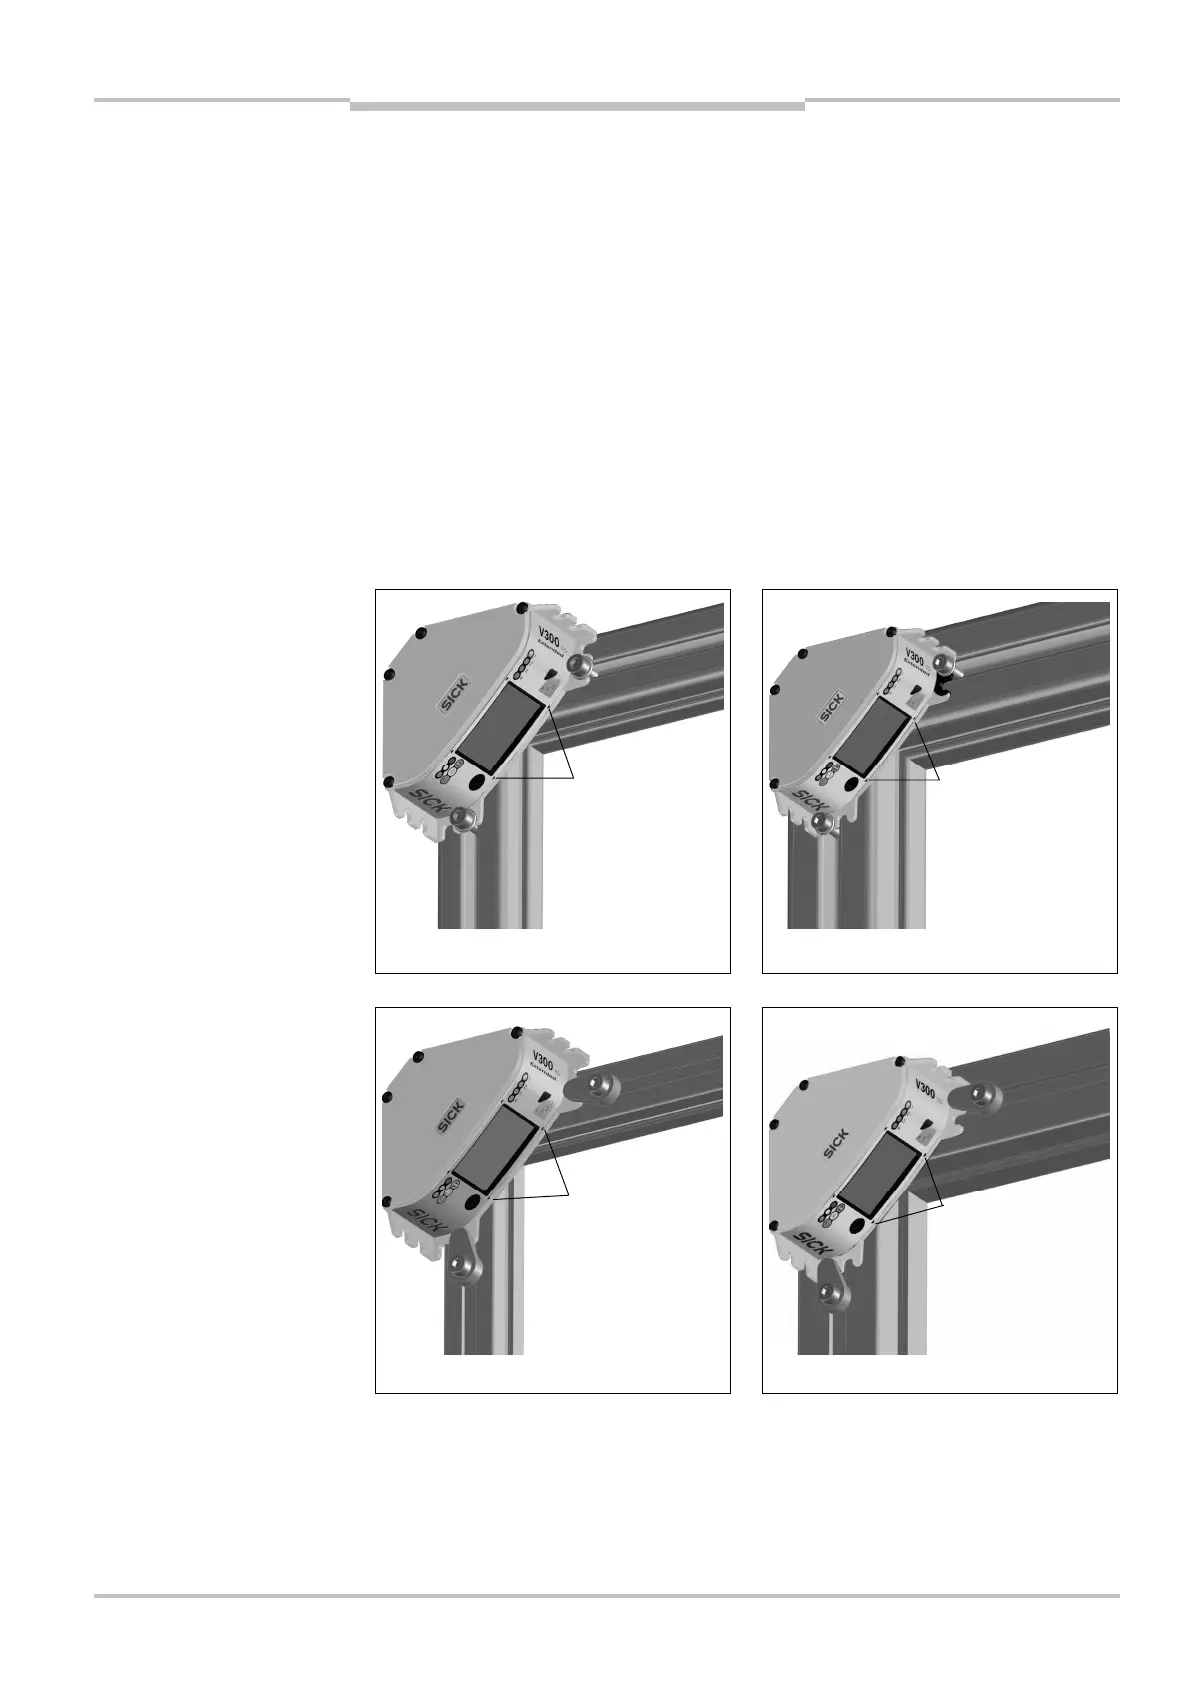
4.4.1 Mounting on a frame
⋅ Always mount the camera with at least two screws and use the fastening openings on
two opposite sides of the housing.
⋅ Secure the two fixing screws against unintentional loosening.
⋅ Always use washers under the screws (cf. figure).
⋅ To mount the camera use sliding nuts suitable for the profile system used or the
clamping lugs available as accessories (see section 12.2 “Accessories” on page 59).
⋅ Pay attention to the thickness of the flange on the camera when selecting a suitable
screw length (see section 11.2 “Dimensional drawings” on page 56).
Mounting on 40 mm profile Mounting on 60 mm profile
Mounting on 30 mm profile Mounting on 50 mm profile
⋅ Align the camera such that the housing markings are aligned with the inside of the
frame profile. (The protective field stretches between the housing markings and the
ends of the reflective tape.)
Note
Notes
with sliding nuts on different
thickness profiles
with clamping lugs on
different thickness profiles