Issue 08/03
42 Quick Start Guide MICROMASTER 440
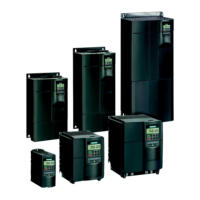
6SE6400-5GA00-0BP0
Externally Supplied Control Voltage
Parameter Settings:
Make these changes
AFTER quick
commissioning: see section
5.5 on page 42
These are the default settings
as shown. No parameter
changes are necessary other
than quick commissioning.
RL1
NC
RL1
NO
RL1
COM
RL2
NO
RL2
COM
RL3
NC
RL3
NO
RL3
COM
A
OUT1
+
A
OUT1
-
PTC
A
PTC
B
DIN
5
DIN
6
Iso
0V
P
+
N
-
A
OUT2
+
A
OUT2
-
10V 0V
AIN1
+
AIN1
-
DIN
1
DIN
2
Iso
24V
AIN2
+
AIN2
-
DIN
3
DIN
4
ON (UP) = 0 to 20mA
OFF = 0 to 10V
ON (UP) = 0 to 20mA
OFF = 0 to 10V
DIP SW 2
(Analog Input 2)
DIP SW 1
(Analog Input 1)
0-10V Analog Signal
Ext. System 0V
It is necessary for the 0V from the
external system to be connected
to the 0V on the drive to complete
the circuit.
24V DC External Signal
Ext. System 0V
Using Fixed Frequencies
Parameter Settings:
Make these changes
AFTER quick
commissioning: see section
5.5 on page 42
P0003=2 (Extended)
P0703[0]=15 DIN3=FF3
P1000[0]=3 (Fixed Frequency)
P1003[0]=FF3
P1004[0]=FF4
RL1
NC
RL1
NO
RL1
COM
RL2
NO
RL2
COM
RL3
NC
RL3
NO
RL3
COM
A
OUT1
+
A
OUT1
-
PTC
A
PTC
B
DIN
5
DIN
6
Iso
0V
P
+
N
-
A
OUT2
+
A
OUT2
-
10V 0V
AIN1
+
AIN1
-
DIN
1
DIN
2
Iso
24V
AIN2
+
AIN2
-
DIN
3
DIN
4
ON (UP) = 0 to 20mA
OFF = 0 to 10V
ON (UP) = 0 to 20mA
OFF = 0 to 10V
DIP SW 2
(Analog Input 2)
DIP SW 1
(Analog Input 1)
FF3
REVERSE
RUN/STOP
FF4
This example gives you 2 fixed
frequencies in either direction.
If both Fixed Frequencies are
selected together then the sum of
P1003 and P1004 will be the setpoint.
This may be limited by FMAX/FMIN
www . ElectricalPartManuals . com
 Loading...