23
1° Ebene -
Diese Ebene wird aus der Normalanzeige heraus
gestartet. Die Sollwerte "SP1", "SP2 / dSP" kön-
nen geändert und die Analogeingänge "E2"
(Externer Sollwert/Sollwertverschiebung) und "E3"
(Außentemperatur) können angezeigt werden.
SOLLWERTE ÄNDERN
"SP1", "SP2" oder "dSP" ändern
³ Wechseln in die Bedienerebene mit
³ Ändern des Sollwerts "SP1" mit P e
³ Wechseln zu Sollwert "SP2" oder "dSP" mit
³ Ändern des Sollwerts "SP2" oder "dSP" mit P
und
³ Rückkehr zur Normalanzeige mit oder
automatisch nach ca. 30 s durch Time-Out
Nach 2 s wird der eingestellte Wert automatisch
übernommen. Der Wert ändert sich nur innerh-
alb des zugelassenen Wertebereichs.
HANDBETRIEB, BRENNER MODULI-
EREND
³ Taste 5 s lang drücken
Die LED über dem Symbol Hand leuchtet.
³ Ändern des Stellgrades mit und P
Relais 2 fährt das Stellglied auf, solange Taste
gedrückt wird.
Relais 3 fährt das Stellglied zu, solange Taste
P gedrückt wird.
Die LEDs für das Stellglied zeigen an, wenn
"AUF" oder "ZU" gefahren wird.
³ Zurück zum Automatikbetrieb, indem 5
s lang gedrückt wird
³ Ändern des Stellgrades mit und P
Der stetige Ausgang gibt den eingegebenen
Stellgrad aus.
³ Zurück zum Automatikbetrieb, indem 5
s lang gedrückt wird
Merke. Bei Aktivierung des Handbetriebs wird
der Stellgrad zunächst auf 0 gesetzt bis eine
weitere Tasteneingabe erfolgt.
Der Handbetrieb kann nur aktiviert werden,
wenn über die Thermostatfunktion Relais 1
aktiv ist.
Schaltet die Thermostatfunktion Relais 1
während des Handbetriebs inaktiv, wird der
Handbetrieb beendet.
HANDBETRIEB, BRENNER 2-STUFIG
³ Taste 5 s lang drücken
³ Taste kurz drücken
- Relais K2 ist aktiv, Relais K3 inaktiv
- Analogausgang (Option) gibt DC 10 V aus
Stellantrieb fährt auf
³ Oder Taste P kurz drücken
- Relais K2 ist inaktiv, Relais K3 aktiv
- Analogausgang (Option) gibt DC 0 V aus
Stellantrieb fährt zu
³ Zurück zum Automatikbetrieb, indem 5
s lang gedrückt wird
Merke. Schaltet die Thermostatfunktion Relais 1
während des Handbetriebs inaktiv, wird der
Handbetrieb beendet.
1° level -
This level is started from the basic display. Set-
points "SP1", "SP2 / dSP" can be altered, and
the analog inputs "E2" (external setpoint / set-
point shift) and "E3" (outside temperature) can
be displayed.
CHANGING THE SETPOINTS
To change "SP1", "SP2" or "dSP"
³ Go to the user level with
³ Change the setpoint "SP1" with P and
³ Go to setpoint "SP2" or "dSP" with
³ Change the setpoint "SP2" or "dSP" with P
and
³ Return to the basic display with or
automatically by time-out after about 30 s
After 2 seconds, the set value is automatically
memorised. The value can only be changed
within the permitted range.
MANUAL OPERATION OF A MODULAT-
ING BURNER
³ Press for 5 s
The LED above the hand symbol lights up.
³ Change the servomotor position with and P
Relay 2 opens the servomotor as long as is
pressed.
Relay 3 closes the servomotor as long as P is
pressed.
The LEDs on the front panel of the controller
indicate if "OPEN" or "CLOSE" is activated.
³ Return to automatic operation by pressing
for 5 s
³ Change the servomotor position with and P
The modulating output takes the servomotor to
the position that was entered.
³ Return to automatic regulation by pressing
for 5 s
Attention. when manual operation is acti-
vated, the servomotor position is set to 0 until
another entry is made using the relative buttons.
Manual operation can only be activated if the
thermostat function has set relay 1 to active.
If the thermostat function sets relay 1 to inac-
tive during manual operation, manual operation
is terminated.
MANUAL OPERATION OF A TWO-
STAGE BURNER
³ Press for 5 s
³ Press briefly
- Relay K2 is active, relay K3 is inactive
- Analog output (optional) delivers DC 10 V
The servomotor opens
³ Or press P briefly
- Relay K2 is inactive, relay K3 is active
- Analog output (optional) delivers DC 0 V
The servomotor closes
³ Return to automatic operation, by pressing
for 5 s
Note. If the thermostat function sets relay 1 to
inactive during manual operation, manual oper-
ation is terminated.
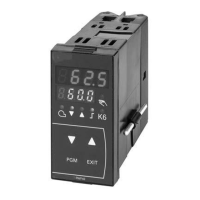
3-position controller
t3ti
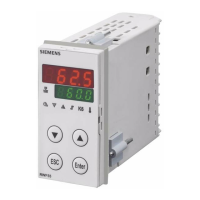
Modulating controller
t3ti
1° niveau -
Ce niveau est lancé à partir de l’affichage nor-
mal. On peut modifier les valeurs de consigne
"SP1", "SP2 / dSP" et visualiser les entrées
analogiques "E2" (consigne externe / décalage
de consigne) et "E3" (température externe).
MODIFIER LES VALEURS DE CON-
SIGNE
Modifier "SP1", "SP2" ou "dSP"
³ Aller dans le niveau opérateur à l’aide de
³ Modifier la consigne "SP1" avec P et
³ Passer à la valeur de consigne "SP2" ou
"dSP" avec
³ Modifier la consigne "SP2" ou "dSP" avec P
et
³ Retour à l’affichage normal avec ou
automatiquement au bout de 30 s environ
grâce à la temporisation
Au bout de 2 s, la valeur réglée est adoptée
automatiquement. Cette valeur ne varie que
dans les limites de la plage de valeurs autor-
isée.
FONCTIONNEMENT MANUEL, BRÛ-
LEUR MODULANT
³ Appuyer pendant 5 s sur la touche
La LED au-dessus du symbole de la main
s’allume.
³ On peut modifier la position du servomoteur
avec les touches et P
Le relais 2 ouvre il servomoteur tant que la tou-
che est enfoncée.
Le relais 2 ouvre il servomoteur tant que la tou-
che P est enfoncée.
Les LED sur le devant du régulateur indiquent le
mouvement d’ ”OUVERTURE” ou de “FERME-
TURE”.
³ Retour au fonctionnement automatique en
appuyant sur pendant 5 s
³ On peut modifier la position du servomoteur
avec les touches et P
La sortie progressive met le servomoteur dans
la position qui a été saisie.
³ Retour au fonctionnement automatique en
appuyant sur pendant 5 s
Attention. Lorsque le mode manuel est activé,
la position du servomoteur est réglée sur 0
jusqu’à ce qu’on la modifie avec les touches
correspondantes.
Le fonctionnement manuel ne peut être activé
que si le relais 1 est actif par l’intermédiaire de
la fonction, thermostat.
Si la fonction thermostat désactive le relais 1
pendant le mode manuel, celui-ci prend fin.
FONCTIONNEMENT MANUEL, BRÛ-
LEUR À 2 ALLURES
³ Appuyer sur la touche pendant 5 s
³ Appuyer brièvement sur la touche
- Le relais K2 est actif, le relais K3 inactif
- La sortie analogique (option) envoie DC 10 V
Le servomoteur s’ouvre
³ ou appuyer brièvement sur la touche P
- Le relais K2 est inactif, le relais K3 actif
- La sortie analogique (option) envoie DC 0 V
Le servomoteur se ferme
³ Retour au fonctionnement automatique en
appuyant sur pendant 5 s
Note. Si la fonction thermostat désactive le
relais 1 pendant le fonctionnement manuel,
celui-ci prend fin.
Régulateur pas à pas 3 points
t3ti
Régulateur progressif
t3ti

 Loading...