① Push-in terminal
② Spring release
③ Measuring tap
(suitable probes: Diameter 1.0 mm, cone height max 1.15 mm; length ≥ 10 mm in compliance
with the approved voltage category)
④ Holder for shield contact
P1 Supply voltage L+: The terminal assignment depends on the type of terminal block (see tables
in the following section "Supply voltage")
P2 Supply voltage M
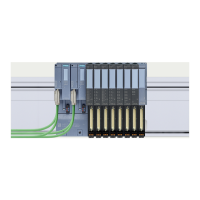
Figure 6-6 View of the terminal block (example for the terminal block TB22-P32+4B/T)
Note
Specific designations of the process terminals in the wiring and block diagrams of the I/O
modules / terminal blocks
● RES: Reserved, these process terminals must be left unconnected for future expansions
● n.c.: Not connected, these process terminals have no function. However, they can be
connected to potentials specifically defined for a module, for example, for the laying unused
wires.
Supply voltage
Connect the supply voltage to a light-colored terminal block. The following two tables show the
terminal blocks to which you need to connect the cables of the supply voltage.
Table 6-3 Connection terminals for the supply voltage on the terminal block TB22.../ TB45-P32...
Potential Terminals on the terminal block Labeling of the terminal Voltage on the power
bus
● Ground ● 1P2 and 2P2
Blue
● P2
● L+ ● 1P1 and 2P1
Note: Terminals connected
Red
● P1
Wiring
6.5 Wiring the terminal block
ET 200SP HA Distributed I/O system
88 System Manual, 08/2019, A5E39261167-AD

 Loading...