Installation
S7-300 Programmable Controller Hardware and Installation
5-8 A5E00105492-01
Steps of installation
The specific steps for module installation are described below.
1. Plug the bus connectors into the CPU and
signal/function/communication/interface
modules.
One bus connector is included per
module, but not for the CPU.
• Always start at the CPU when you plug
in the bus connectors. Here, take the
bus connector of the "last" module in
the row.
• Insert the bus connectors into the
other modules.
The "last" module is not equipped with
a bus connector.
2. Suspend all modules in their specified
sequence onto the rail (1), slide them up
to the module on the left (2), then swing
them down (3).
1
3
2
3. Screw-fasten all modules, tightening the
screws with a torque of 0.8 N/m to
1.1 N/m.
0,8 - 1,1 Nm
CPU
Inserting the key
After you have mounted all modules, insert the key into the S7-300 CPU's mode
selector switch (not with CPU 31xC).
5.4 Label the modules
Assigning slot numbers
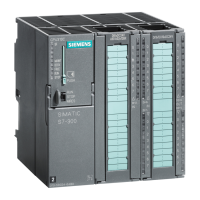
After installation, you should assign a slot number to each module. This makes it
easier to assign the modules in the configuration table in STEP 7. The table below
shows the slot number assignment.
 Loading...


