Service and maintenance
7.4 Performing a firmware and project update
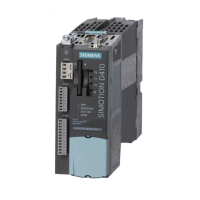
SIMOTION D4x5-2
Commissioning and Hardware Installation Manual, 02/2012
341
4. Go online and select the devices whose firmware you wish to update.
The list displays the current firmware version of the devices.
5. Click "Firmware update" to download the new firmware to the devices. To do so, you
must select all components whose firmware is to be updated.
6. When the firmware update is complete, switch the 24 V power supply off and on again.
The device is now ready for operation.
Note
The SINAMICS components must be configured for a firmware update to take place. The
firmware cannot be updated if the components have not been configured.
You can also update the firmware via the expert list. See the
SINAMICS S120
Commissioning Manual for a description of how to do this.
7.4.5.4 Download project to target system
Once all the changes required for upgrading your project have been made, you must
download the project to the SIMOTION D4x5-2.
Requirement
The firmware required is located on the CompactFlash card; for information, refer to the
section titled Firmware update via CompactFlash card (Page 339).
You have recompiled the project and checked it for consi
stency. See Section Save project,
compil
e and check consistency (Page 330).
Procedure
1. Save the project.
2. Click "Connect to selected target systems" to establish a connection to the target system.
3. Execute "Download project to target system" and then "Copy RAM to ROM" to download
the upgraded project to the CompactFlash card as well.
4. Because of the automatic follow-up configuration in the SINAMICS Integrated drive, you
must now execute "Load CPU / drive unit to PG".
5. Save the project.
Note
When upgrading SINAMICS drive units (e.g. SINAMICS Integrated) only the p
parameters (setting parameters) are loaded into the upgraded project. The r parameters
(monitoring parameters) are not loaded. The r parameters in the drive unit are derived or
calculated from an automatic subsequent parameterization and must therefore be
uploaded to the project. To do this, execute "Load CPU/drive unit to PG". If the upload is
not performed, this can lead to inconsistencies in the drive parameterization dialog boxes.
 Loading...