3.1 UNPACKING THE BOILER
The standard appliance is supplied in two separate card-
board cartons. In addition up to two extension duct kits
may be used. If the appliance is to be installed without
access to the outside wall, the wall liner will also be requi-
red. Unpack each carton and check the contents against
the following lists:
Appliance package:
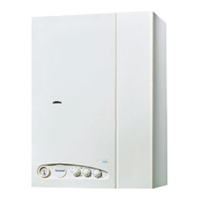
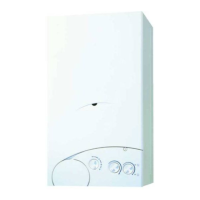
– combination boiler (assembled);
– installation and servicing instructions;
– users instructions;
– wall mounting templates (paper);
– wall mounting bracket assembly ;
– fixing screws with wall plugs;
– plastic bags containing:
– gas service cock;
– C.H. F/R isolation valves;
– D.H.W. isolation valve;
– D.H.W. compression fitting;
– aluminium ring;
– associated fixing screws;
– associated gaskets;
– safety valve discharge pipe.
Flue Package:
– inner duct (flue) c/w flue terminal and centering springs;
– outer duct (air);
– junction collar with protective metal sleeve;
– flue elbow with gasket;
– rubber sealing ring.
Extension duct kit(s) (optional):
– inner duct c/w springs;
– outer duct;
– junction collar with protective metal sleeve.
3.2 FIXING THE WALL MOUNTING BRACKET
Before installing the appliance ensure that the chosen loca-
tion is suitable (section 2.2) and that the requirements for
flue position, (section 2.3), and minimum clearances, (table
2) are satisfied. These minimum clearances are essential to
provide access for servicing, and are included on the wall
mounting templates.
– Open the paper wall mounting templates. If a rear flue
is to be used, discard the side templates and secure the
rear template in the desired position. For a side flue
application, secure both the rear and appropriate side
template in position.
– Mark the position of the two wall mounting bracket
fixing holes, the two lower frame fixing holes, and the
flue/air duct hole on the appropriate wall(s).
– Remove the template(s) and drill the top two fixing
holes using a 10 mm masonry drill and the bottom two
fixing holes using a 6 mm masonry drill. Fit the plastic
plugs provided.
–
Cut the hole in the wall for the flue/air duct. The diame-
ter should not be less than 100 mm (4 in) and must be
horizontal. If the hole is not accessible from the outside
of the building, its minimum diameter should be suffi-
cient to allow the insertion of the wall liner (130 mm - 5
1
/
4
in diameter) which will be sealed with mortar. Refer to
fig. 13. (The wall liner is available as an optional extra).
appliance but may lower the water temperature below
an acceptable level.
–
If the appliance is installed in an area where the tem-
porary hardness of the water supply is high, say over
150 ppm, the fitting of an in line scale inhibitor may be
an advantage. Consult the Local Water Undertaking if
in doubt.
– Devices capable of preventing the flow of expansion
water: e.g. non return valves and/or loose-jumpered
stop cocks should not be fitted unless separate arrange-
ments are made for expansion water.
– If a non-return valve is fitted in the incoming water sup-
ply - e.g. in line with a scale inhibitorthen the optional
D.H.W. expansion vessel MUST be obtained and fitted at
the connection provided in the D.H.W. circuit within the
casing of the appliance (section 3.6.2.)
–
For specific information relating to fittings (eg.
Showers, washing machines etc.) suitable for connec-
tion in the D.H.W. circuit, consult the Local Water
Undertaking, however the following information is
given for guidance.
2.10.1 Domestic hot/cold water supply
taps and mixing taps
All equipment designed for use at mains water pressure is
suitable.
2.10.2 Showers
Any mains pressure shower is suitable, but if the unit has a
loose head which may become immersed in bath water
either an anti-syphonage device must be fitted, or the
length of the flexible hose must be reduced so that it can-
not fall closer than 13 mm (1/2 in) to the top of the bath.
2.10.3 Bidets
Providing that the appliance is of the over-rim flushing type,
the outlets are shrouded and it is impossible to attach a tem-
porary hand held spray, no anti syphonage device is necessary.
8
3 INSTALLING THE BOILER