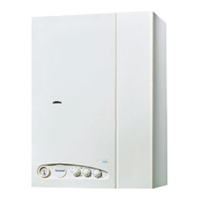
and air ducts should be joined before proceeding to the
next section. The extension ducts should be joined to
each other and to the standard ducts using the fol-
lowing procedure (fig. 9):
– For the flue ducts in turn, push the plain end of the
standard and (if using two extensions) extension duct
into the swaged end of the extension duct(s).
– Introduce an air duct in the clamp.
Join the air ducts (larger ducts) and tighten the screws an
the clamp to connect them.
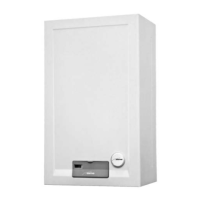
3.4.2 Cutting the flue/air duct to the correct length
Rear flue outlet (Only - fig. 10)
– Select the air duct (larger duct) and starting at the for-
med end, ‘mark off’ the length to be cut which is the
wall thickness X + 130 mm (5
3
/
18
in).
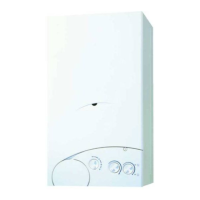
Side flue outlet (Only - fig. 11)
– Select the air duct (larger duct) and starting at the formed
end, ‘mark off’ the length to be cut which is the wall thick-
ness X + the clearance Y plus 155 mm (6
3
/
18
in).
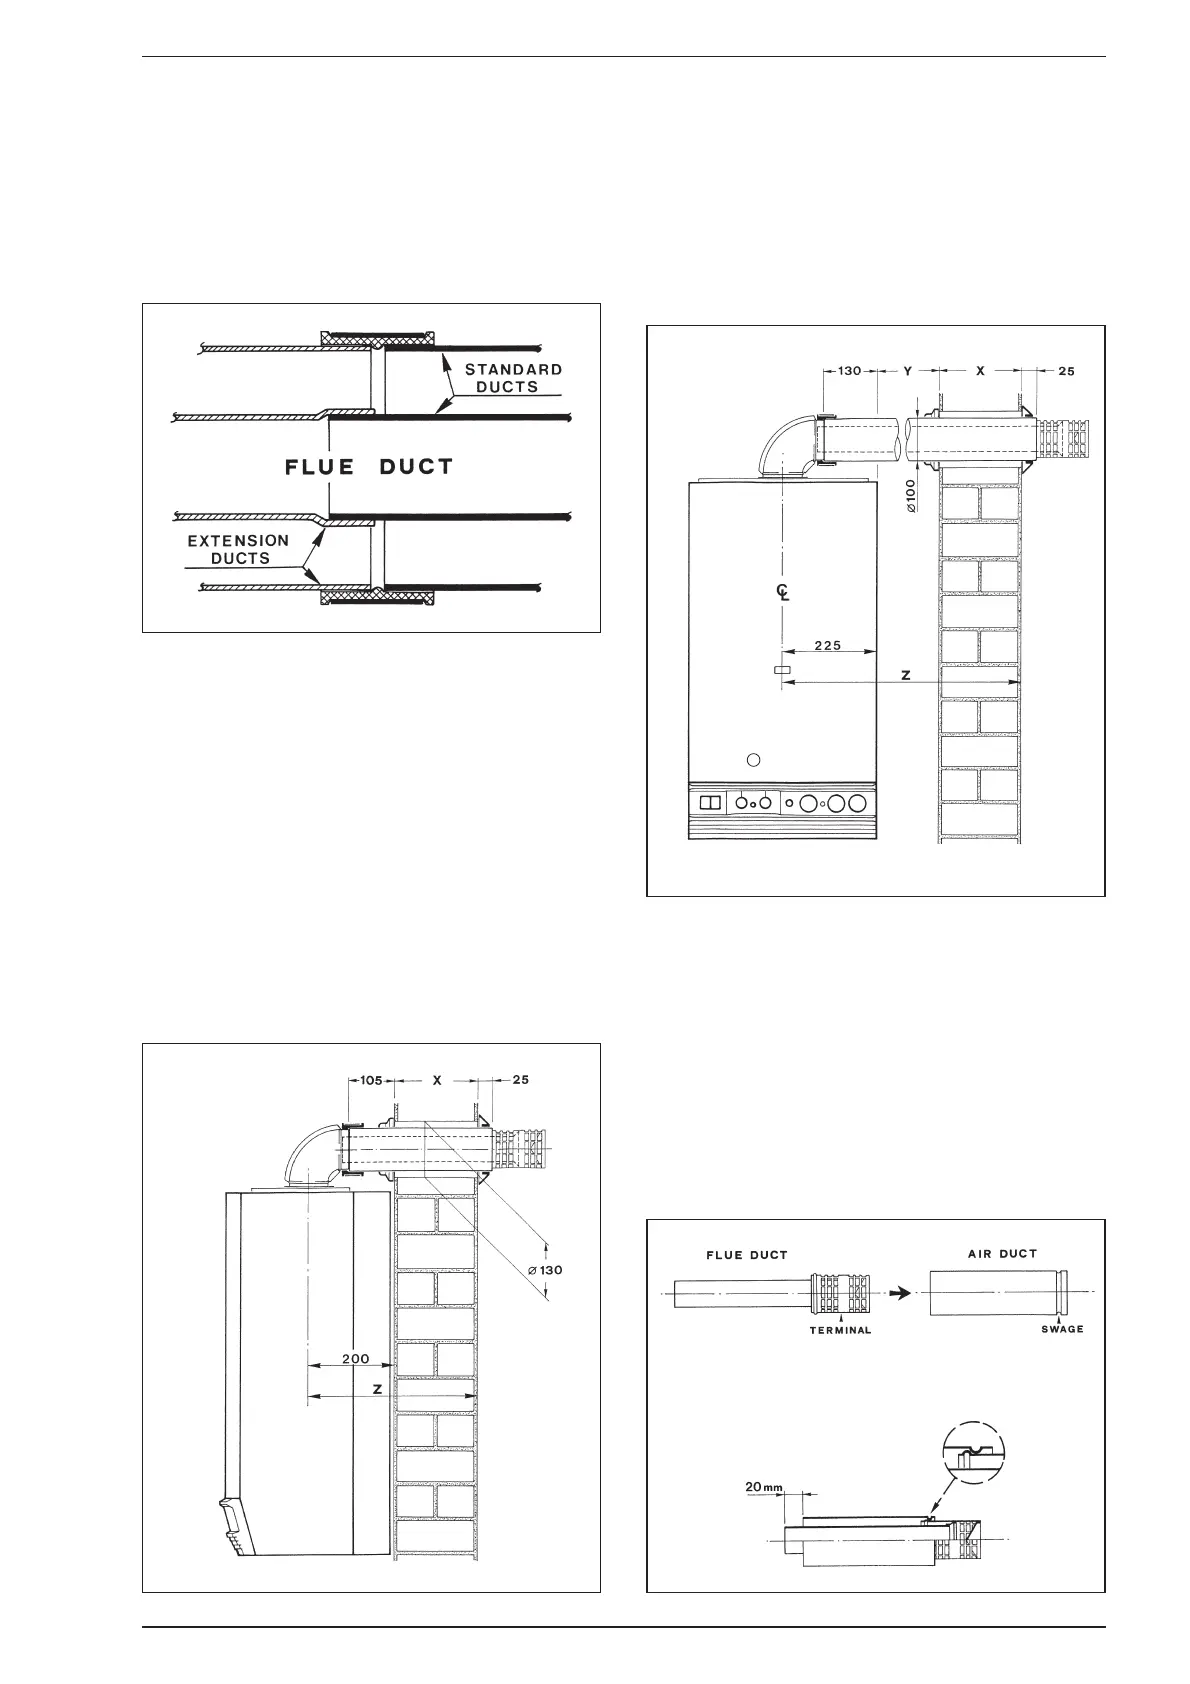
All installations
– Cut the air duct square to the mark and remove all burrs
and sharp edges.
– Refer to fig. 12. Hold the air duct at the plain end, and
slide the flue duct (small duct) inside the air duct (terminal
first) until the external swage of the terminal stops against
the internal swage of the air duct, then mark off the
length to be cut which leaves 20 mm protruding flue duct.
– Remove and cut the flue duct square to the mark and
remove all burrs and sharp edges.
10
Push flue duct and terminal into air duct from this end.
Fig. 9
Fig. 10
Fig. 11
Fig. 12