Page 52 December 2007
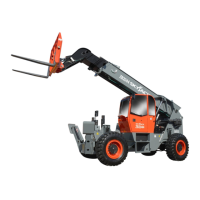
ZB2044
Attachment Installation Procedure Section 2 - Operation
2.13 Attachments Installation
Most of ZB telehandler attachments are “Quick Attach”
making the attachment change simple and effortless
with no time lost on the job.
2.13-1 Removing Attachments Using the Quick
Attach Feature
1. Find an elevated, level surface on which to place
the attachment.
2. Move transmission lever to neutral and apply
parking brake.
3. Extend and lower boom enough for attachment
to rest on the elevated, level surface and lock bar
latch located at bottom of subcarriage is fully
accessible (see Figure 2-17-3).
4. Disconnect auxiliary hydraulic oil hoses
(if equipped).
5. Remove hitch pin located at end of lock bar then lift
carriage pin-stop upward to unlatch and remove
lock bar.
6. Lower boom, resting the attachment on the ground
and tilt subcarriage forward until subcarriage bar
is clear of the hooks (see Figure 2-17-2).
7. Retract boom, disengaging the attachment (see
Figure 2-17-1).
2.13-2 Installing Attachments Using the Quick
Attach Feature
1. Ensure attachment is on a level surface.
2. Move the transmission lever to neutral and apply
parking brake.
3. With subcarriage tilted forward, lower and extend
boom so that the quick attach bar is positioned
under attachment hooks (see Figure 2-17-2).
4. Engage the attachment by raising the boom and
tilting subcarriage backward, so that attachment
is just above the ground (see Figure 2-17-3).
5. Install lock bar then latch carriage pin-stop, and
install hitch pin to secure attachment in place.
6. Connect auxiliary hydraulic oil hoses (if equipped).
WARNING
Visually check the attachment is correctly
coupled and secured to the boom before
operating the telehandler.
Figure 2-17-3
Figure 2-17-2
Figure 2-17-1
To order go to Discount-Equipment.com