MENTOR 12 USER’S MANUAL SECTION 3: ADVANCED CONTROL – Page 67
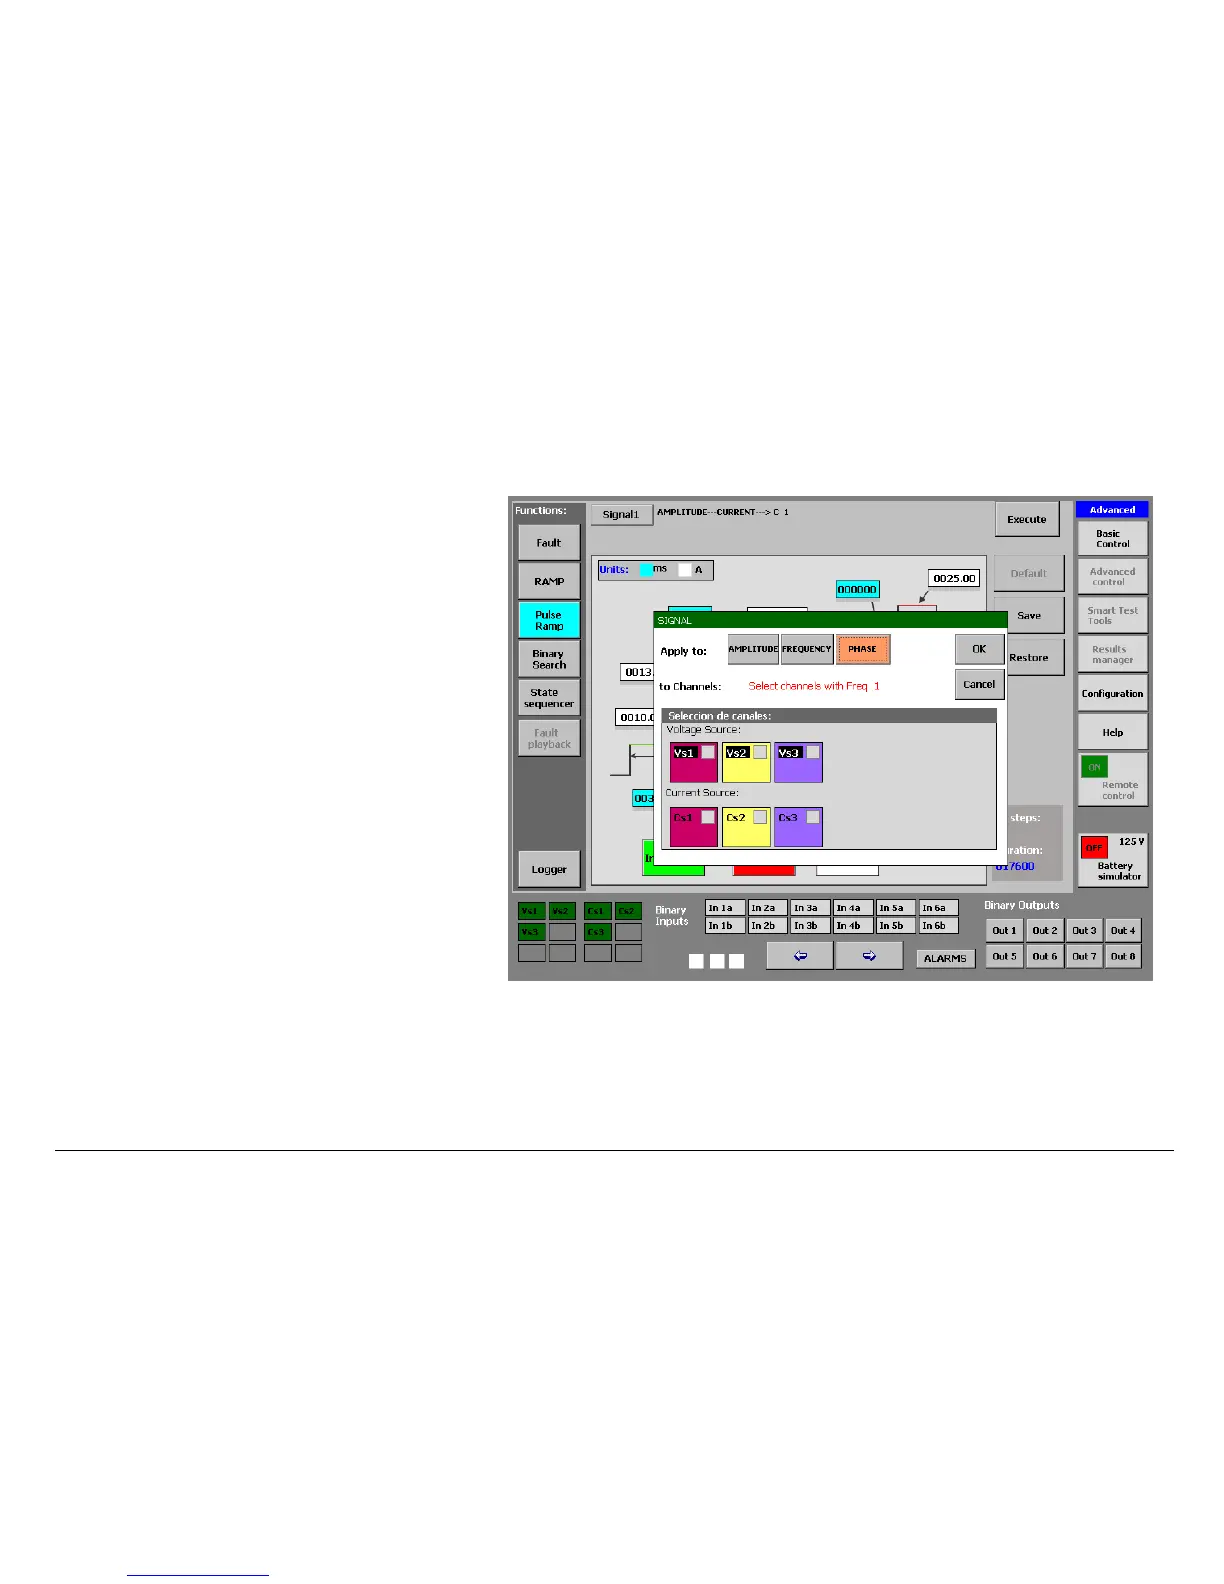
The Configuration screen permits configuring all the pulse
ramp parameters Proceed as indicated below for this:
• Press on the button situated in the upper left-
hand corner, marked “Signa1”
• A window will appear; press on the name of the
parameter you wish to use for the ramp. This
may be AMPLITUDE, which means that the
ramp will be applied to the signal level that will
be selected in the following step; PHASE, which
means that the ramp will be applied to the phase
angle of the signal that will be selected in the
next step or FREQUENCY, which means that
the ramp will be applied to ALL the sources
whose frequency reference is Frequency Bus 1
(Freq. 1).
• If you select AMPLITUDE, two buttons appear
below it, marked “Voltage” and “Current”,
respectively. If you press on the one you wish to
use, the available output sources, corresponding
to the magnitude selected, appear in the bottom
window.
• If you select PHASE the Frequency 1 sources
eligible for the angle ramp appear below. The
sources chosen will carry out the same angle
variation with identical start and end points.
• Press on the indicators of each output source you wish to use. For example, if
you wish to use a single-phase ramp, press on one any of them, but not on
the others. If you want a phase-to-phase ramp (two-phase) press on two of
the available sources, if it is three-phase, on three of them, etc.
 Loading...