Operation Manual
23
Loading Printer Paper
The paper can be manually or automatically fed into the printer.
Manual feed:
1) Unscrew the bolt using a 3 mm. Allen and open
the printer’s cover
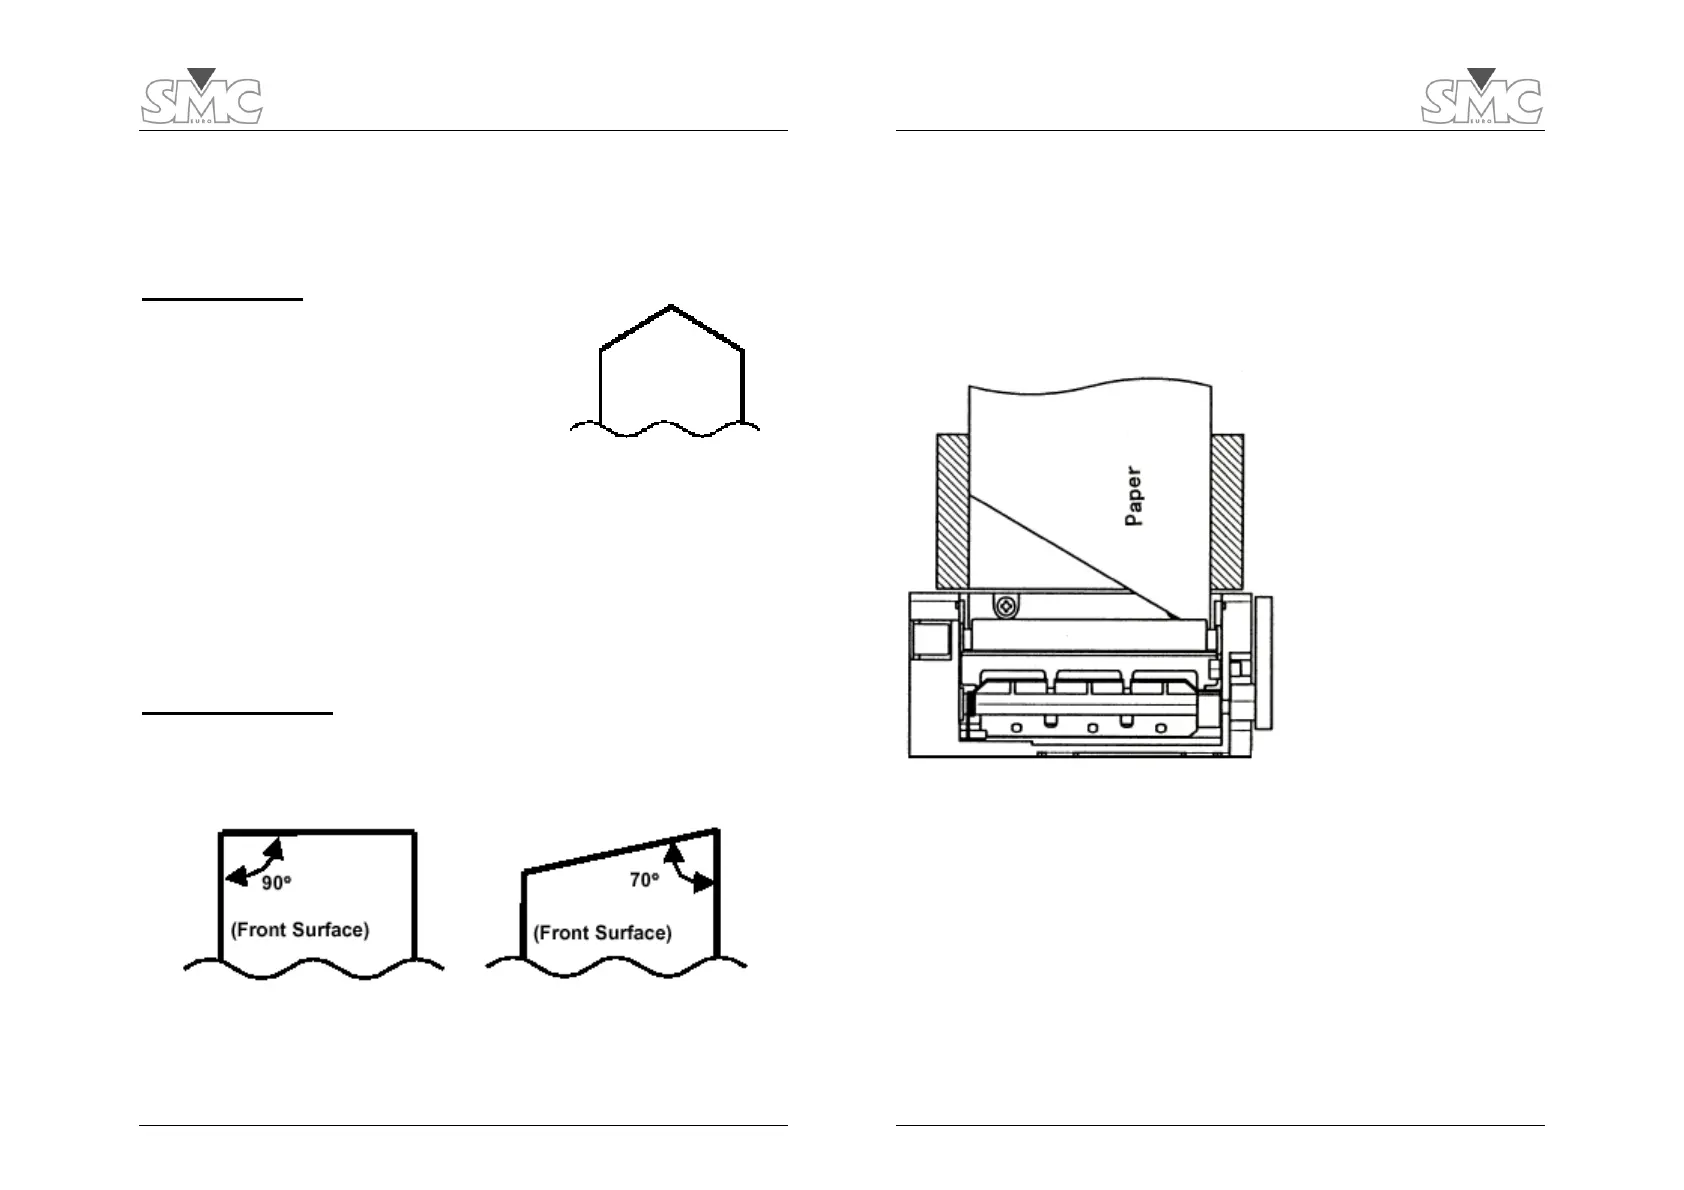
2) Cut the paper edge as shown to make insertion
easier.
3) Free the rubber roller up by lifting the blue lever
at the right side.
4) Insert the edge and drag the roller manually to make it turn until the paper comes
out towards you some 8 cm. Paper should come out the roll from below.
5) Press the blue lever back down to block the paper in position and pull gently
towards you to check that it has no turn.
6) Drive the free length of paper through the slot in the printer’s lid while you place it
back into position and fasten the retaining screw with your fingers. Do it firmly but
do not use a tool. In this way you’ll be able to remove the screw back by hand
again.
Automatic feed:
1) Review the manual method above. Do not release the blue lever this time.
2) Cut the paper as shown below to make insertion easier.
3) Upon inserting the paper as shown in the figure, the printer will automatically detect
and wind the paper. If it does not, this means that it has not detected the presence
of paper or the blue lever is released.
PME-500-TR
24
4) Once some 4” length has been brought through, release the blue lever and re-align
it if needed.
5) Engage the lever back down and check for proper alignment by pulling the paper
slowly towards you.
6) Drive the free length of paper through the slot in the printer’s lid while you place it
back into position and fasten the retaining screw with your fingers. Do it firmly but
do not use a tool. In this way you’ll be able to remove the screw back by hand
again.
 Loading...