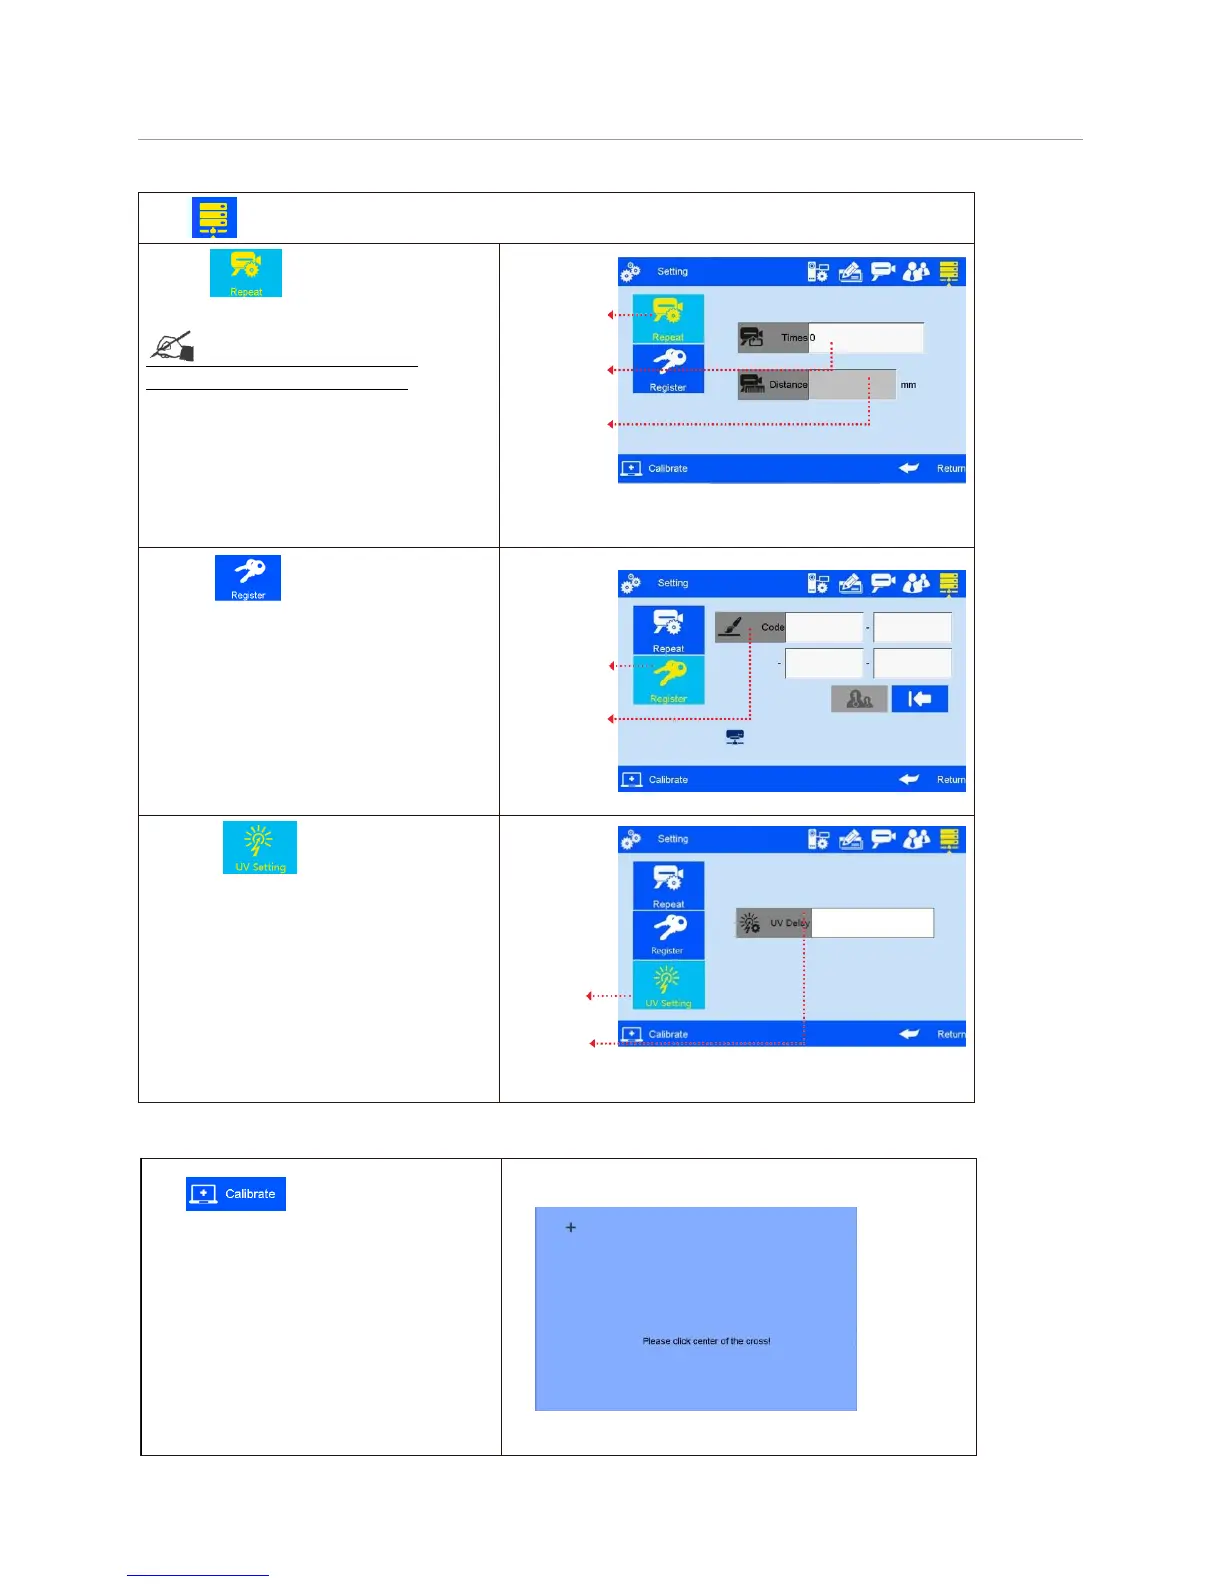
on system management interface to enter “Special Features” setting.
A. Click to enter “Continuous
printing” setting (see Figure 38).
See Appendix 1: Terms and
Definitions 9 for more information.
1) Continuous output times: system default
0 (OFF). Adjustable scope 0~9999.
Note: 0 is equal to OFF; 9999 equal to
2) Output interval: system default OFF,
adjustable scope 0~999mm.
B. Click to enable “Special
Features” (see Figure 39).
Note: Enable special features by
registration code.
C. Press , entering UV setting
interface (see Figure 40)
Note: Can set the UV delay distance;
Adjustable scope 0-3000mm.
5.4.6 Screen Touch Correction
management interface to enter screen
touch correction (see Figure 41).
Note: Please correct screen touch when
there’s inaccurate touch phenomenon.
Icon “+” appears on different location on
screen guides you the screen correction.
The interface exits after screen touch
correction finished, and a message
appears to prompt screen touch correction
success or failure for your attention.