EasyManuals Logo

SolarEdge SE6000H User Manual

SolarEdge SE6000H
90 pages
To Next Page IconTo Next Page
To Previous Page IconTo Previous Page
Page #28 background imageLoading...
Page #28 background image
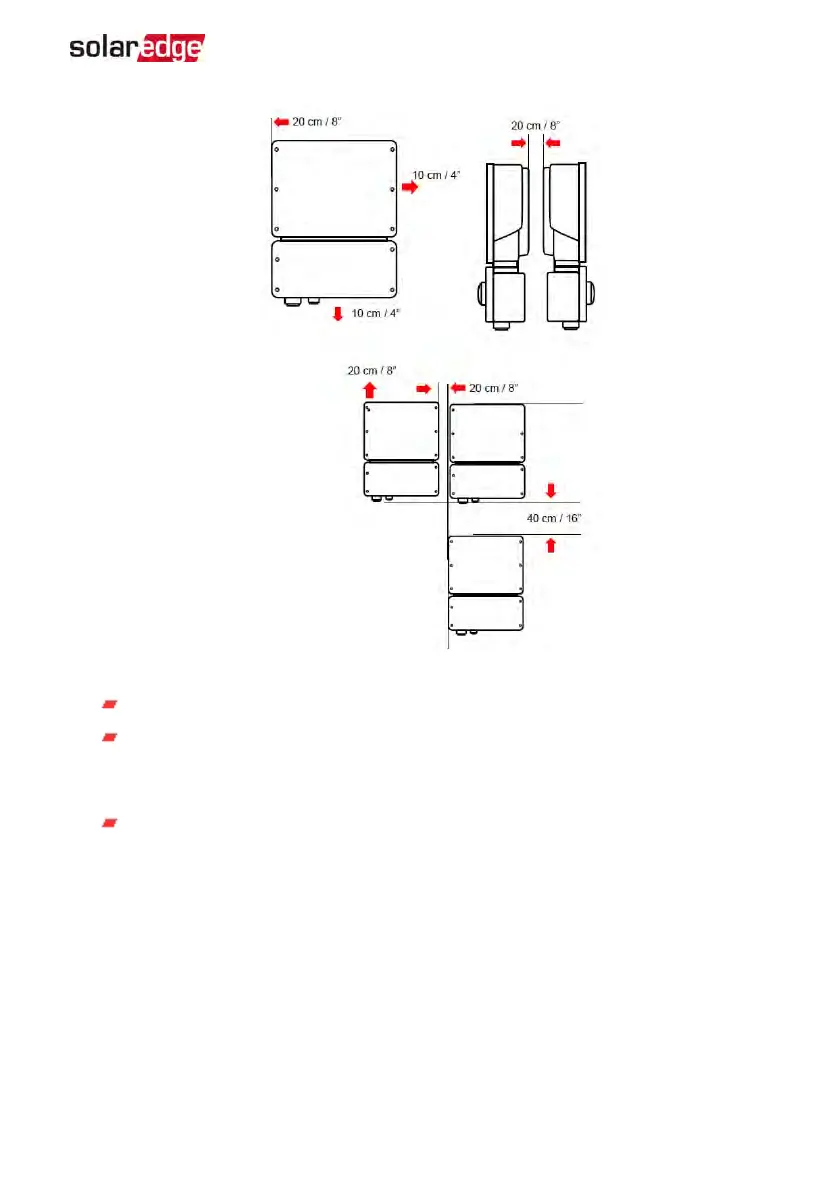
Figure 10: Clearance areas
20 cm (8") from the top of the inverter.
At least 18" (45 cm) from the bottom of the inverter if installing it indoors, 24
(60 cm) if outdoors; if conduit entry to the Connection Unit will be from the
bottom, leave sufficient clearance for the conduits as well.
10 cm (4") from the right and left of the inverter.
3. Position the mounting bracket against the wall/ pole and mark the drilling hole
locations (refer to for inverter and mounting bracket dimensions).
4.
Drill the holes and mount the bracket. Verify that the bracket is firmly attached to
the mounting surface.
5.
Hang the inverter on the bracket:
Chapter 3: Installing the Inverter 27
EV Charging Single Phase Inverter Guide MAN-01-00583-1.5

Table of Contents

Other manuals for SolarEdge SE6000H

Questions and Answers:

Question and Answer IconNeed help?

Do you have a question about the SolarEdge SE6000H and is the answer not in the manual?

SolarEdge SE6000H Specifications

General IconGeneral
ModelSE6000H
ManufacturerSolarEdge
AC Output Power6000 W
Rated AC Power6000 W
CoolingNatural Convection
Noise Level< 25 dBA
TopologyTransformerless
Number of MPP Trackers1
Warranty12 years
Max. Input Voltage480 V
MPPT Voltage Range380 - 480 V
Operating Temperature Range-25°C to 60°C
Dimensions450 x 370 x 174 mm
Weight23.6 lbs (10.7 kg)
AC Voltage208/240 V

Related product manuals