Appendix B: Replacing and Adding System
Components
NOTE
If you are permanently disassembling the installation or part of it, make sure to
use the disposal methods dictated by local regulations.
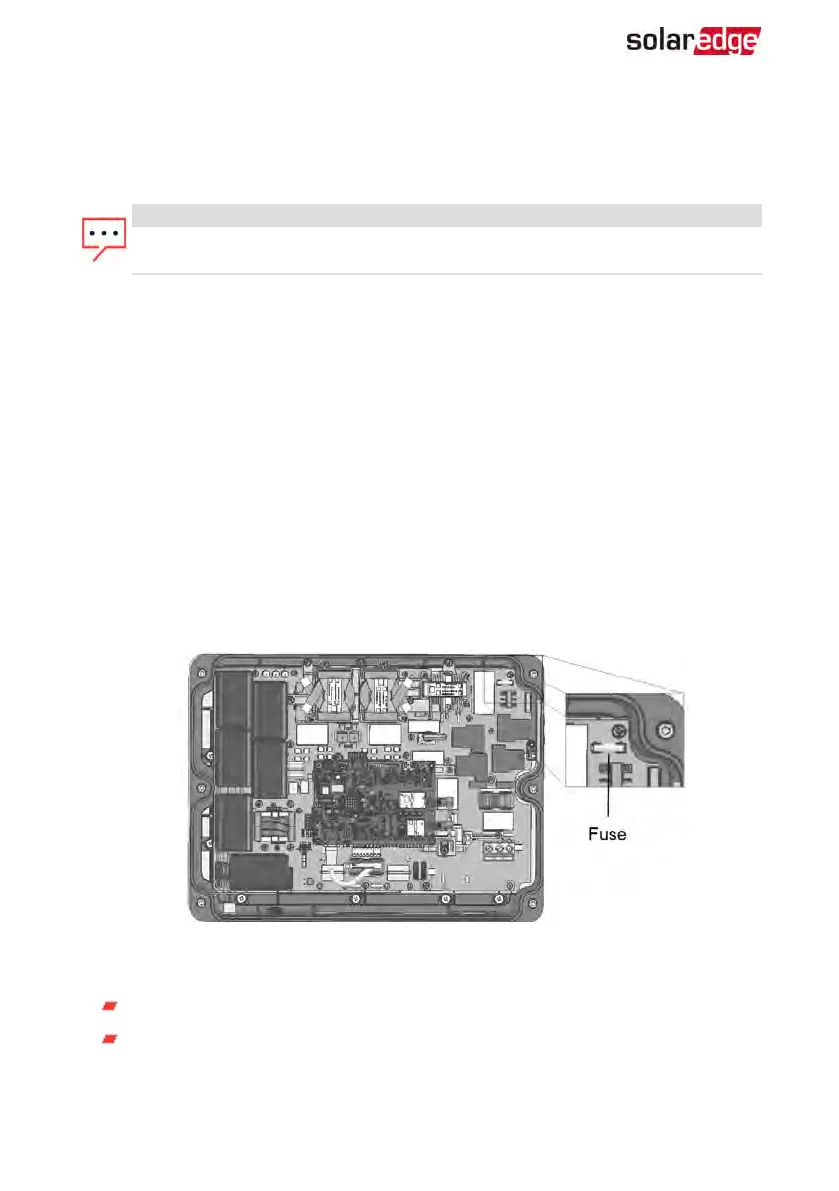
Fuse Replacement
The inverter is equipped with a fuse, located at the top right corner of the inverter.
Fuse replacement kits are available from SolarEdge or you can use other fuses with
identical ratings.
1.
1. Turn OFF the inverter ON/OFF/P switch, and wait until the green LED is blinking,
indicating that the DC voltage is safe (<50V), or wait five minutes before continuing
to the next step.
Turn OFF the Connection Unit.
2. Open and remove the inverter cover.
3. Remove the existing fuse from the upper corner of the inverter and replace with a
new fuse.
4.
Close the inverter cover.
Figure 28: Inverter fuse
5.
Turn ON:
The inverter ON/OF/P switch
The Connection Unit
6. Verify proper system operation.
EV Charging Single Phase Inverter Guide MAN-01-00583-1.5
70 Appendix B: Replacing and Adding System Components