59
en
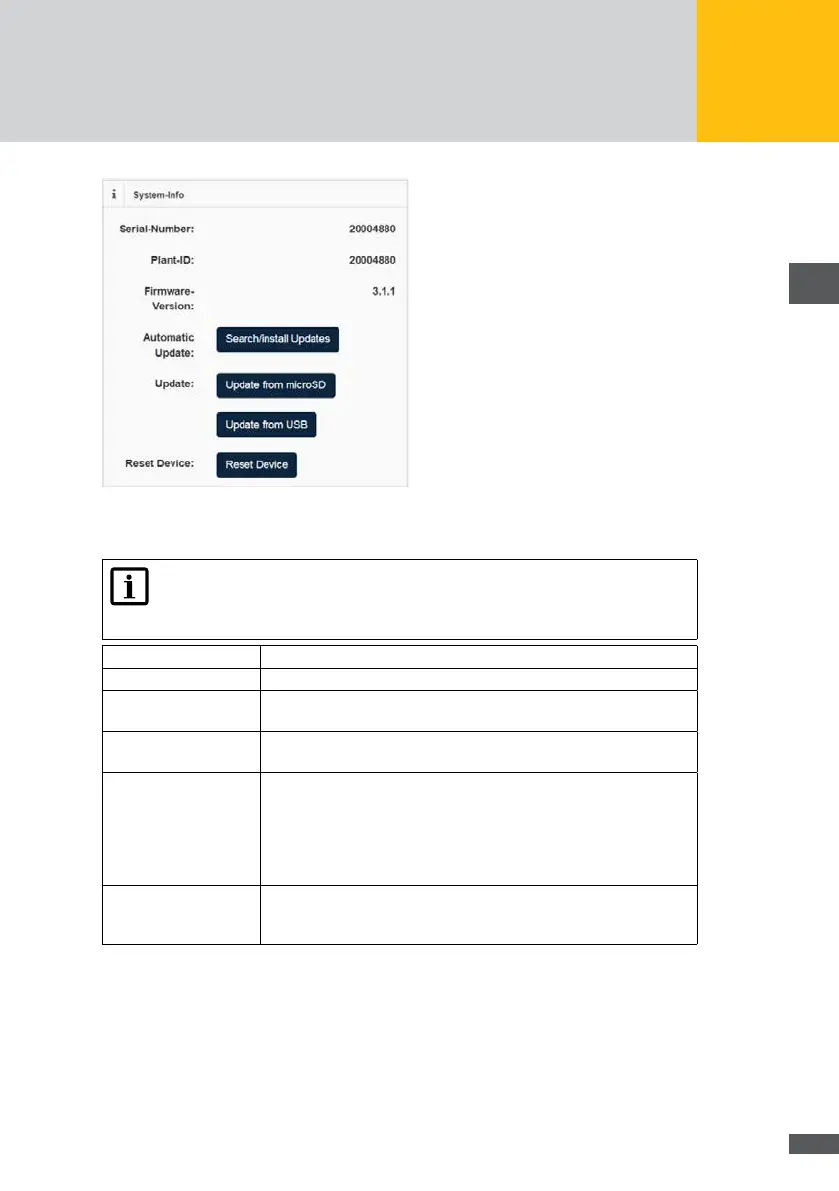
Fig. 57: System information of the MaxWeb XPN
Note
If you click on the “Reset device” button all previous congurations will be
deleted.
Serial number: The serial number of the MaxWeb XPN is shown in this eld
Plant ID: The identication number of the plant is shown in this eld.
Firmware version: The currently installed rmware of the MaxWeb XPN is shown in this
eld.
Automatic update: Click the “Search/install update” button to search for and install the
latest rmware update.
Update: Click the “Update from microSD” button to install a rmware update
from a microSD. To this end, insert the corresponding microSD card
into the slot on the rear side of the MaxWeb XPN.
Click the “Update from USB” button to install a rmware update from
a USB stick. To this end, insert the corresponding USB stick card into
the slot on the front side of the MaxWeb XPN.
Reset Device: Click the “Reset device” button to reset the device to its default
status. Any congurations which have already been set will be
deleted.
In the “System settings” menu, you can set the system time, the plant name and the email
address for the MaxWeb Portal.