Page 11
4.4 Blower Head Mounting Adjustment
The blower head position was adjusted at the factory to the application specifications.
Therefore, it should not be necessary to change the position of the blower head outlet
unless the application specifications have changed or the unit is relocated. See Figure 11
for blower head rotation options. Use the following procedure to modify or adjust the
blower head rotation.
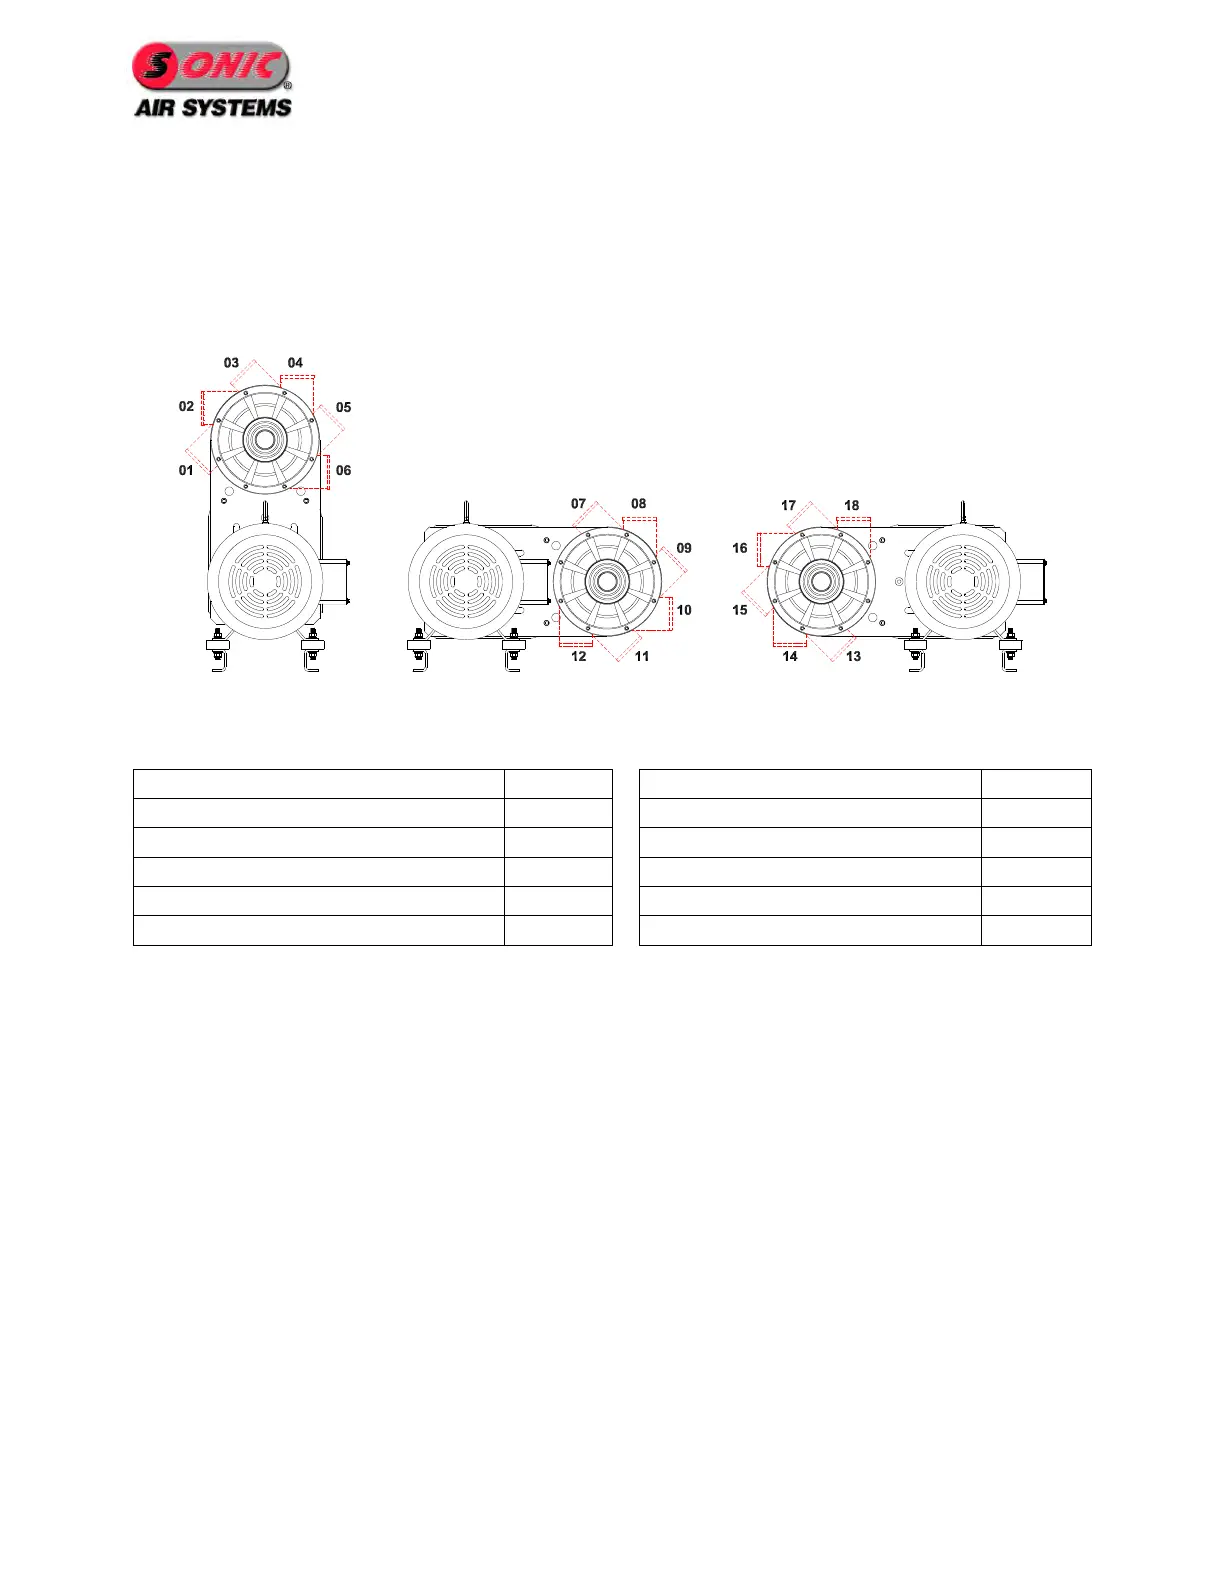
Figure 11 - Blower Rotations
4.4.1 Required Tools
4.4.2 Blower Head Adjustment Procedure
1. Remove the belt guard using the 1/2 inch socket. (See Figure 12)
2. Disconnect the water-cooling lines at the quick disconnect on the blower head. (If
Applicable)
3. Using the 9/16 inch box-end wrench, rotate the belt tensioner arm counter
clockwise (CCW) and remove the belt. (See Figure 13)
Note: If rotating the blower bracket, follow Steps 4 thru 8. If only rotating the blower
head, skip to Step 7.
4. Use the ¾ inch deep socket to hold the motor pulley in place. Using the 5/16 inch
allen socket, remove the motor pulley screws and motor pulley. (See Figure 14)
5. Using the ¾ inch deep socket, remove the four bracket bolts and washers located
behind the motor pulley. (See Figure 15)
6. Rotate the bracket to the desired position and reinstall the bracket bolts and
washers. Tighten only one bolt temporarily for belt adjustment. (See Figure 16
and Figure 17)