Page 37
7.5.2 Bearing Cartridge Assembly Parts List
Spindle-Sonic 100/150 Series Bearing Cartridge
Impeller-Sonic 85/150 Series
Screw-5/16-24 x 1.0 lg., SHCS SS
Screw-5/16-18 x 1.0 lg., SHCS SS
Screw-1/4-20 x .5 lg., SHCS SS
Screw-5/16-24 x 1.0 lg., FHCS SS
7.6 Required Tools
Flat Head Screwdriver (optional)
7.7 Bearing Cartridge Replacement Procedure
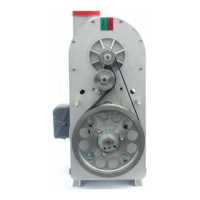
1. Remove the belt guard using the 1/2 inch socket. (See Figure 52)
2. Using the 9/16 inch box-end wrench, rotate the belt tensioner arm counter
clockwise (CCW) and remove the belt. (See Figure 53)
3. Disconnect the water-cooling lines at the quick disconnect on the blower head. (If
Applicable)(See Figure 54)
4. Remove the filter or inlet screen using a flat head screwdriver or a 5/16 inch nut
driver. (See Figure 55)
5. Remove cover using a 3/16 allen wrench for a Sonic 70/85 Series Blower or a 1/4
allen wrench for a Sonic 100/150 Series Blower. (See Figure 56)
6. Remove impeller using a 11/8 inch open end wrench and a 1/4 inch allen wrench.
(See Figure 57)
7. Remove blower pulley using a 1 1/8 inch open end wrench and a 3/16 inch allen
wrench. (See Figure 58)
8. Remove thermocouple using a 1/2 inch open end wrench. (See Figure 59)
9. Remove compression fitting using a 1/2 inch deep socket. (See Figure 60)
10. Remove bearing cartridge using a 3/16 inch allen wrench. (See Figure 61, Figure
62, and Figure 63)
11. Install new bearing cartridge by reversing previous steps.