Page 30
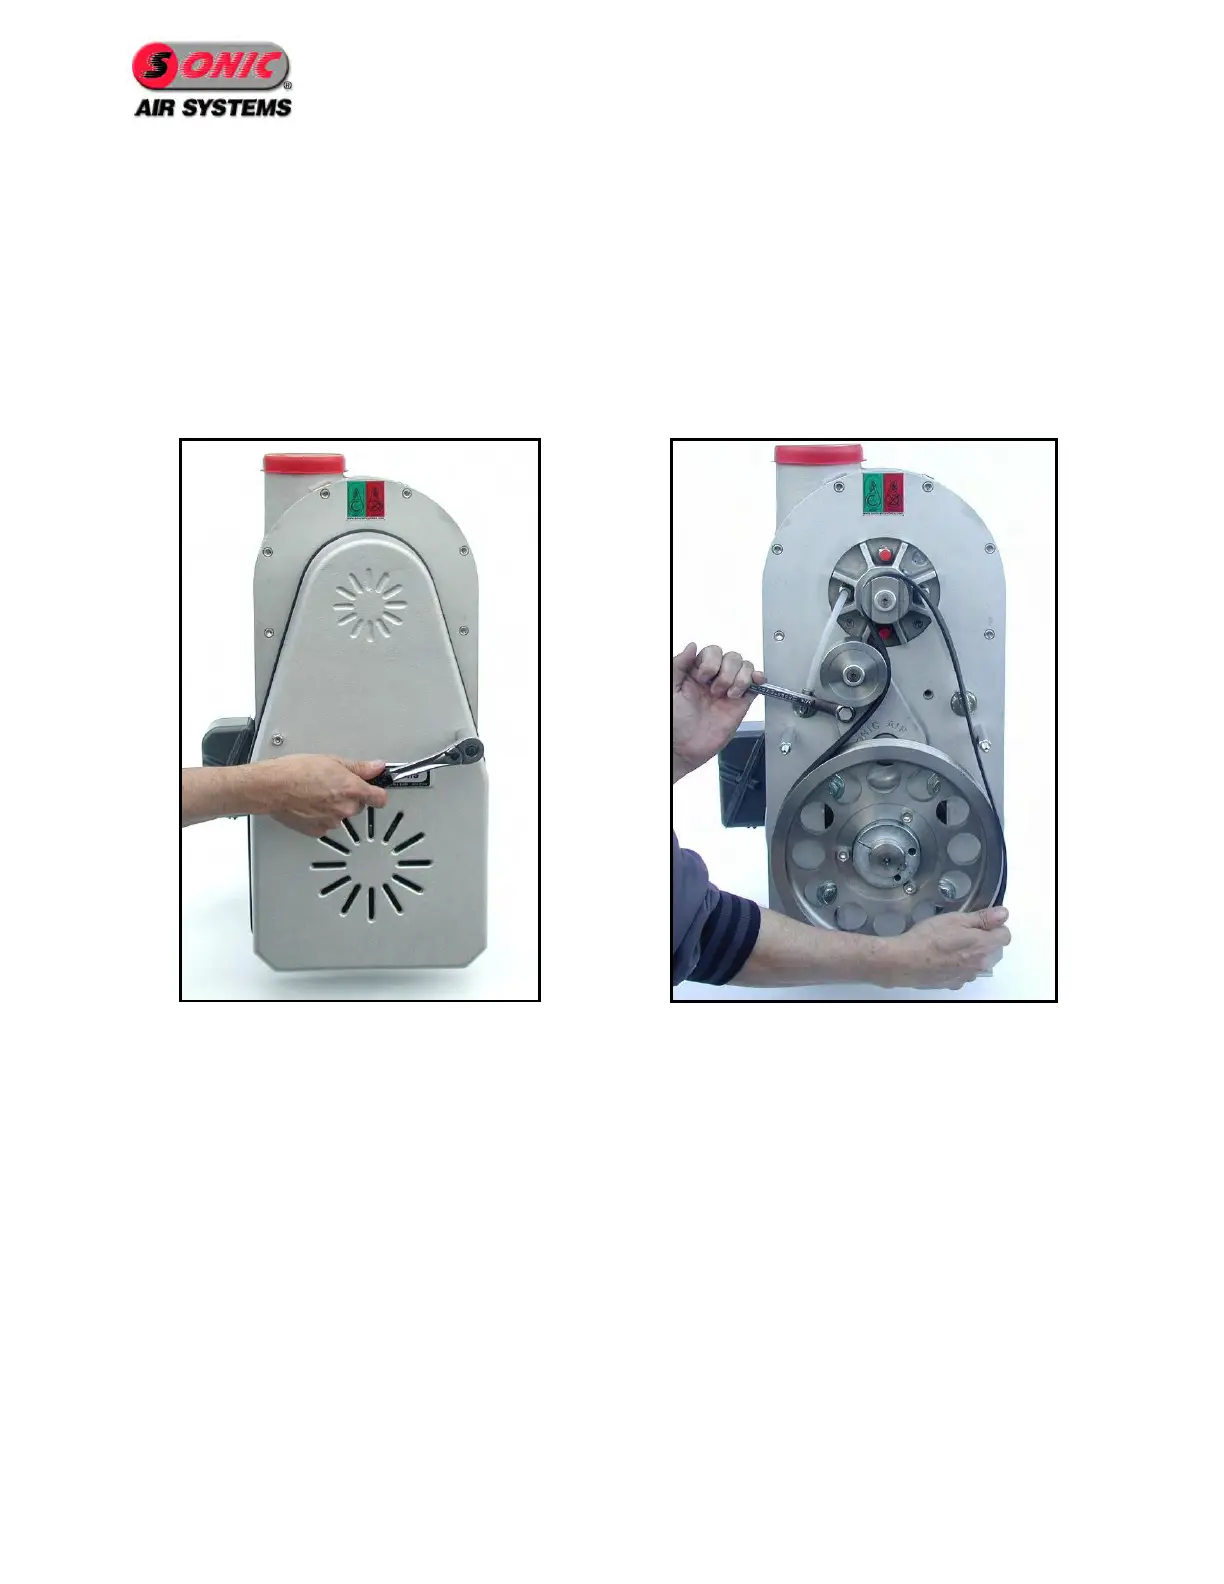
4. Using the 9/16 inch box-end wrench, rotate the belt tensioner arm counter
clockwise (CCW). At the same time wrap the belt around the blower pulley, then
along the right side of the idler pulley, and finally around the motor pulley. (See
Figure 38)
5. Slowly rotate the motor pulley to make sure the belt is seated in the grooves.
6. Verify that the belt gap is approximately ¾ inch ±1/16 inch . (See Figure 39)
7. If a ¾ inch belt gap was not achieved, use a ¾ inch deep socket to loosen the
bracket mounting screws behind the motor pulley and slide the bracket. (See
Figure 40 and Figure 41)(See Section 7.2 - Torque Specifications)
8. Using the 1/2 inch socket, reinstall the belt guard.
Figure 36 - Remove Belt Guard
Figure 37 - Remove Existing Belt