41
Seven Basic Operations — Getting to Know Your DVD Recorder
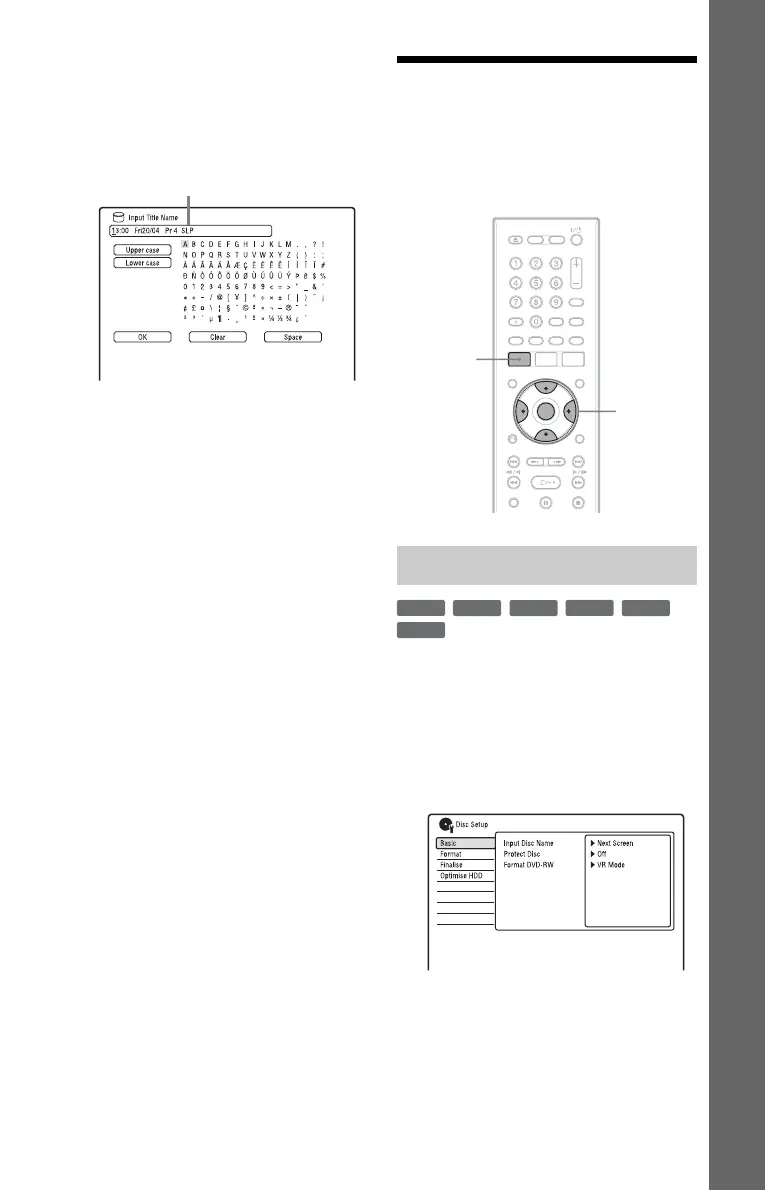
4 Select “Title Name” using M/m, and
press ENTER.
The display for entering characters
appears.
The current name is displayed at the
input row.
5 Move the cursor to the point where
you want to insert the character using
m/M.
To erase all of the characters, press and
hold CLEAR for 2 seconds or more.
6 Select “Upper case” or “Lower case”
using ./>.
The characters for the selected type are
displayed.
7 Press </M/m/, to select the
character you want to enter, and
press ENTER.
The selected character appears at the
input row.
To insert a space, press X (or select
“Space,” and press ENTER).
8 Repeat steps 6 and 7 to enter the
remaining characters.
To erase a character, move the cursor to
the character at the input row, and press
CLEAR (or select “Clear,” and press
ENTER).
To insert a character, move the cursor to
the right of the point where you want to
insert the character. Then select the
character, and press ENTER.
To erase all of the characters, press and
hold CLEAR for 2 seconds or more.
9 Press x (or select “OK,” and press
ENTER).
To cancel the setting, press
O RETURN.
5. Labelling and
Protecting a Disc
You can execute options effective for the
entire disc in the “Disc Setup” setup.
1 Insert a disc.
See “1. Inserting a Disc” on page 34.
2 Press SYSTEM MENU.
The System Menu appears.
3 Select “Disc Setup,” and press
ENTER.
Input row
Labelling a disc
</M/m/,,
ENTER
SYSTEM
MENU
+
RW
-
RWVR
-
RW
Video
-
RVR
+
R
-
R
Video
,continued