The Sony IT-A100/A200 is an integrated telephone answering machine designed for home and office use, offering a range of features for communication and message management.
Function Description:
This device serves as both a standard telephone and an answering machine. As a telephone, it supports making and receiving calls, redialing, and memory dialing. The answering machine function allows users to record and play back greetings, record incoming messages, record telephone conversations, and record memo messages. It also includes remote operation capabilities, enabling users to manage messages and settings from a remote phone.
Important Technical Specifications:
- Power Source: DC 12V from an AC power adaptor.
- Power Consumption:
- IT-A100: 2.8 W (max.) / 0.75 W (min.)
- IT-A200: 2.8 W (max.) / 0.97 W (min.)
- Dial Signal: Tone, pulse selectable.
- Dimensions: Approximately 182.5 x 88.5 x 202 mm (w/h/d) or approximately 7 1/4 x 3 1/2 x 8 inches.
- Mass: Approximately 940 g (2 lb 1.4 oz).
- Answering Machine:
- Greeting: Up to 19 seconds.
- Incoming message: Up to 4 minutes/message.
- Memo message: Up to 4 minutes/message.
- Supplied Accessories: AC power adaptor AC-T66 (1), Sony Microcassette MC-30 (1), Telephone line cords (2), Handset cord (1), Wall bracket and screws (1 set), Operating instructions (1), Remote control card (1), Directory (1 set).
Usage Features:
Before Operating the Phone:
- Checking the Package Contents: The manual provides a visual guide to ensure all components (handset, handset cord, screws, telephone line cords, AC power adaptor, microcassette, directory, wall bracket) are included.
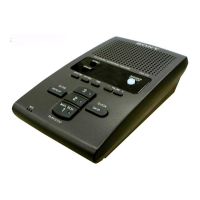
- Identifying the Parts: Detailed diagrams label all buttons and switches, including dialing keys, program button, clear messages button, message counter (IT-A200), recording indicator (IT-A100), answer indicator (IT-A100), memo/conv rec button, fast forward button, play/stop button, power indicator, volume controls, speaker, microphone, rewind button, redial/pause button, one touch dialing buttons, speed dial button, tone button, handset, answer on/off button, time button, audible ind/ann only switch, set/rec (record) button, greeting button, dial mode switch, ringer level switch, DC IN 12V jack, and line jack.
- Connecting the Phone: Instructions detail how to connect the AC power adaptor to the DC IN 12V jack and an AC outlet, pass the power adaptor cord around the hook, plug one end of the telephone line cord into the LINE jack and the other into a telephone outlet, and connect the handset cord to the handset.
- Hanging the Phone on a Wall: Step-by-step guide for wall mounting, including pressing the AC power adaptor cord and telephone line cord into the wall bracket, hooking the wall bracket to the wall plate, inserting tabs, reversing the hang-up tab, and connecting the phone to its handset, AC outlet, and telephone cord.
- Choosing Tone or Pulse Dialing: Users must set the DIAL MODE switch to "T" for tone dialing or "P" for pulse dialing. A trial call is recommended to confirm the setting.
- Adjusting the Volumes: The RINGER LEVEL switch (H, L, OFF) controls the ringer volume, and the VOLUME controls (+/-) adjust the speaker volume.
Operating the Phone:
Using as a Telephone:
- Making/Receiving a Call: Pick up the handset, listen for a dial tone, and dial the number. To receive a call, pick up the handset when the phone rings. To finish talking, replace the handset in the cradle.
- Redialing: Pick up the handset, listen for a dial tone, and press the REDIAL/PAUSE button to redial the last number.
- Using Touch-Tone Services (for pulse dialing systems only): Pick up the handset, dial the service number, and press the TONE button when connected to the service. Then press the required dialing keys.
- Memory Dialing:
- Storing Memory Dialing Numbers: Pick up the handset, press PROGRAM, dial the phone number (up to 16 digits for pulse dialing or 15 for tone dialing), then for one-touch dialing, press one of the 3 ONE TOUCH DIALING buttons (1 to 3). For speed dialing, press the SPEED DIAL button and the desired dialing key (0 to 9).
- Using a Private Branch Exchange (PBX): To access an outside line, dial a digit (such as 9), then press REDIAL/PAUSE for a pause, and then dial the phone number.
- To Keep a Directory: Write down names and numbers stored in memory and attach to the handset.
- Making a Memory Dialing Call: Pick up the handset, listen for a dial tone. For one-touch dialing, press the desired ONE TOUCH DIALING button (1 to 3). For speed dialing, press SPEED DIAL, then the desired speed dialing button (0 to 9).
Using as a Telephone Answering Machine:
- Preparation:
- Inserting the Microcassette: Open the lid and insert the supplied microcassette with the side for recording facing up.
- Types of Greetings: The phone offers "Standard" (pre-recorded, "Hello, I'm unable to answer your call right now. Please leave your name, number, and message after the tone.") and "ANN (announcement) ONLY" (pre-recorded, "Hello, I'm unable to answer your call right now. Please call again. Thank you."). Users can also record their own greetings.
- Recording a Greeting: Press SET/REC, then GREETING. Speak about 30 cm (12 inches) away from the microphone for 2 to 19 seconds. Press GREETING again to confirm. Set the AUDIBLE IND/ANN ONLY switch to the desired position (ANN ONLY ON for announcement only, ANN ONLY OFF or AUDIBLE IND ON for standard).
- Setting the Day and Time: Press SET/REC, then TIME to select the day of the week. Press SET/REC to finish the day setting. Press TIME to select the hour, then SET/REC to finish. Press TIME to select the minute, then SET/REC to finish.
- Turning the Answering Function On or Off: Set the AUDIBLE IND/ANN ONLY switch to the desired position. Press ANSWER ON/OFF.
- Setting a Beep for Incoming Messages: The AUDIBLE IND/ANN ONLY switch can be used to set a beep for recorded messages. To stop the beeping, press PLAY/STOP and listen to messages, or move the switch to AUDIBLE IND OFF.
- Playing Back Messages: Press PLAY/STOP to play new messages. Messages are played in the order they were recorded, with day and time announcements if set. To fast forward or rewind, press and hold FAST FORWARD or REWIND. To play old messages, turn off the answering function and press PLAY/STOP.
- Clearing Messages: After playing all messages, press CLEAR MESSAGES. A confirmation beep will sound, and the tape will rewind.
- Recording a Telephone Conversation: Press ANSWER ON/OFF to activate the answering function, then MEMO/CONV REC during the conversation. To stop, press MEMO/CONV REC or PLAY/STOP.
- Recording a Memo Message: Press ANSWER ON/OFF, then MEMO/CONV REC. Speak about 30 cm (12 inches) away from the microphone for up to 4 minutes. Press MEMO/CONV REC or PLAY/STOP to finish.
- Calling from a Remote Phone: Dial your phone number from a pushbutton phone. When you hear the greeting, press (2) and the remote code. If new messages are recorded, the phone answers after 3 rings; if not, it answers after 5 rings. The manual provides a table of control codes for remote operations (e.g., play back new messages, rewind, fast forward, clear all played messages, turn off answering function, monitor sound, record new greeting, interrupt current operation).
Maintenance Features:
- Cleaning the Cabinet: Clean the cabinet with a soft cloth slightly moistened with water or a mild detergent solution. Avoid abrasive pads, scouring powder, solvents like alcohol or benzine, as they can damage the finish.
Precautions:
- On Power Source: Operate the unit only on 12V DC using the supplied AC power adaptor. Plug into an AC outlet with a continuous power supply.
- On Installation: Avoid exposing the unit to heat sources, extremely low temperatures, direct sunlight, moisture, rain, mechanical vibration or shock, inclined positions, or devices containing magnets (speakers, TVs).
- FCC Compliance: The equipment complies with Class B digital device limits (Part 15 of FCC Rules). If interference occurs, measures include reorienting/relocating the receiving antenna, increasing separation between equipment and receiver, connecting to a different circuit, or consulting a dealer/technician.
- Service Requirements (USA): All repairs for IT-A100/A200 models must be performed by an authorized Sony Service Center. Unauthorized repairs will void the FCC registration and warranty. For assistance, contact Sony Telecommunications Helpline (201) 391-6111.
- Emergency Numbers: If the phone has automatic dialing, program emergency numbers and explain the situation to the operator. Perform these activities during off-peak hours.
- Hearing Aid Compatibility: The equipment is compatible with hearing aid devices.