— 28 —
15
Getting Started
After Unpacking
Check the supplied accessories.
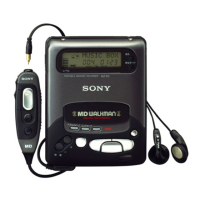
• Remote commander (remote) RM-DR1E (1)
• AA-size (R6) batteries (2)
• Connecting cable (control S cable) (1)
Inserting batteries into the remote
Insert two AA-size (R6) batteries with the 3 and #
properly oriented to the markings into the battery
compartment.
z When to replace the batteries
Under normal conditions, the batteries should last for
about six months. When the remote no longer operates
the recorder, replace both batteries with new ones.
Notes
• If you use the batteries incorrectly, they may leak liquid
or be blown up. Be sure to obey the following points:
- Do not mistake 3 and # terminals.
- Do not use a new battery with an old one or batteries of
different types together.
- Do not recharge the batteries.
- If you don’t use the remote for an extended period of
time, remove the batteries.
- If the batteries are leaking, wipe to clean the battery
compartment before replacing with new ones.
• Do not expose the remote sensor to direct sunlight or
lighting apparatus. Doing so may cause a malfunction.
16
Getting Started
Hooking Up the Audio
Components
Hook up a mixer, CD player, DAT recorder, and other
components to the MD recorder. Be sure to turn off the
power of each component to do so.
Mixer
OUT IN
DIGITAL
OPTICAL OUT
DIGITAL
OPTICAL IN
DIGITAL
COAXILAL IN
DIGITAL
COAXILAL OUT
CD player or
DAT recorder,
MD recorder
Remote or
control
component
CD player or
DAT recorder,
MD recorder
To power outlet
ç : Flow of signal
z
When the remote is used as the wired remote
Use the supplied control S cable to connect the jack at
the front of the remote with the control jack of the
recorder.
When the recorder and remote are connected by the
control S cable, infrared rays are not emitted from the
remote and infrared rays are not received by the
recorder.
When the remote is used as the wireless remote,
unplug from the jack of the recorder and remote.
1 Prepare necessary connecting cables.
• Audio connecting cable (pin type)
White White
Left (L) Left (L)
Right (R) Right (R)
Red Red
• Optical Digital connector cable POC-15A
• Coaxial digital connecting cable VMC-10
• Control S cable (accessory)
(Mini-jack)
2 Connect.
xWhen connecting with mixer
Use audio connecting cords.
Connect a white pin with the white (L) jack and a red
pin with the red (R) jack. Be sure to securely plug
into the jacks during connection. If not, noise may
occur.
MD recorder Mixer
ANALOG(UNBAL)
OUT
IN
L
R
2TR
OUT
IN
L
R
Ç
Ç
ç : Flow of signal
17
Getting Started
xWhen connecting with digital components
(CD player, DAT recorder, other MD recorders,
mixer with coaxial digital input/output jacks or
optical digital input/output connector.)
When this recorder is connected with a CD player,
MD recorder, or DAT recorder, digital recording can
be performed. Use an optical digital connecting
cable (POC-15A) or a coaxial digital connecting cable
(VMC-10) that can be purchased separately.
• When using an optical digital connecting cable
Take the caps off the connectors and insert the cable
plugs securely.
MD recorder Digital component
DIGITAL
OUTIN
OPTICAL
DIGITAL
Ç
Ç
ç : Flow of signal
• When the coaxial digital cable is used
MD recorder Digital component
IN
COAXIAL
OUT
DIGITAL
DIGITAL
OUTIN
COAXIAL
Ç
Ç
ç : Flow of signal
z A sampling rate converter is mounted in this recorder
All digital input signals are converted to the
sampling frequency (44.1 kHz) of an MD recorder
for recording.
Therefore, this allows you to record sources such as
32 or 48 kHz DAT or satellite broadcasts, as well as
CDs and MDs.
3 Connect the power cord.
18
Recording on
MDs
This chapter explains the various ways to
record to an MD , as well as how to mark
track numbers and perform synchro-
recording with other components.
Recording on an MD
If the MD has recorded material on it, the recorder will
automatically start recording from the end of the recorded
portion.
POWER
LEVEL / DISPLAY / CHAR TIME
INPUT
AMS
1 Turn on the mixer and program source.
2 Select the source on the mixer.
3 Press POWER to turn on the recorder.
4 Insert a recordable MD.
5 Use INPUT to select the position that corresponds to
the input jacks (connector) connected to the
program source.
If the source is connected Display to be selected
to the connector or jacks
DIGITAL OPTICAL connector OPTICAL
DIGITAL COAXIAL jacks COAX
ANALOG (UNBAL) jacks ANALOG
6 If necessary, locate the point on the MD to start
recording from.
If you want to record on a new MD or start recording
from the end of the recorded portion, go to step 7.
• To record over from the beginning of an existing
MD track
Turn AMS (or press ./> repeatedly) until the
number of the track to be recorded over appears.
• To record over from the middle of an MD track
Turn AMS (or press ./> repeatedly) until the
number of the track to be recorded over appears,
then press 7 to start playback. Press 7 again at
the point you want to start recording from.
7 Press z
The recorder changes to recording pause.
8 If necessary, adjust the recording level.
For details, see “Adjusting the Recording Level” on
page 21.
9 Press 7
Recording starts.
10 Start playing the program source.