3-8
SSC-DC593/DC593P/DC598P (E)
TP202
IC304
CN202
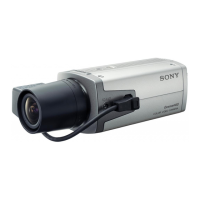
PR-269 board (Side A)
CL201
CN202
IC202
PR-269 board (Side A)
3-5. Confirmation
3-5-1. Confirmation of fsc Adjustment
1. Set the DIP switch on the rear panel to LL.
2. Input a sync signal to the VS IN connector.
3. Check that the measuring frequency is within
specification.
Subject: Not required
Measuring point: PR-269 board, TP202
Measuring equipment: Frequency counter
Specification: 14.318181 ±0.000080 MHz
(SSC-DC593)
17.734472 ±0.000080 MHz
(SSC-DC593P/598P)
3-5-2. Confirmation of 57 MHz Adjustment
1. Set the DIP switch on the rear panel to INT.
2. Check that the measuring frequency is within
specification.
Subject: Not required
Measuring point: PR-269 board, CL201
Measuring equipment: Frequency counter
Specification: 57.272720 ±0.000800 MHz
(SSC-DC593)
56.750000 ±0.000800 MHz
(SSC-DC593P/598P)
3-4. Confirmation after Adjustment
3-4-1. Preparation for Confirmation
Before performing the confirmation after adjustment,
remove the commander and adjustment commander relay
tool from the camera, and restart the unit.
3-4-2. Menu Operation
1. Set the MENU LOCK switch on the rear panel to OFF.
2. Press the MENU/ENTER button on the side panel and
keep pressing until the menu is displayed.
3. Move the cursor to the item you want to select using
the up and down (↑, ↓) buttons on the side panel.
4. Press the MENU/ENTER button.
The menu of the selected item is displayed.
(The example below shows the screen when
EXPOSURE is selected.)
. To select the item, move the cursor (>) using the up and
down (↑, ↓) buttons and to change the setting, move the
cursor using the left and right (←, →) buttons.
. Move the cursor to RET and press the MENU/ENTER
button to return to the previous screen, .
. To return to the normal screen, move the cursor to EXIT
and press the MENU/ENTER button.
[CAMERA MAIN MENU] [A]
> SYNC
EXPOSURE
DAY/NIGHT
WHITE BALANCE
ACTIVITY DETECTION
ZONE MASKING
OTHERS
CAMERA TITLE
USER PRESET
EXIT
[EXPOSURE] [A]
> AGC OFF
SHUTTER OFF
BLC OFF
VARIABLE GAMMA OFF
VIDEO LEVEL L--*--H
RET EXIT
 Loading...