STR-DH730/DH830
9
SECTION 3
TEST MODE
TUNER AM STEP CHANGE MODE
(US and Canadian models only)
Either the 9 kHz step or 10 kHz step can be selected for the AM
channel step.
Procedure:
1. Press the [
?/1
] button to turn on the main power.
2.
Turn the [INPUT SELECTOR] button to select the “AM TUNER”.
3. Press the [
?
/
1
] button to turn off the main power.
4. While pressing the [TUNING MODE] button, press the [
?
/
1
]
button to turn on the main power.
5. Either the message “10K Step” or “9K Step” appears, select
the desired step
VACUUM FLUORESCENT DISPLAY TEST MODE
All fl uorescent segments are tested.
When this test is activated, all segments light on at the same time,
then each segment lights on one after another.
Procedure:
While depressing the [SPEAKERS] and the [DIMMER] buttons
simultaneously, press the [
?
/
1
] button to turn on the main power.
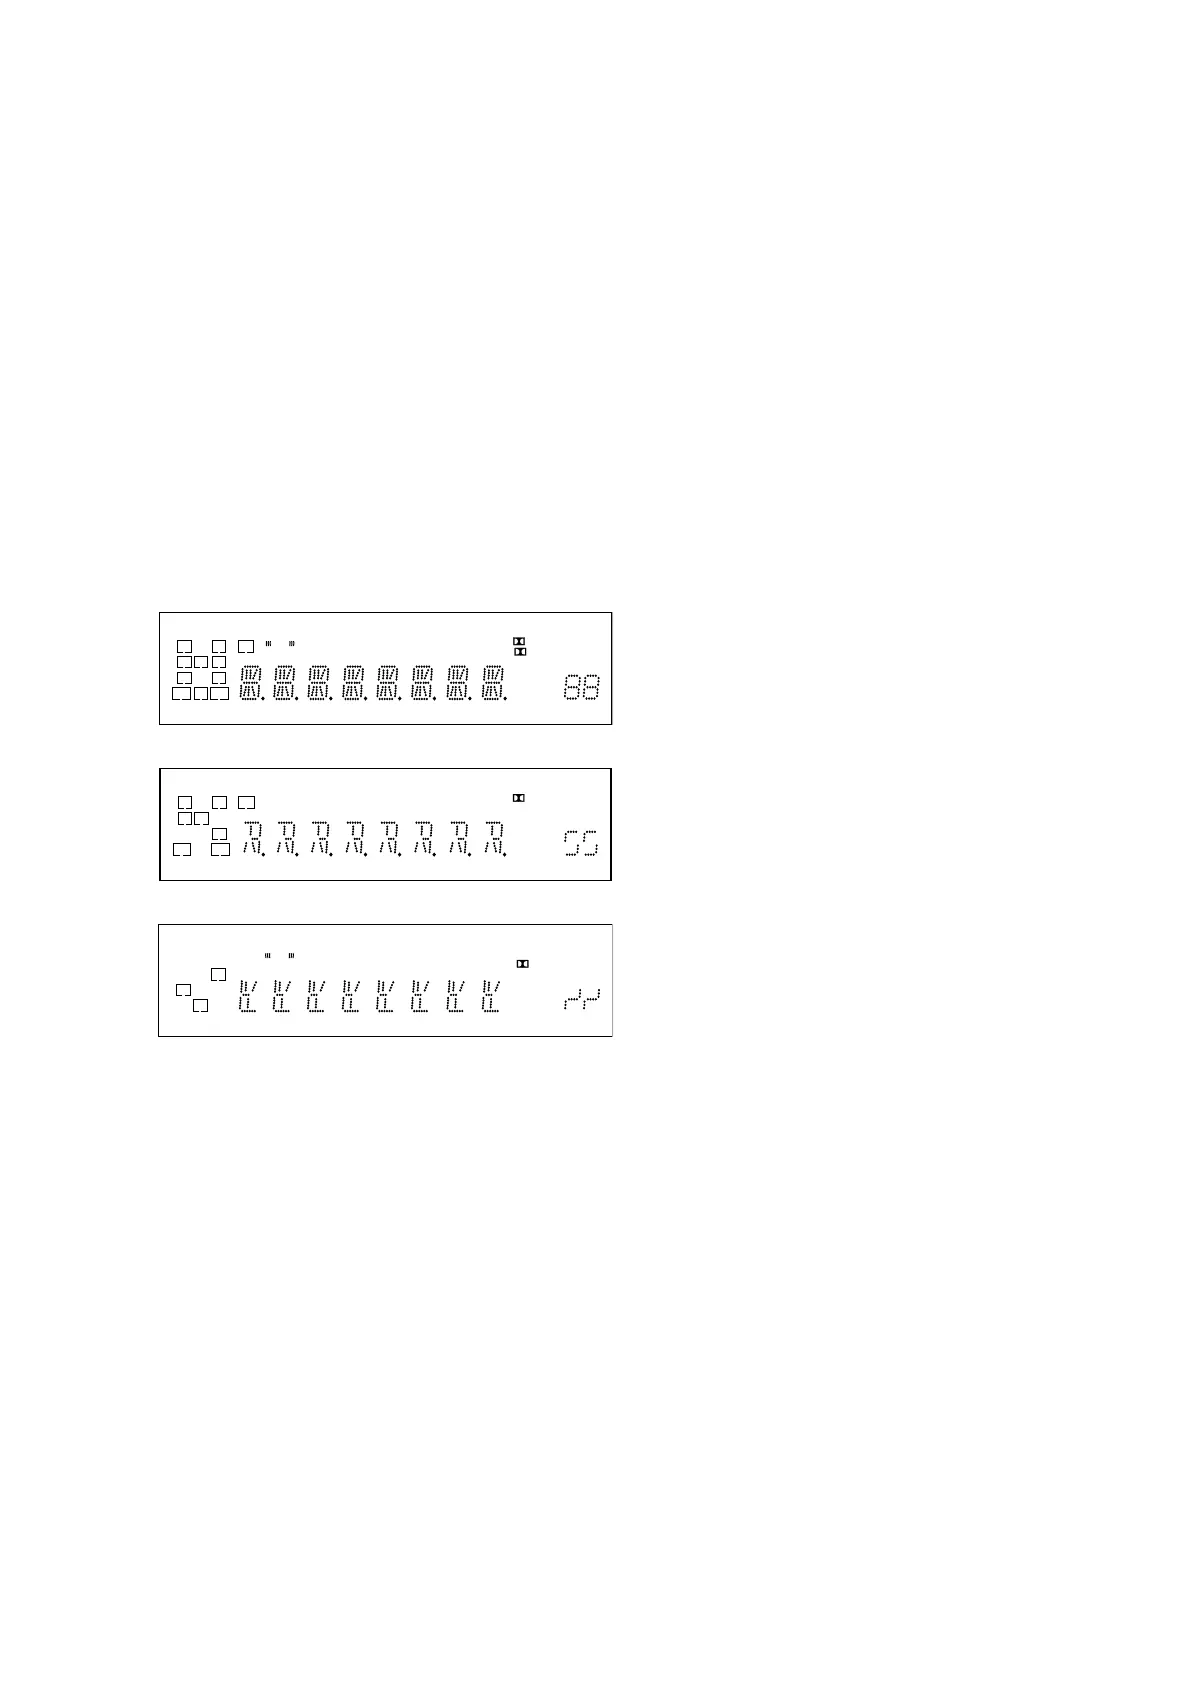
1. ALL segments light on.
LH RH SW
L RC
SBL SBRSB
SL SRS
xzIIPL
D + EX
LFE
COAX
HDMI
OPT
-ES
MSTR
96/24
HI RES
NEO:6
LBR
S-AIR
LPCM
TrueHD
SLEEP
D.RANGE
AAC ST
dB RDS
k Hz m
MHz ft.
DTS
DTS-HD
2. Press the [DISPLAY] control, confi rm display.
LH RH SW
LRC
SBL SBRSB
SL
SRS
zPL
+
LFE
COAX
HDMI
OPT
-ES
MSTR
96/24
HI RES
NEO:6
LBR
S-AIR
LPCM
TrueHD
SLEEP
D.RANGE
AAC
dB
k m
ft.
DTS
DTS-HD
3. Press the [DISPLAY] control, confi rm display.
LH RH SW
L R
SBL SBR
S
xIIPL
D EX
LFE
COAX
HDMI
OPT
-ES
MSTR
96/24
HI RES
NEO:6
LBR
S-AIR
LPCM
TrueHD
SLEEP
D.RANGE
ST
RDS
Hz
MHz
DTS
DTS-HD
4. Press the [DISPLAY] control, all segments light off.
SOUND FIELD CLEAR MODE
The preset sound fi eld is cleared when this mode is activated.
Use this mode before returning the product to clients upon com-
pletion of repair.
Procedure:
1. While depressing the [MUSIC] button, press the [
?/1
] button
to turn on the main power.
2.
The message “S.F. CLEAR” appears for a moment and initial-
ization is performed.
SOFTWARE VERSION DISPLAY MODE
The software version is displayed.
Procedure:
1. While pressing the [TUNING MODE] and [DISPLAY] but-
tons, press the [
?
/
1
] button to turn on the main power.
2. The message “H7 ** MX.XX” appears.
**: Destination
X.XX: Software version
Each time the [DISPLAY] button is pressed, “H.VER X.XX”,
“S.VER X.XX”, “F.VER X.XX” and “T.VER X.XX” appear
in this order, and returns to the “H7 ** MX.XX” display.
KEY CHECK MODE
Button check
Procedure:
1. While depressing the [SPEAKERS] and the [INPUT MODE]
buttons simultaneously, press the [
?/1
] button to turn on the
main power.
2. The message “REST 13” appears.
Every pressing of any button other than the [
?/1
] counts
down the buttons. The buttons which are already counted
once are not counted again. When all buttons are pressed
“REST 00” appears.
SWAP ALL MODE
The signal will be swap to all channels so that all speakers will
have sound output.
Procedure:
1. While depressing the [TUNING MODE] and the [MOVIE
(HD-D.C.S.)] buttons simultaneously, press the [
?
/
1
] button
to turn on the main power.
2. “SWAP. MODE” appears.
INITIALIZE MODE
All preset contents are cleared when this mode is activated. Use
this mode before returning the product to clients upon completion
of repair.
(a) SHIPMENT MODE
Procedure:
1. While pressing the [TUNING MODE] and [DIMMER] but-
tons, press the [
?
/
1
] button to turn on the main power.
2. The message “CLEARING” appears and the memories are
reset to the default values.
3. When done, the message “CLEARED” appears, the set will
power off.
(b) ALL CLEAR INITIALIZE
Procedure:
1. While pressing the [TUNING MODE] and [INPUT MODE]
buttons, press the [
?
/
1
] button to turn on the main power.
2. The message “CLEARING” appears and the memories are
reset to the default values.
3. When done, the message “CLEARED” appears, the set will
power on.
(c) USER INITIALIZE
Procedure:
1. Hold the [
?
/
1
] button for 5 seconds.
2. The message “CLEARING” appears on the display.
3. After few seconds, “CLEARED” appears.
PROTECTOR AUTO OFF
To disable auto off after protector occur.
Procedure:
1. While depressing the [TONE MODE] and the [A.F.D.] but-
tons simultaneously, press the [
?
/
1
] button to turn on the main
power.
2. “PROTEVER” appears and switch on the set.
DCAC TEST MODE
Procedure:
1. While pressing [TONE MODE] and [MOVIE (HD-D.C.S.)]
buttons, press the [
?
/
1
] button to turn on the main power.
2. The message “SOURCE” or “MIC” appears.
Repeat step 1 to toggle between “SOURCE” and “MIC”.
SOURCE: normal mode
MIC: mode that output audio from mic input