– 5 –
Basic Operations
8
GB
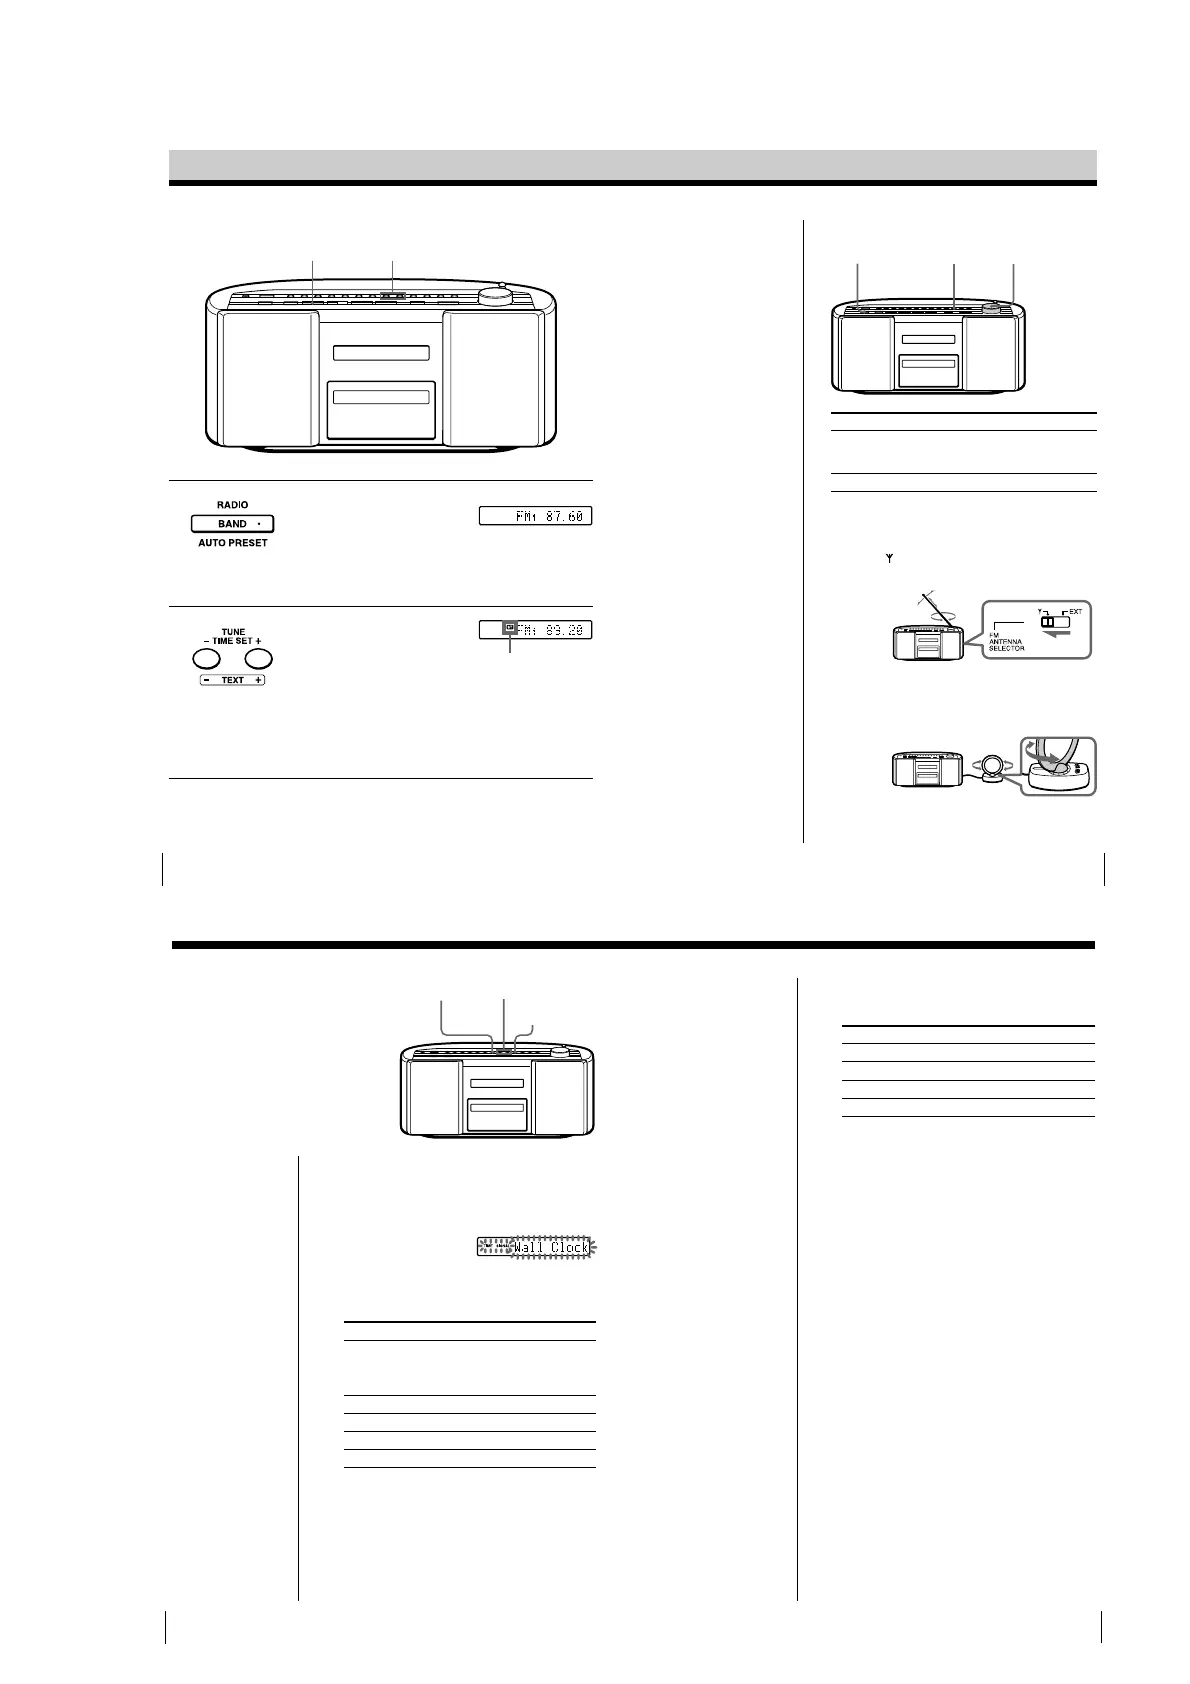
Listening to the radio
Connect the mains lead to the mains (see page 35).
1
Press RADIO BAND •AUTO
PRESET until the band you want
appears in the display (direct
power-on).
Each time you press the button,
the band changes as follows:
“FM1” t “FM2” t “MW” t
“LW”
2
Hold down TUNE•TIME SET +
or – (TUNE + or – on the remote)
until the frequency digits begin to
change in the display.
The player automatically scans
the radio frequencies and stops
when it finds a clear station.
If you cannot tune in a station,
press the button repeatedly to
change the frequency step by
step.
Display
Indicates an FM
stereo broadcast.
12
Basic Operations
9
GB
To Do this
adjust the volume Turn VOLUME toward +
or – (press VOL +, – on
the remote).
turn on/off the radio Press OPERATE.
To improve broadcast reception
FM:
Set the FM ANTENNA SELECTOR at the rear of the
player to “
” (telescopic aerial).
Reorient the aerial for FM.
MW/LW:
Adjust the orientation of the loop aerial by aligning it
with the marks on the base one by one. Be careful not
to move the base of the aerial unit.
If the broadcast is still noisy, connect the external
aerial (page 36).
Use these buttons for additional operations
Tips
• The “FM1” and “FM2”
bands have the same
functions. You can store
the stations you want
separately in “FM1” and
“FM2” (page 16).
• If the FM broadcast is
noisy, press PLAY
MODE•MONO/ST
(MODE on the remote)
until “Mono” appears in
the display and the
radio will play in
monaural.
• Next time you want to
listen to the radio, just
press RADIO BAND•
AUTO PRESET. The
player turns on
automatically and starts
playing the previous
station.
PLAY MODE
MONO/ST
OPERATE
VOLUME
The Timer
28
GB
1
When the power is off, press TIME SIGNAL to
display “TIME SIGNAL” indication.
Do the following operations by checking the
display.
2 Press TUNE•TIME SET + or – until the sound you
want appears in the display, and press DISPLAY•
ENTER MEM.
Display Intervals
Wall Clock Sounds on the hour the number of times
corresponding to the hour and again on the
half hour once (Example: Three times at
3:00 and again at 3:30 once).
Harp Sounds on the hour once
Music box Sounds on the hour once
Chime Sounds on the hour once
Organ Sounds on the hour once
3 Press TUNE•TIME SET + or – to set the volume
you want, and press DISPLAY•ENTER MEM.
Setting the time
signal
When the power is off, you can hear the
time signal on this player. You can select
the sound for the time signal. Make sure
you have set the clock (see page 4 or 26).
TIME SIGNAL
Note
The time signal does
not sound when the
player is turned on.
TUNE
TIME SET –, +
DISPLAY
ENTER MEM
Display
The Timer
29
GB
4 Press TUNE•TIME SET + or – to select the time for
the time signal function to work, and then press
DISPLAY•ENTER MEM.
Display Time
signal sounds
Off Not at all
Every Hour All day
Auto 7:00 - 22:00
Once a Day* Once a day
* If you selected “Wall Clock” in step 2, you cannot select
“Once a Day”
5 If you selected “Once a Day” in step 4, set the time
for the time signal to sound. (If you selected other
items in step 4, omit this step.)
1 Press TUNE•TIME SET + or – to set the hour
and press DISPLAY•ENTER MEM.
2 Press TUNE•TIME SET + or – to set the minutes
and press DISPLAY•ENTER MEM.
To check the sound types (demonstration mode)
Press and hold TIME SIGNAL for about 2 seconds.
You can hear the five types of sound once.