Installation
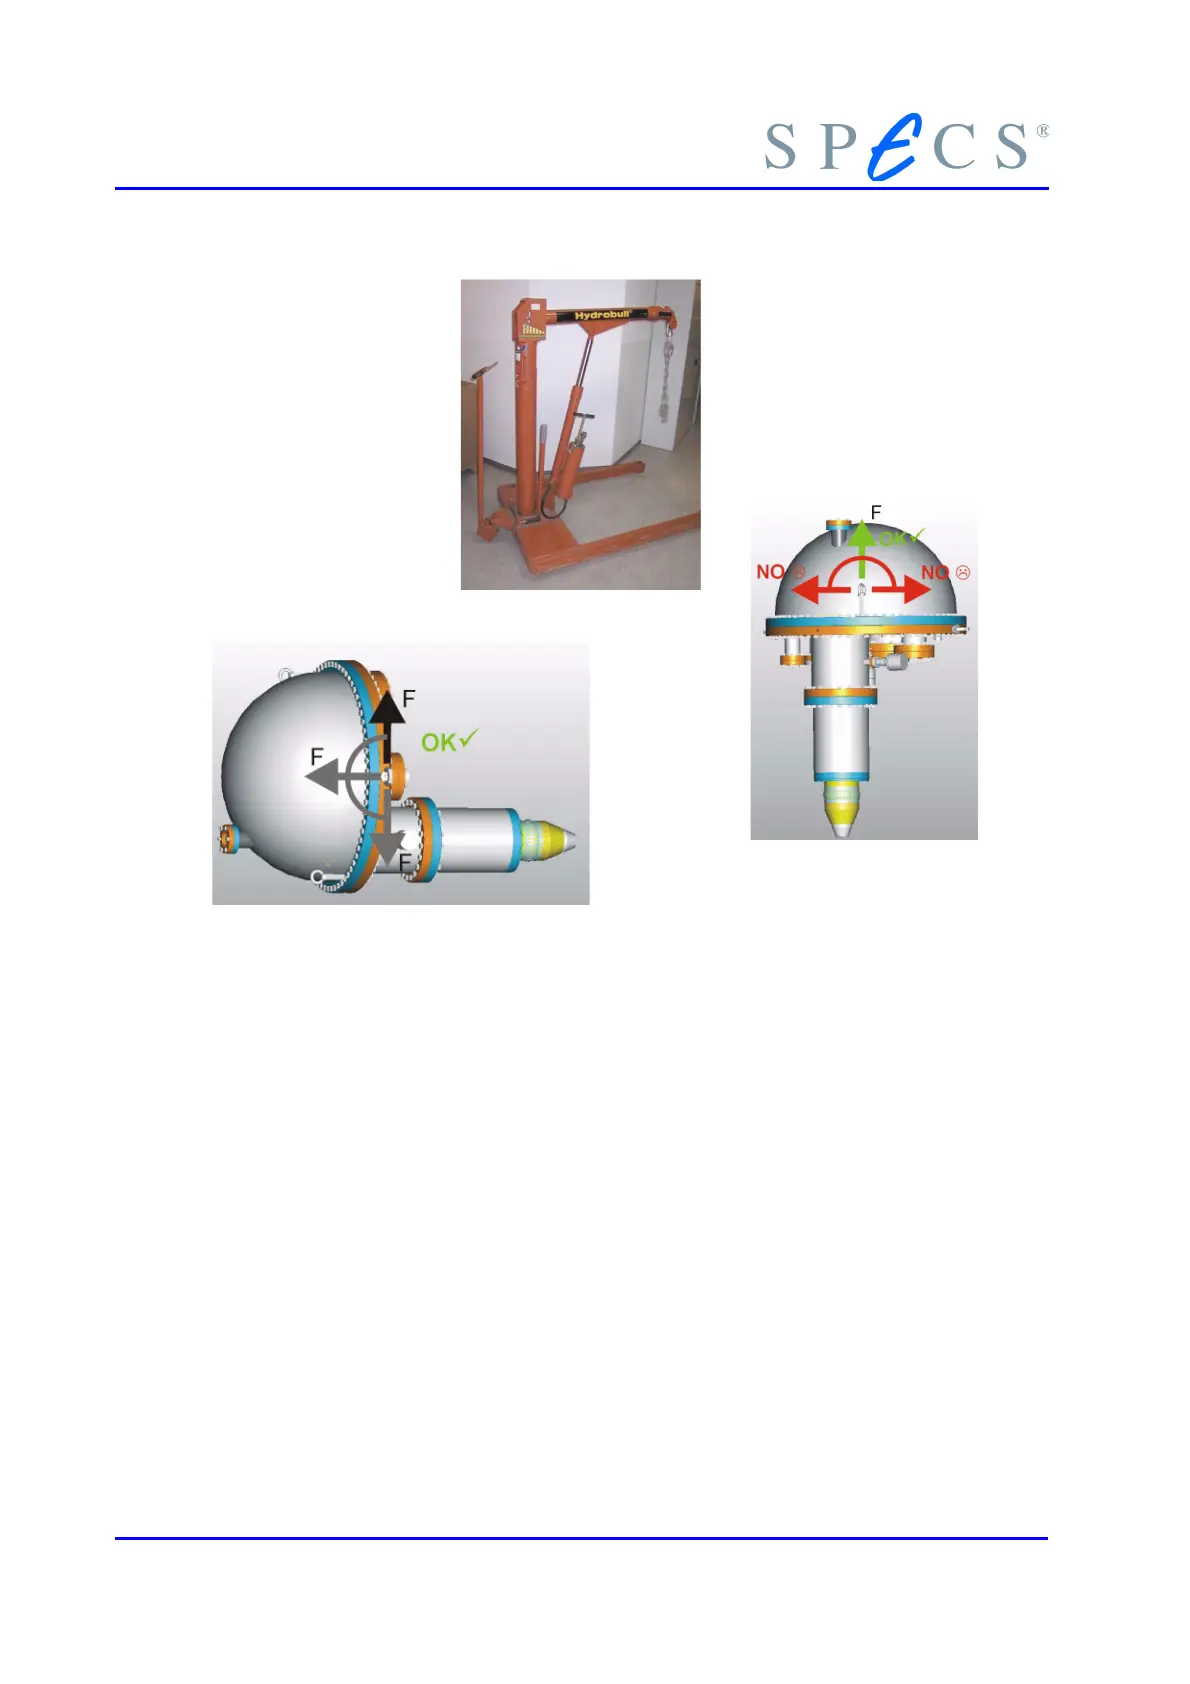
Figure 23: Mounting Tips
5. Keep the analyzer in a stable position, if possible keep the same orientation as
in the transport box (soft lie down is allowed).
6. The analyzer is evacuated. Vent via valve at the protection housing. SPECS re-
commends using a dry dust free venting gas like nitrogen to avoid particle or
water intrusion. Remove the lens protection housing from the analyzer mount-
ing flange. Do not touch any vacuum parts without gloves.
7. Check the working distance of the analyzer (40mm between sample and the top
of the lens system -> insertion depth in your chamber).
8. Tighten the delivered stay bolts (PHOIBOS150) on the analyzer mounting flange
and prepare the necessary mounting parts (screws for PHOIBOS100, washers
and nuts).
9. Insert a new DN100CF copper gasket into the vacuum chamber flange.
10. Center the analyzer mounting flange above the vacuum chamber flange.
11. Introduce the lens system into the vacuum chamber flange very slowly. Do not
use any force.
12. During the introduction check all other components in the vacuum chamber for
possible physical damage. During the introduction check all other components
in the vacuum chamber because of possible physical damage. All rotary feed-
42 PHOIBOS
When mounting horizontally, use the
hooks as shown in the picture above.
When mounting vertically,
use the hooks as shown in
the picture above. Never
use these for mounting
horizontally!
Specs recommends
using a hydraulic lift,
as in the photo to the
right.

 Loading...