26
Shock Eyelet Service
Shock Eyelet Service
Mounting Hardware and Bushing Service
Prior to servicing the rear shock, remove it from the bicycle frame according to the bicycle manufacturer's instructions. Once the shock is removed
from the bicycle, remove the mounting hardware before performing any service.
Parts, Tools, and Supplies
Parts
• 2024 (A2) SIDLuxe 50 or 200 Hour Service Kit
Safety and Protection Supplies
• Apron
• Clean, lint-free shop towels
• Nitrile gloves
• Safety glasses
RockShox Tools
• RockShox 1/2" x 1/2" rear shock bushing removal/installation tool
Lubricants and Fluids
• RockShox Dynamic Seal Grease
Common Tools
• Bench vise with aluminium soft jaws
• Open end wrenches: 13 mm (2)
• Adjustable wrench
Mounting Hardware Removal
NOTICE
To prevent damage to the shock, use aluminium soft jaws and position the eyelet in the vise so that the remote cable stop and adjustment knobs are
clear of the vise jaws.
Some mounting hardware is easily removed using only your fingers. Try to Some mounting hardware is easily removed using only your fingers. Try to
remove the end spacers with your fingernail or small screwdriver, then push remove the end spacers with your fingernail or small screwdriver, then push
the bushing pin out of the bushing. If this works, continue to the next section.the bushing pin out of the bushing. If this works, continue to the next section.
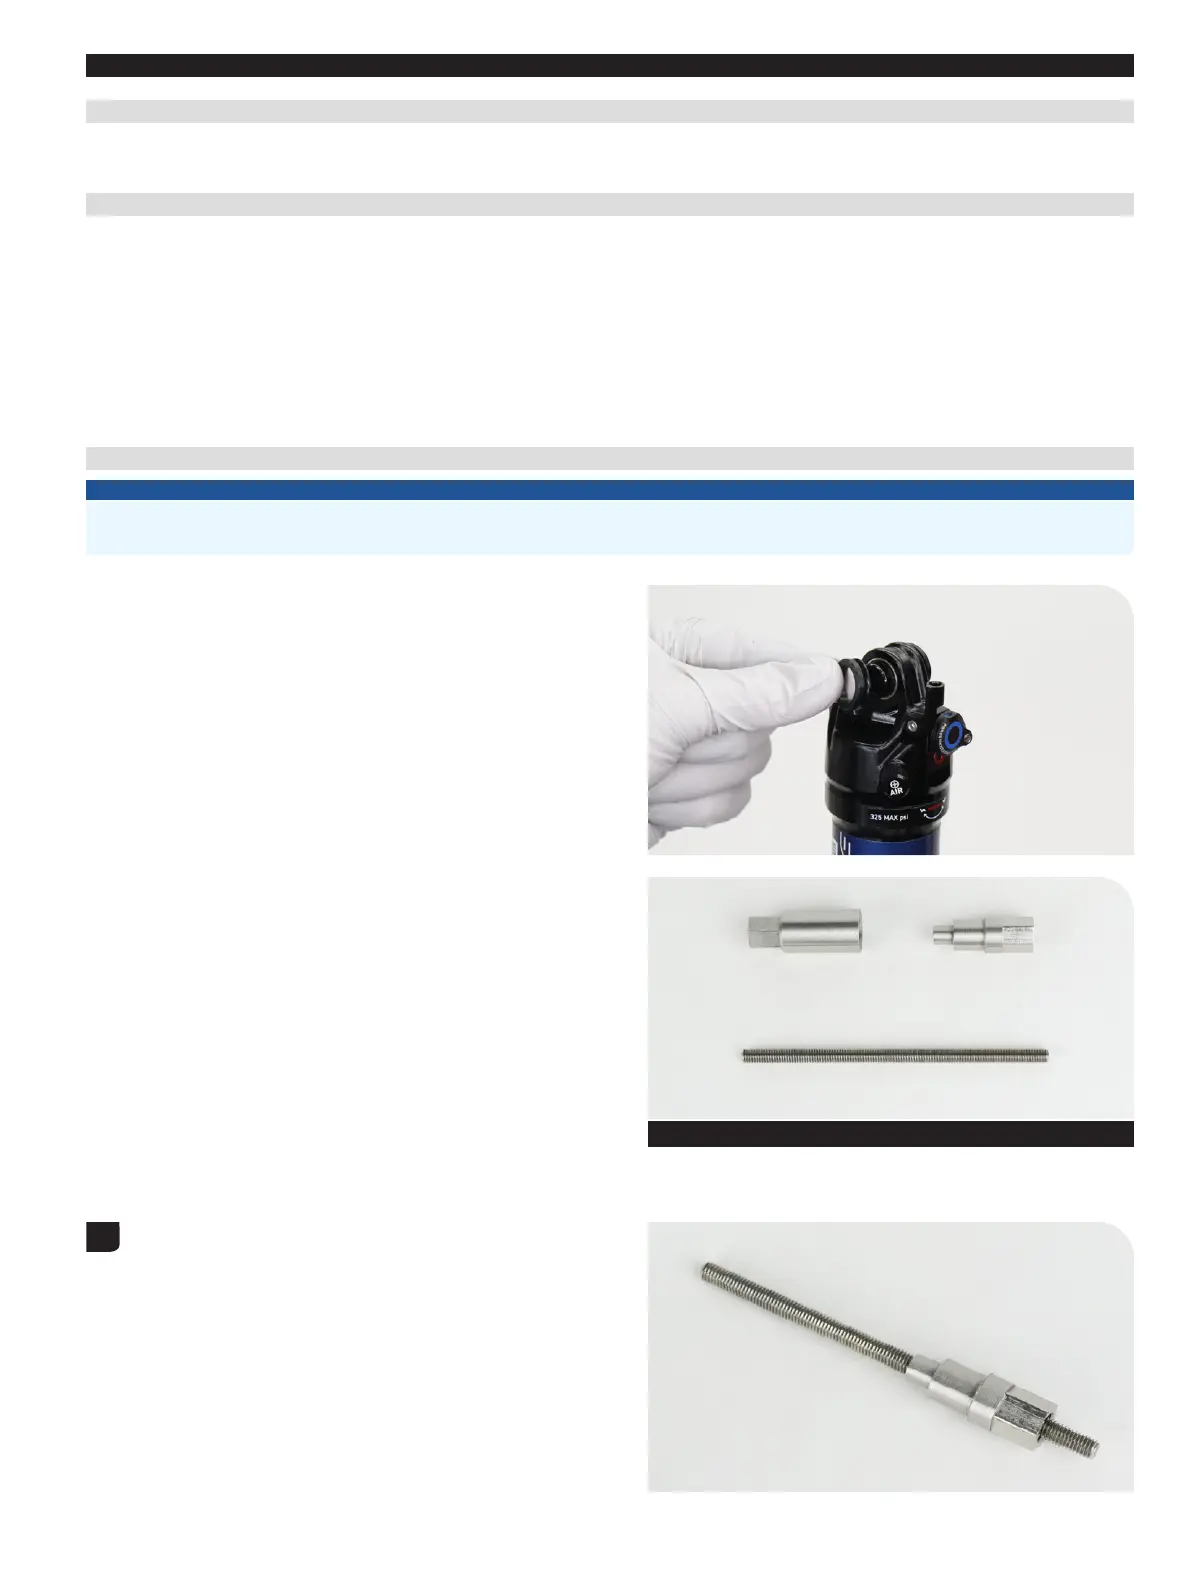
If you are unable to remove the mounting hardware using your fingers, use If you are unable to remove the mounting hardware using your fingers, use
the RockShox rear shock bushing removal/installation tool.the RockShox rear shock bushing removal/installation tool.
Thread the small end of the push pin onto the threaded rod until the Thread the small end of the push pin onto the threaded rod until the
rod is flush or slightly protrudes from the hex-shaped end of the rod is flush or slightly protrudes from the hex-shaped end of the
push pin.push pin.
Rear shock bushing removal/installation tool
Catcher
Push pin
Threaded rod
1