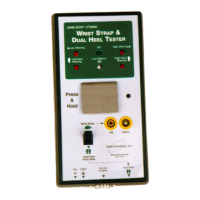
Static Solutions CT-8900 Combo Tester Instructions 1/15/2015
18
SOFTWARE INSTALLATION GUIDE
Software Installation for First Time Installation of New Software
1. Close all open programs. If installation problems arise, then close anti-virus programs also.
2. Insert the CD into the CD reader.
3. If the CD does not start automatically, select "RUN" From the start menu and type: D:\setup and press enter. Follow
instructions.
4. If the following message is displayed, "A file being copied is older than the file currently on your system. It is recommended that
you keep your existing file. Do you want to keep this file? “, Select Yes. If the user is reinstalling this software due to a
computer error after already having input data, do not copy over the log.txt or names.txt files.
5. After installing the software, a small window will pop up asking if you want to check for newer versions on the internet. Note the
present version number. If the computer is connected to the internet, then you may press yes. Follow the instructions below for
“upgrading to a minor version change”.
6. To create an EsdTest program startup icon on your desktop as a shortcut, click Start, Programs and select the EsdTest icon in
the ESD Test folder to use as an icon to copy. Click on it, hold the left mouse button down, drag the icon onto the desktop,
press the Ctrl key to duplicate it, and release the mouse button. This should create icon on the desktop identical to the one in
the start menu. If you ever loose the start menu icon, you can also generate the desktop icon by using Windows Explorer to
locate the ESD Test folder on the hard drive, usually in the C:\EsdTest directory. Open it and right click on the EsdTest.exe file
icon. Select Create Shortcut in the menu, and then drag the newly created shortcut it onto your desktop.
Software installation for Upgrading to a Minor Version Change
When updating any software, it is advisable to first back up your present data. If all the data is contained in the c:\EsdTest directory,
then just back up this directory (as in step A below).
To get the latest software updates, run the EsdTest program and press the Help, “Check for software updates” menu item. This
should open an internet browser to www.EsdTest-SS.com. Close the EsdTest program. If the version shown in the update link on
the website is newer than the present version, then:
1. Click on the top update link,
2. Download the update program
3. The unzip window should open
4. Modify the file destination folder box if necessary
5. Click Unzip
Software Installation for Upgrading to a Major Version Change
Follow these instructions to upgrade from ver 6 to ver 8, or from ver 7 to ver 8.
A - Backup everything.
1. Open Windows Explorer (not Internet Explorer). Either hold the Windows Logo key and press the E key, or click on the
MyComputer desktop icon.
2. If there are not 2 panes (columns) then click on the Folders icon so that you see 2 panes. The left pane should now say Folders.
3. Left click on the Local Disk (C:) drive item to expand it. All its folders should then be displayed beneath it.
4. Right click on the EsdTest folder and select Copy.
5. Right click on the Local Disk (C:) drive item and select Paste.
6. A new folder should have been created that says "Copy of EsdTest".
7. Left click on this new backup "Copy of EsdTest" folder and you should see all the files displayed in the right pane. There are 5
crucial ones: Names.txt, Log.txt, EsdTest.ini, GenReports.txt, and Netlist.txt. If these exist, then you can proceed to uninstall.
B - Uninstall old program
8. Close or minimize window explorer.
9. Click the Start icon on the lower left toolbar

 Loading...