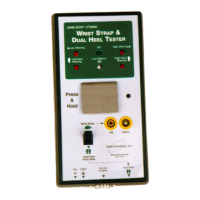
Static Solutions CT-8900 Combo Tester Instructions 1/15/2015
27
CASI-RUSCO
94x, 97x weigand, HID 5352, HID RW-400
, AWID
SP-6820 RS232 reader Installation
Note: These readers are no longer officially supported. They can not be directly selected in the entry window. However, they
may still be selected by manually editing the “Barcode” parameter in the EsdTEst.ini file (0=keybd 1=barcd 2=HID5352 3=Casi
4=GeneralRS232 5=HIDrw400 6=USB). If upgrading from and older software version that used these readers, simply copy the
old EsdTest.ini file to the C:\EsdTest directory so the new software will use it.
The computer must have two working serial ports installed on the computer. One for the meter and one for the reader. A
low cost two serial port card is available from any computer store. However, if a USB port is preferred, an optional USB
converter with USB to Com port driver may be purchased from Static Solutions.
1. Attach the HID 5352 reader to the Static Solutions HID to RS-232 serial comm. port. Converter, and plug the converter
into the computer. Connect the CASI RUSCO 94x, 97x reader to the Static Solutions CASI RUSCO to RS-232 serial
comm. port. Converter, and plug the converter into the computer. Attach the two-plug power supply. Male to the HID or
Casi-Rusco unit and female to the meter. Test the card to see if the unit reads green and emits a ‘buzz’ sound.
2. Check the HELP files on the C:\EsdTest directory for any later updates.
3. Open the ‘Employee selection Configuration’ screen and press the appropriate box for HID 5352 , or CASI-RUSCO
Wegand in addition to the character and bit information. (See figure below.) The RS232 box is for a Motorola unit with a
Wiegand to RS232 converter, or any other reader with a general RS232 output.
4. Click the appropriate box in the Identify Employee section to select if an employee is to be identified by having an
employee:
select their name from a list of names
or by automatically scanning a badge number ort typing name, ID number, or badge number if the badge is lost
5. If you do not want the numbers to be displayed for safety reasons select the Don’t Show Numbers box.
6. If there is no monitor, the “NoMonitor” box may be selected. This will continue to take data if the test button is pressed
again, even after a good reading. This may only be required for some circumstances when using RS232.
7. If there is no keyboard, select the No Keybaord boz to bypass any of the question boxes.
8. “Simulate mode is only used in some demo programs. It is not used for actual testing.
9. If the employees are to enter their own sick/vacation schedule then check the “Allow employees to change own sick time”
box.
10. If the employee has multiple straps but is not required to test all of them, click the “show results of non-required strap” to
allow the employee to see the results of all the tests.
11. If it is desired to show the last person that tested on the login screen, then check the “show last person that tested” box.
12. If its is desired to require an individual employee password for each employee that tests, then check the “ ask for password
before each test” box.
13. On new models of the tester that have an extra “employee recognized – OK to test” LED, select this box.
14. Press “EDIT READER PARAMETERS”
15. For HID 5352 readers select the HID 5352 option, for a standard “26 bit” HID card enter Use 16 bits and enter Skip first 31
bits (because the RS232 version adds extra bits.) If the 8 bit facility code is to be included in addition to the 16 card
number bits, than use 24 bits and skip first 23 bits. For an HID “37 bit” card, use 31 bits and skip the first 16. Parity and
checksum bits are not checked.
16. For the HID RW-400 reader (10-16VDC) select the HID RW-400 option in the reader configuration window. Skip 11 bits
and use 16 for their demo cards.
17. For CASI-RUSCO 94x, 97x Weigand cards, the full 38 bits can be read by setting the bits-to-use to 38 and the bits-to-skip
to 1. To only read the 6 digit employee id (which is the last 19 bits of the 38 bit data field) set Bits-to-use to 19 and set bits-
to-skip to 20 (although some cards require setting bits-to-skip to 24).
18. If an Awid Sentinel-Prox SP-6820 reader is used, then select the “HID 5352” option in the reader configuration window. Set
Bits to use = 16, bits to skip = 17. If this gives too many digits on some cards then use 12 bits and skip the first 21 bits.
The number read from the card is the same as the number printed sideways on the rear of the card near the edge (i.e.
01897).
SEND A CARD TO STATIC SOLUTIONS FOR PROPER REGISTRATION
Trouble Shooting If the card does not work.
5. If either the card reader configuration or bits to use or bits to skip is incorrect the card will not work.
6. Incorrect comm. ports will not allow the system to work. Check if they are operable and if they are correctly connected.
The tester and reader must NOT be on the same ports.
7. Press the test press switch for at least two seconds.
8. Try rebooting the computer after everything is installed.

 Loading...