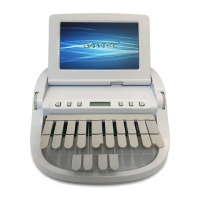
Diamante User Guide
106
© 2012 Stenograph, L.L.C.
Personalize the Diamante Splash Screen
The Splash Screen Loader Utility allows you to personalize the Diamante startup screen with a
photograph of your choice. The photograph displays briefly when turning your Diamante On.
The photograph you load can be located on the computer hard drive or removable media. It must be in
JPEG (.JPG) format. A limited amount of stock photos are available on the Diamante
®
/Wave
™
Utilities
and Tutorial CD in the Diamante Splash Photos folder.
You must have the Diamante USB driver installed on your computer to use the USB cable. See Install
the Diamante USB Drivers on page 18 if you need to load the Diamante USB driver.
To personalize the splash screen:
1. Turn your computer On. Ensure that it is fully booted.
2. Insert the Diamante
®
/Wave
™
Utilities and Tutorial CD into the CD-ROM/DVD drive on your
computer. If the AutoPlay dialog box displays, click Run autorun.exe.
3. The Diamante - Wave Utility dialog box displays. Click Diamante Utilities, User Guide and more.
4. The Diamante Utility dialog box displays. Click Utilities, Slash screen and more.
5. Open the Utilities folder.
6. Copy the Splashloader.exe file to the Desktop on your computer. If you created a Stenograph Utility
folder on your Desktop, copy the utility to that folder.
7. Turn your Diamante On.
8. Connect the appropriate end of the USB cable to the USB B (client) port on the Diamante and the
other end to a USB port on your computer.
Diamante Back Port Panel
9. Double click the Splashloader.exe icon on your Desktop. The Diamante Splash Screen Loader
dialog box displays.
 Loading...