-Slackenoffthemufflermounting
screwshalf-way.
•
Slidethesealingplate(1)
00008558106betweenthe
gasketandcylinder.Retighten
thescrewsmoderately.
Note:Thesealingplatemust
completelyfillthespacebetween
thetwoscrews.
-Carryoutpreparations-
see5.3.1.
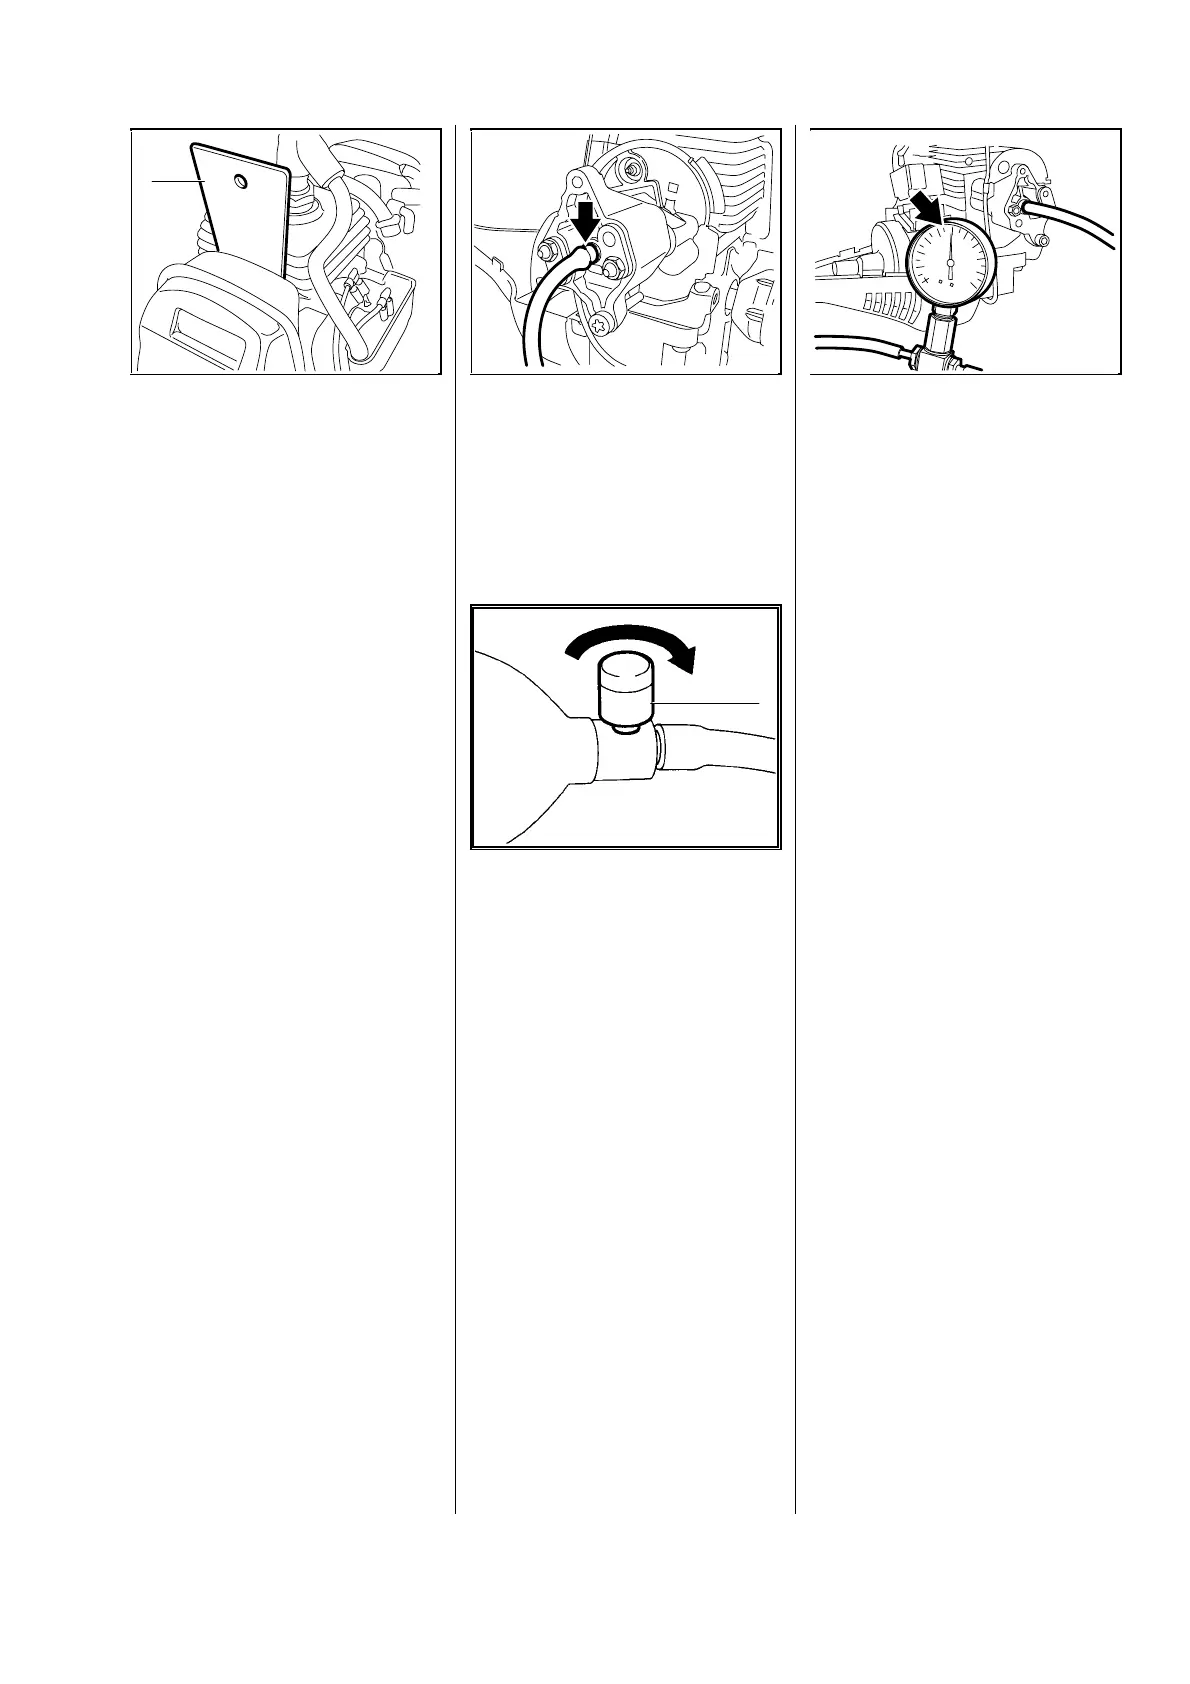
•
Connectpressurehoseoftester
11068502905tonippleontest
flange.
•
Closetheventscrew(1)on
therubberbulb.
-Userubberbulbtopumpairinto
theengineuntilthegauge
indicatesapressureof0.5bar
(7.25psi).Ifthispressure
remainsconstantforatleast
20seconds,thecrankcaseis
airtight.
•
However,iftheindicated
pres-suredrops,theleakmust
belocatedandthefaultypart
replaced.
Note:Tofindtheleak,coatthe
suspectareawithoiland
pressurizethecrankcaseagain.
Bubbleswillappearifaleakexists.
-Repeatthepressuretest.
-Carryoutthevacuumtest-
see5.3.3.
-Afterfinishingthetest,openthe
ventscrewanddisconnectthe
hose.
-Removethetestflange.
-Slackenoffthemufflermounting
screws.
-Pulloutthesealingplateand
tightendownthescrewsto
9.0Nm(6.6lbf.ft).
-Installthecarburetor-see9.2.2.
-Fittheshroud.
5.3.2 PressureTest
VA
232RA034
1
VA
232RA035
11
143RA046
232RA036
0
0,2
0,4
0,6
0,8
1,0
VA
FS45 11
 Loading...