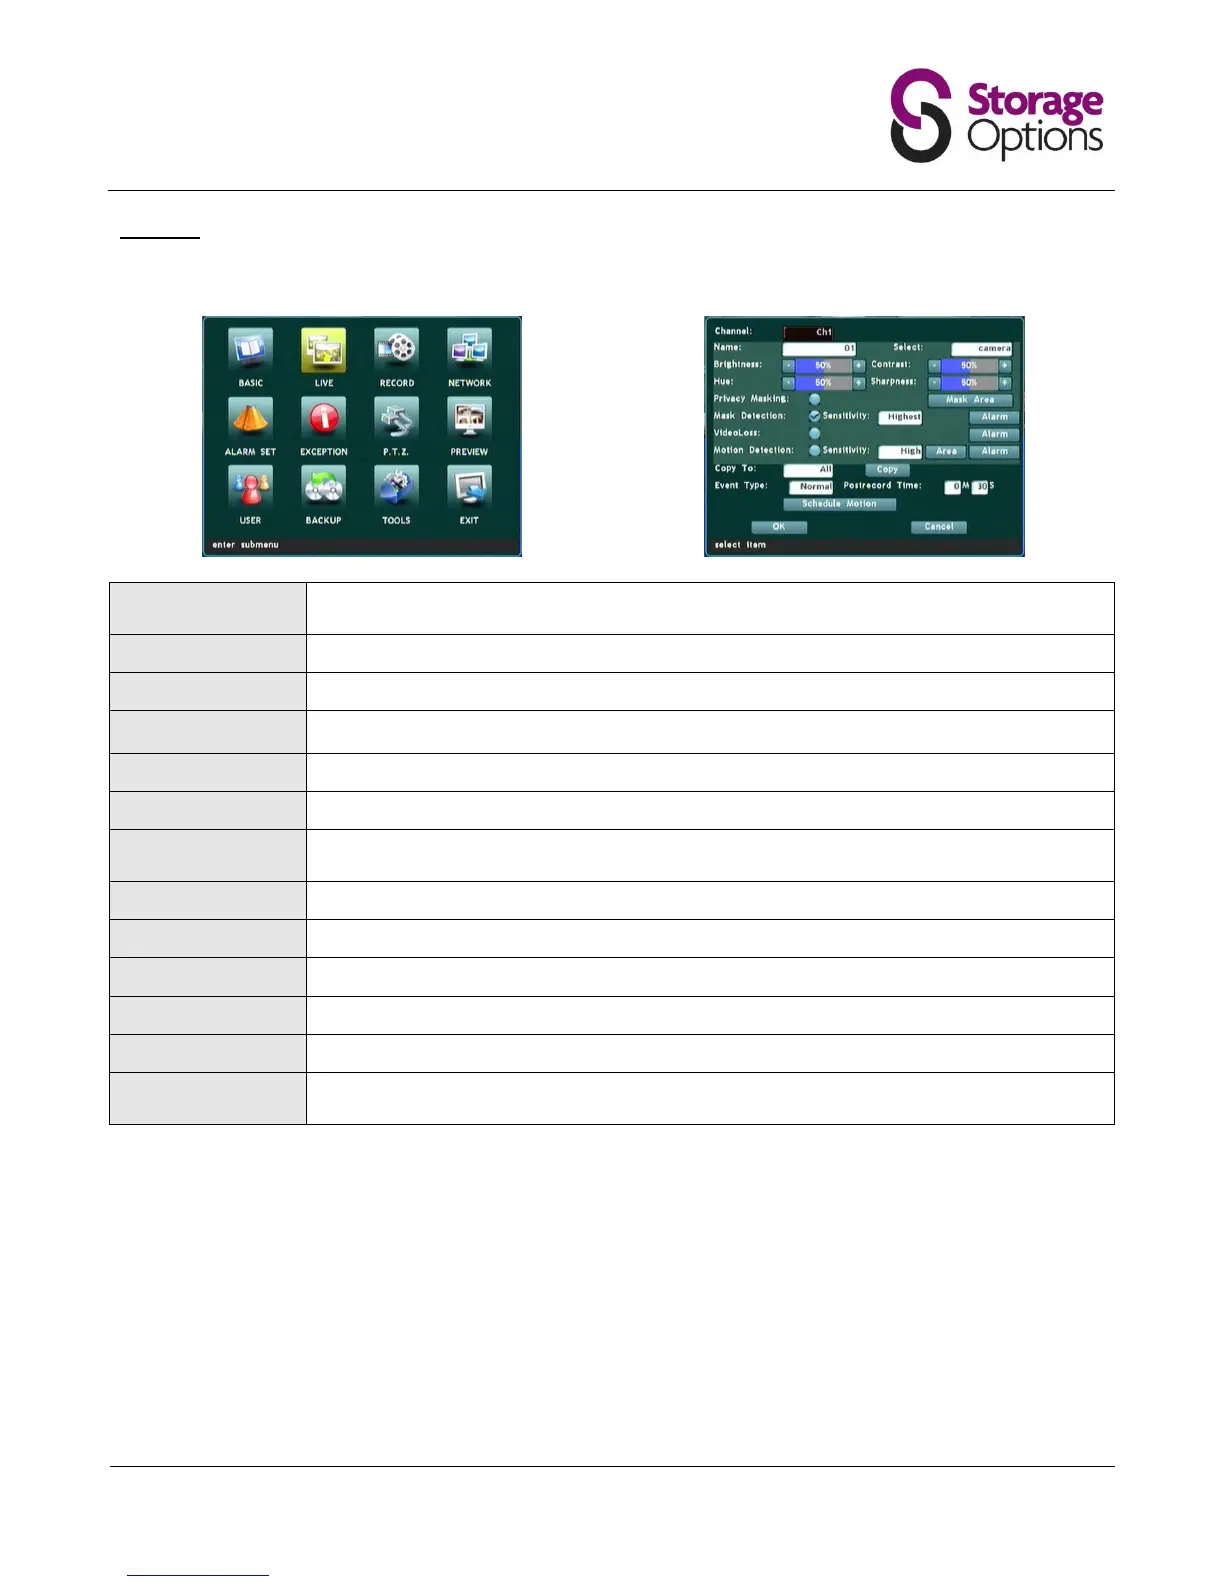
5.3 – Live
Under the live menu you can adjust the settings of individual cameras.
Settings on this page refer to an individual camera. Please choose the camera you wish to
change settings for from the Channel menu.
Type a unique, descriptive name for the selected camera.
Choose from a list of predefined camera names.
Brightness / Contrast /
Hue / Sharpness:
Adjust image quality settings with these scales (1 - 100%, default 50%).
Mask an area of the image which is NOT to be recorded (e.g. number pad on an ATM).
Use arrow keys to position and size the masked area.
Use this option to mask an area of the image which you do NOT want to trigger a motion
detection alarm (e.g. a swaying tree).
Choose the sensitivity of the mask selection function.
Enable alarm for when loss of video feed occurs.
Choose the sensitivity of the motion detection function.
Allows the above settings to be copied to other cameras connected to the DVR system.
Use this function if there is a time period when you know there will be motion and you do
NOT want the DVR to trigger a motion alarm (e.g. 9am-5pm in an office).
To set up motion detection:
1. Under “Live”, choose the appropriate channel, then tick the box for “Motion Detection”, and select the
sensitivity.
2. Click the “Area” button and colour the area in RED which you want to trigger a recording.
3. Click the “Alarm” button then select cameras under “Trigger Record” to start recording when motion is
detected on the current channel. (e.g. if you are setting motion detection on channel 1 and you choose
cameras 1, 2 and 3 here, when camera 1 detects motion all three cameras will start recording).
4. On the “Live” menu, choose a suitable “Post-record Time”. Set this to how long you want the recording to
continue after on-screen movement has stopped.
5. Click “Schedule Motion” and make sure the “Active” checkbox is NOT ticked.