6.1 – Connecting the DVR to a Network
The Storage Options CCTV System can be connected to a network and many of it’s functions can be used on a
computer.
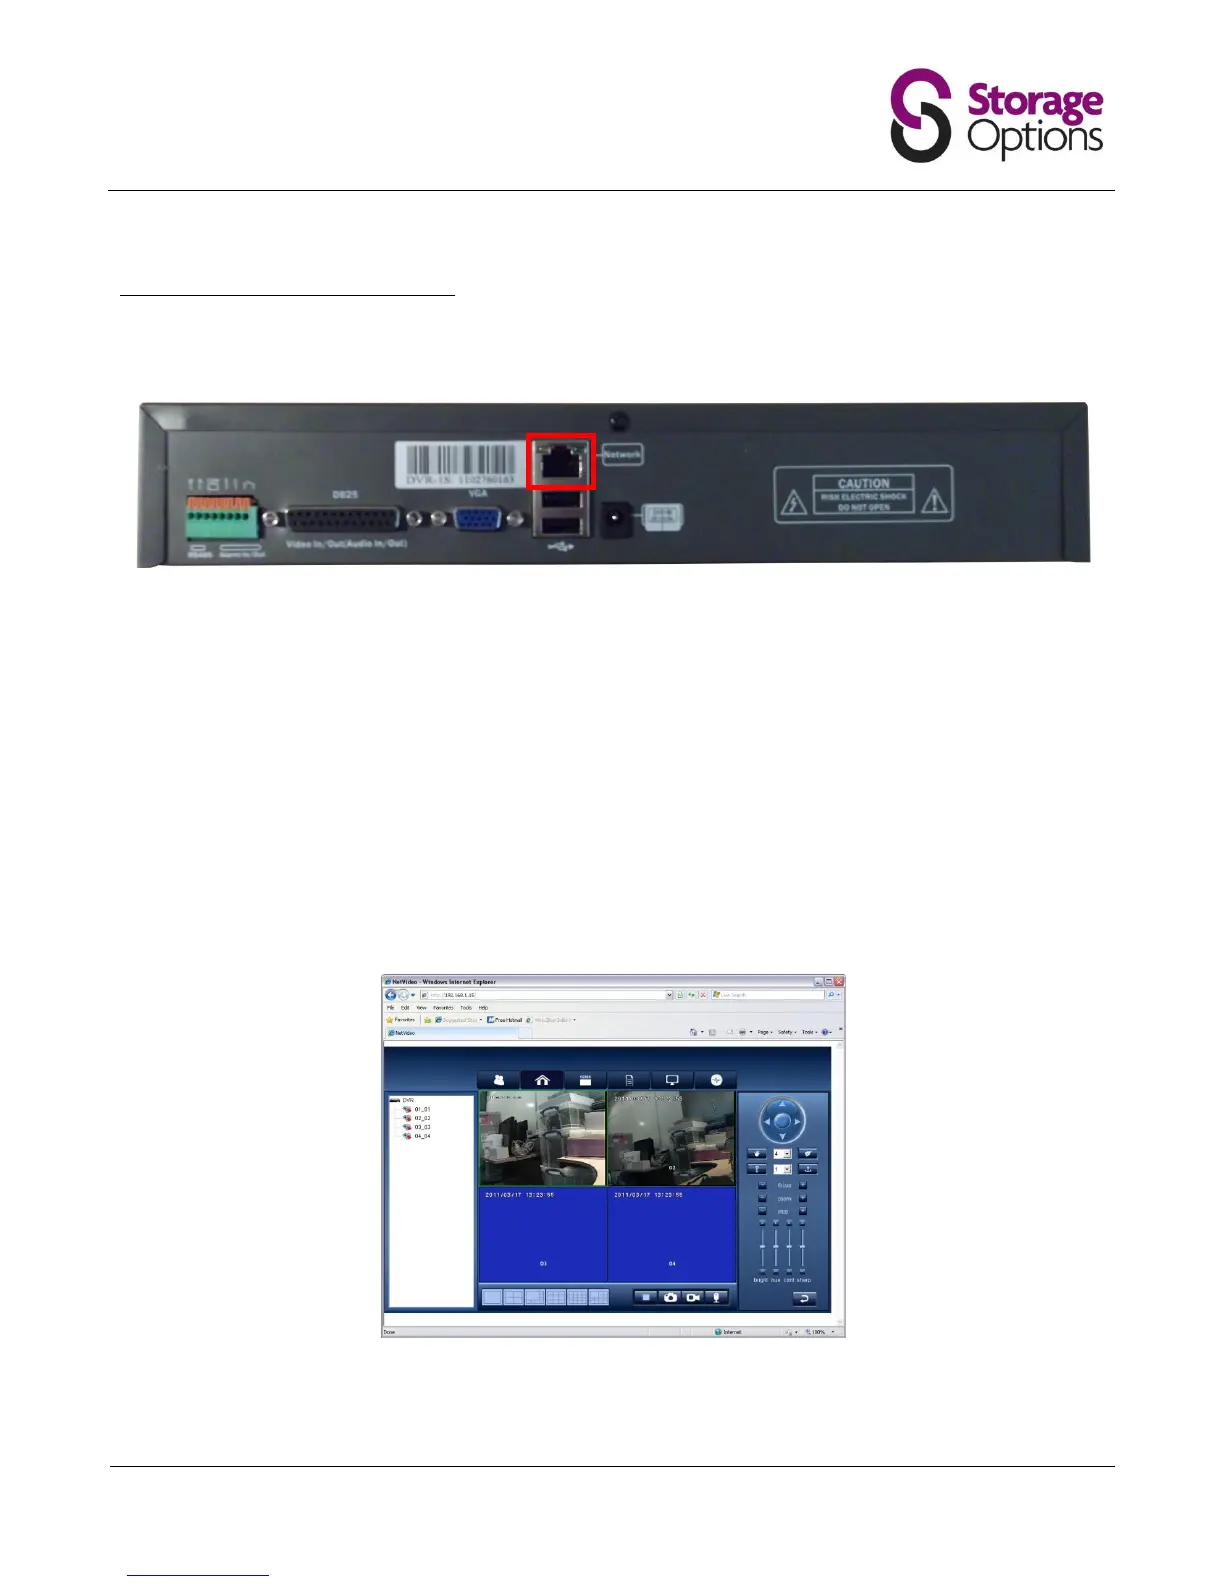
1. Connect an RJ45 network cable to the “Network” port on the back of the DVR.
2. Connect the other end of the network cable to the network router.
3. If the router has a DHCP server, the DVR should automatically configure itself (see section 5.5 – Network). If
address information is not automatically configured, you will need to set up a static configuration. See your
router’s manual for more information on what values you should use.
4. Take note of the DVR’s “IP Address”. You will need this to access the DVR from a computer.
5. On a computer which is attached to the same network, open Internet Explorer and in the address bar type
“http://” followed by the DVR’s IP address (e.g. http://192.168.1.15).
Please note, you must use Internet Explorer as the CCTV system uses ActiveX controls which are exclusive to this
browser. Other browsers such as Firefox, Chrome and Safari, are not supported.
6. If you are prompted to download or allow access to an ActiveX control or piece of software, please allow this
action. CCTV browser software will be transferred from the DVR to your browser.
Once the software has finished installing, you will be presented with the CCTV software in your browser window.
Please read the following instructions to understand how to use this software.