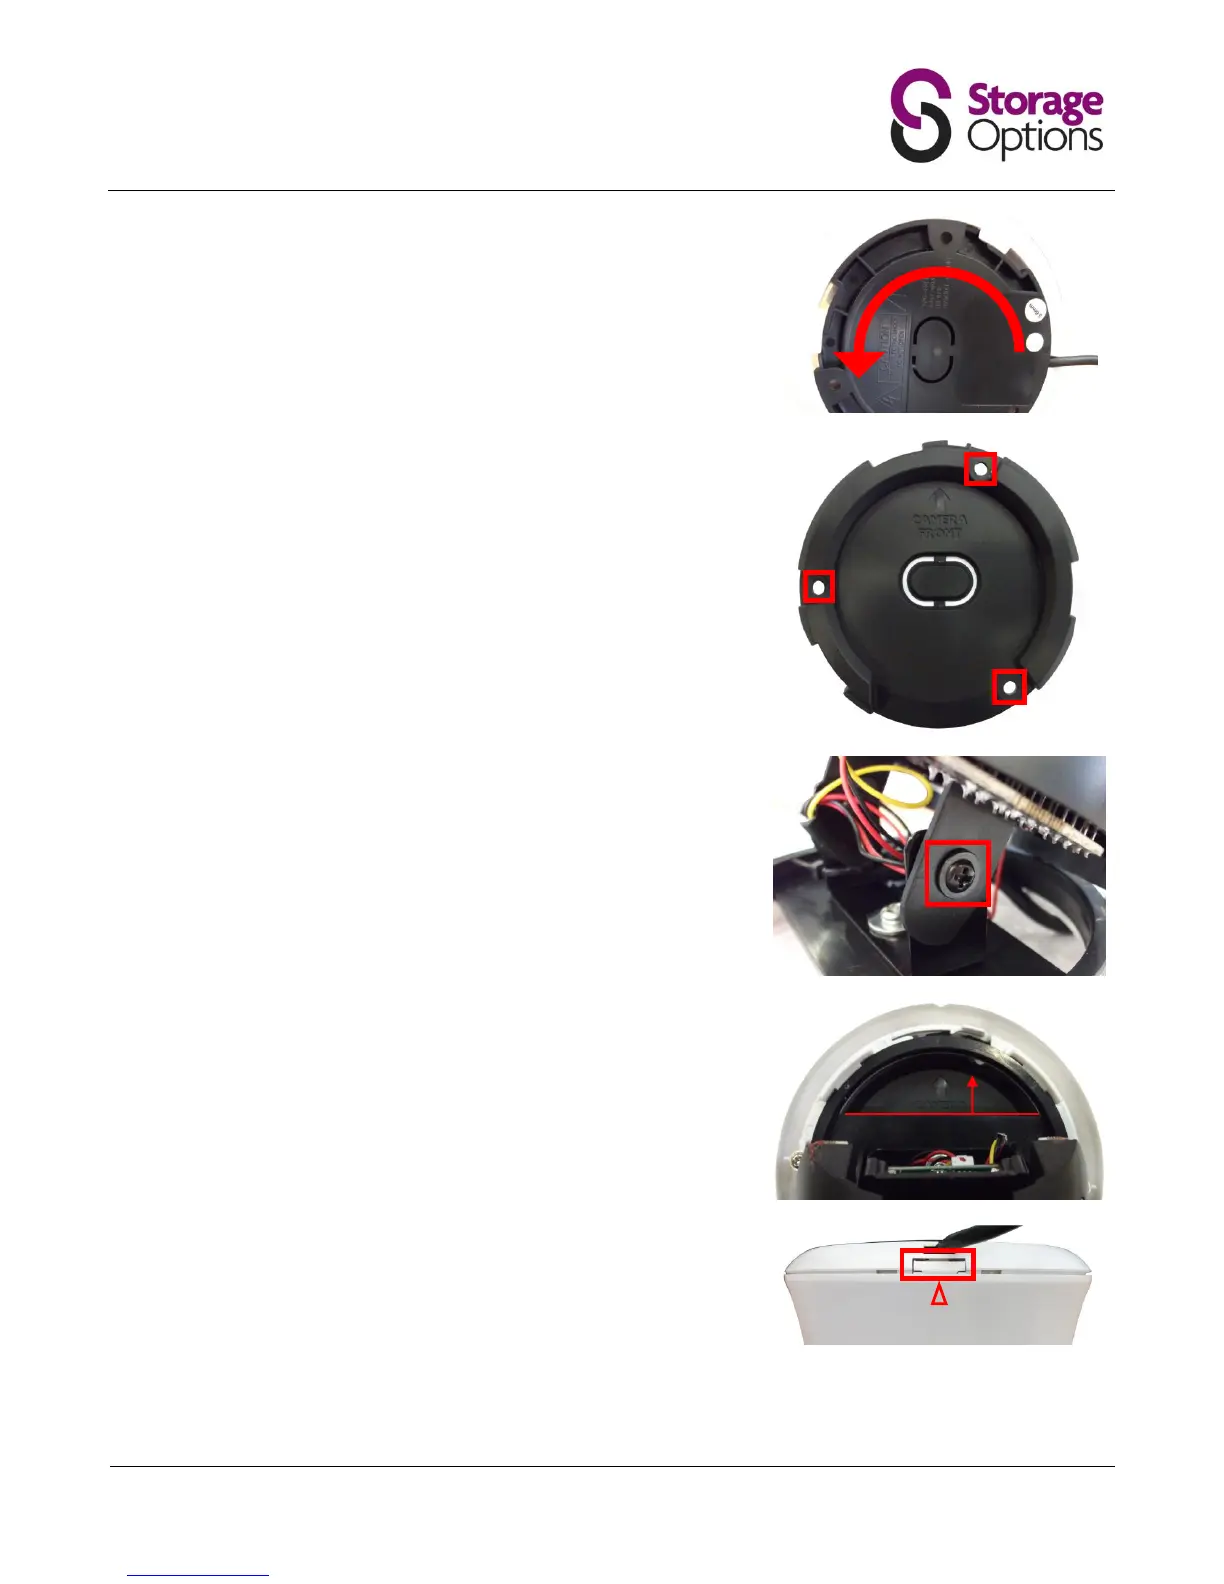
While holding the locking mechanism in the unlocked position, flip the
camera over and twist the ceiling mount unit (large black plastic) anti-
clockwise to unlock and release it.
Ensure the surface you want to mount the camera on is solid and can
support the weight.
Accurately mark on the wall the position of the holes to be drilled.
Drill to the correct depth in the wall, as indicated by the plugs.
Insert plugs into the drilled holes.
Secure the bracket to the wall / ceiling using the provided screws.
Position the camera lens to the required angle then tighten the screws on
either side of the hinges to secure it in place.
Reattach the chassis to the mounting bracket by sliding it into position,
then turn it clockwise until it locks into place.
Hold the camera by it’s hinges and twist to line it up the “camera front”
arrow. The chassis will create a clicking sound when you do this; this is
normal.
Realign the marker arrow on the dome to the release catch on the
mounted frame and push back into place to secure.