ISP Immersive Sound Processor
19
function, you are encouraged to upgrade
loudspeakers and/or amplification.
10. Tilt EQ
For speakers behind a motorized screen for
example, you might need to change their
“audio brightness” depending on the screen
position up or down. TiltEQ allows the sound
to be darker or brighter.
11. Polarity
Check the box for any channel in which you
wish to invert signal polarity.
Test Tone Generator
The ISP includes a highly configurable test tone
generator which can be used to help manually
calibrate channels.
12. Generator
Click this button to turn on the tone generator.
It will automatically start with Group 1 with
green highlight on the active channels.
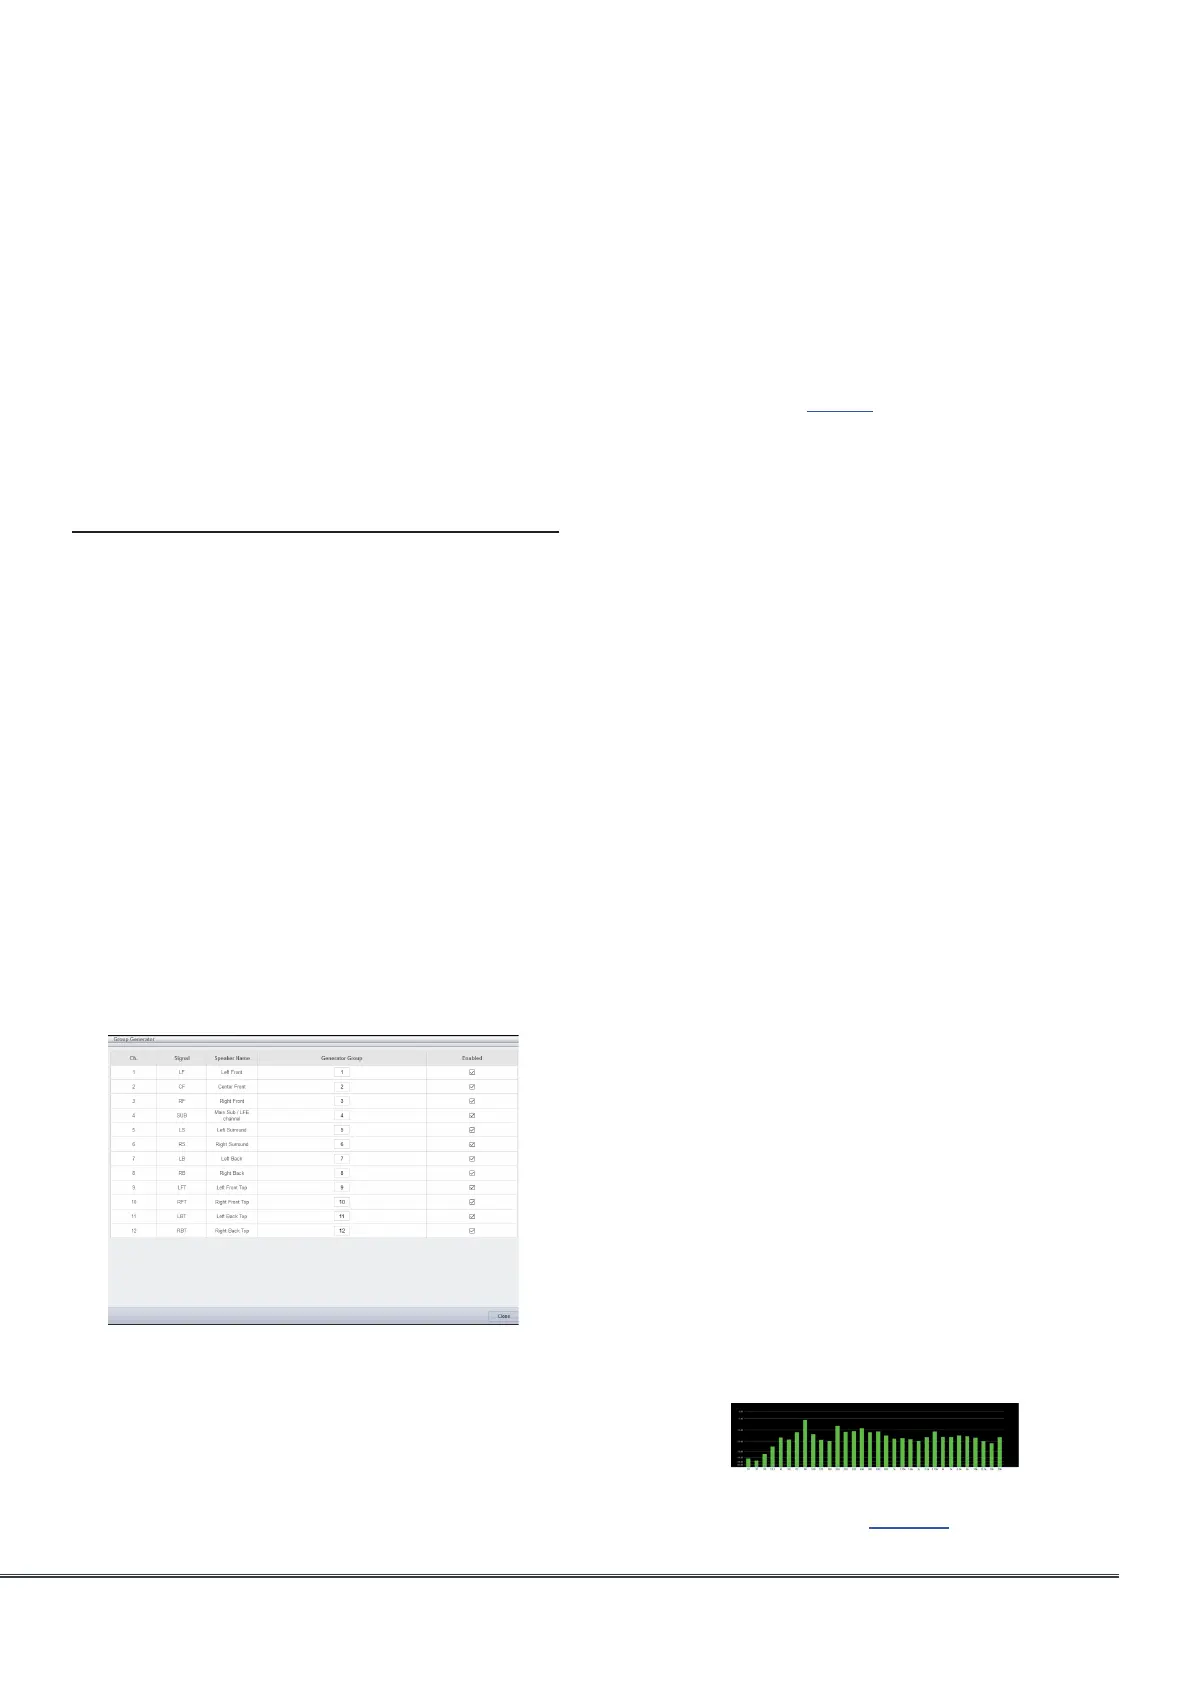
13. Setup
Unlike traditional generators, the ISP plays
tones per channel group. Click Setup to
define the groups and the channels they
contain. For example, if you have 2-way active
loudspeakers, you may wish to group the high
frequency and low frequency component of
each into one group.
14. Noise Selection
Choose the type of noise or tone created by
the generator.
• Sine: Generates a sine wave at the frequency
specified.
• Pink Noise: Generates full bandwidth pink noise.
• Pink Noise 400Hz-4kHz: Generates pink noise
band limited to one decade. This is particularly
useful when setting relative levels between
channels with dramatically different useful
bandwidths. Remember SPL meters measure not
only sound pressure but also bandwidth.
• External: it is possible to use an external noise
generator connected to one of the ISP input
(except XLR input). This is usually required when
using an external tool providing its own stimuli
(Room EQ Wizard is one of them, see “REW
integration”, page 22).
15. Gain
The gain figure can be set so that the noise
generator operates at a level at or below that
of a normal source playing at 0dBFS. Default
is 0.1 (-20dBFS).
16. Group -/+
When the noise generator is active, use this
function to play the noise through different
groups defined in “13. Setup”.
17. Volume Reference
It is good practice when calibrating systems
to always work at a reference level such as
85dB C-weighted. Before activating the noise
generator, make sure the master volume is at
a low level. Set and recall a reference master
volume value. Click SET once you have dialed
the value you’d like to store. Click RECALL to
quickly return to that value.
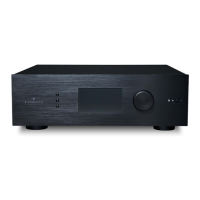
18. RTA
When a USB microphone (such as the
optional Microphone Mini Kit) is connected
to the ISP, you can use the Real Time Analyzer
to visualize the response of loudspeaker
groups in the room. Note that the built in RTA
is not accurate enough to use for calibration,
but is useful for getting a good idea of
the approximate response of the system.
Maximum level of the capture can be set by
adjusting Mic Ref Level. Graph vertical scale
can be changed from Logarithmic (default) to
Linear.
19. DIRAC
See “Dirac Live” on page 27 for use of Dirac
Live® Calibration Tool.